本文是一份详细的指南,将一步步指导你在 CentOS 9 系统上安装和配置 Kubernetes 1.35 集群,涵盖从系统初始化到网络插件部署以及应用测试的全过程。
先决条件
开始安装前,请确保满足以下条件:
- 至少需要三个节点(一个主节点和两个工作节点),操作系统为 CentOS 9。
- 每个节点至少应配备 2GB 内存和 2 个 CPU 核心。
- 如果没有设置 DNS,则需要在每个节点的
/etc/hosts 文件中配置主机名解析。
为了方便演示,本文仅使用两台 CentOS 9 节点进行部署:一台 master 节点和一台 worker1 节点。
| 主机名 |
ip |
内存 |
核心 |
操作系统 |
| master |
192.168.213.30 |
16 |
4 |
centos9 |
| worker1 |
192.168.213.31 |
16 |
4 |
centos9 |
在 CentOS 9 上安装 Kubernetes 集群
1、配置网络 IP
在 master 节点执行:
[root@localhost ~]# nmcli connection modify "ens160" ipv4.method manual ipv4.addresses 192.168.213.30/24 ipv4.gateway 192.168.213.2 ipv4.dns "192.168.213.2"
[root@localhost ~]# nmcli connection up "ens160"
Connection successfully activated (D-Bus active path: /org/freedesktop/NetworkManager/ActiveConnection/3)
在 worker1 节点执行:
[root@localhost ~]# nmcli connection modify "ens160" ipv4.method manual ipv4.addresses 192.168.213.31/24 ipv4.gateway 192.168.213.2 ipv4.dns "192.168.213.2"
[root@localhost ~]# nmcli connection up "ens160"
Connection successfully activated (D-Bus active path: /org/freedesktop/NetworkManager/ActiveConnection/3)
配置好 IP 后,在两个节点上都需要设置 /etc/hosts 文件:
[root@master ~]# cat /etc/hosts
127.0.0.1   localhost localhost.localdomain localhost4 localhost4.localdomain4
::1         localhost localhost.localdomain localhost6 localhost6.localdomain6

192.168.213.30  master
192.168.213.31  worker1
2、配置主机名
在对应的节点上执行以下命令:
[root@localhost ~]# hostnamectl set-hostname master
[root@localhost ~]# hostnamectl set-hostname worker1
3、关闭防火墙和设置 SELinux(两个节点都需要)
[root@master ~]# systemctl stop firewalld.service
[root@master ~]# systemctl disable firewalld.service
Removed "/etc/systemd/system/multi-user.target.wants/firewalld.service".
Removed "/etc/systemd/system/dbus-org.fedoraproject.FirewallD1.service".
[root@master ~]# setenforce 0
[root@master ~]# sed -i 's/^SELINUX=enforcing$/SELINUX=permissive/' /etc/selinux/config
4、关闭 Swap(两个节点都需要)
[root@master ~]# sed -ri 's/.*swap.*/#&/' /etc/fstab
[root@master ~]# swapoff -a
5、配置阿里云 Yum 源(两个节点都需要)
tee /etc/yum.repos.d/centos.repo > /dev/null << 'EOF'
[baseos]
name=CentOS Stream $releasever - BaseOS - mirrors.aliyun.com
baseurl=https://mirrors.aliyun.com/centos-stream/9-stream/BaseOS/x86_64/os/
gpgcheck=1
gpgkey=file:///etc/pki/rpm-gpg/RPM-GPG-KEY-centosofficial
enabled=1
[baseos-debuginfo]
name=CentOS Stream $releasever - BaseOS Debuginfo - mirrors.aliyun.com
baseurl=https://mirrors.aliyun.com/centos-stream/9-stream/BaseOS/x86_64/debug/tree/
gpgcheck=1
gpgkey=file:///etc/pki/rpm-gpg/RPM-GPG-KEY-centosofficial
enabled=0
[baseos-source]
name=CentOS Stream $releasever - BaseOS Source - mirrors.aliyun.com
baseurl=https://mirrors.aliyun.com/centos-stream/9-stream/BaseOS/source/tree/
gpgcheck=1
gpgkey=file:///etc/pki/rpm-gpg/RPM-GPG-KEY-centosofficial
enabled=0
[appstream]
name=CentOS Stream $releasever - AppStream - mirrors.aliyun.com
baseurl=https://mirrors.aliyun.com/centos-stream/9-stream/AppStream/x86_64/os/
gpgcheck=1
gpgkey=file:///etc/pki/rpm-gpg/RPM-GPG-KEY-centosofficial
enabled=1
[appstream-debuginfo]
name=CentOS Stream $releasever - AppStream Debuginfo - mirrors.aliyun.com
baseurl=https://mirrors.aliyun.com/centos-stream/9-stream/AppStream/x86_64/debug/tree/
gpgcheck=1
gpgkey=file:///etc/pki/rpm-gpg/RPM-GPG-KEY-centosofficial
enabled=0
[appstream-source]
name=CentOS Stream $releasever - AppStream Source - mirrors.aliyun.com
baseurl=https://mirrors.aliyun.com/centos-stream/9-stream/AppStream/source/tree/
gpgcheck=1
gpgkey=file:///etc/pki/rpm-gpg/RPM-GPG-KEY-centosofficial
enabled=0
EOF
6、安装内核相关的包文件(两个节点都需要)
[root@master ~]# dnf install kernel-devel-$(uname -r)
7、启用内核模块并配置桥接和 iptables(两个节点都需要)
加载 Kubernetes 正常运行所必需的内核模块。这些模块能确保服务器为 Kubernetes 安装做好准备,并能有效管理集群内的网络和负载均衡任务。
[root@master ~]# modprobe br_netfilter
[root@master ~]# modprobe ip_vs
[root@master ~]# modprobe ip_vs_rr
[root@master ~]# modprobe ip_vs_wrr
[root@master ~]# modprobe ip_vs_sh
[root@master ~]# modprobe overlay
为了让这些模块在系统启动时自动加载,创建配置文件:
cat > /etc/modules-load.d/kubernetes.conf << EOF
br_netfilter
ip_vs
ip_vs_rr
ip_vs_wrr
ip_vs_sh
overlay
EOF
配置关键的 sysctl 参数,这对于 Kubernetes 网络组件的平稳运行至关重要:
net.bridge.bridge-nf-call-ip6tables:使 iptables 能够处理桥接的 IPv6 流量。net.bridge.bridge-nf-call-iptables:使 iptables 能够处理桥接的 IPv4 流量。net.ipv4.ip_forward:启用 IPv4 数据包转发。
cat > /etc/sysctl.d/kubernetes.conf << EOF
net.ipv4.ip_forward = 1
net.bridge.bridge-nf-call-ip6tables = 1
net.bridge.bridge-nf-call-iptables = 1
EOF
[root@master ~]# sysctl --system
8、安装并配置 Docker(两个节点都需要)
这里我们选择使用 Docker 作为 Kubernetes 的容器运行时,而非 Containerd。
[root@master ~]# cd /etc/yum.repos.d/ && wget https://mirrors.aliyun.com/docker-ce/linux/centos/docker-ce.repo
[root@master yum.repos.d]# cd
[root@master ~]# yum install docker-ce -y
[root@master ~]# systemctl start docker
[root@master ~]# systemctl status docker
[root@master ~]# systemctl enable docker
配置 Docker 镜像加速器:
cat << EOF > /etc/docker/daemon.json
{
    "registry-mirrors": [
     "https://docker.1ms.run",
     "https://docker.aityp.com",
     "https://docker.m.daocloud.io"
     ]
}
systemctl daemon-reload
systemctl restart docker
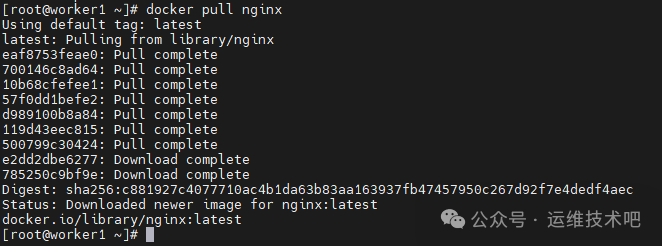
测试镜像下载:
[root@worker1 ~]# docker pull nginx
如果下载镜像仍有问题,建议配置 Docker 代理或离线下载所需镜像。配置 Docker 代理的方法如下:
[root@master ~]# mkdir -p /etc/systemd/system/docker.service.d
[root@master ~]# vim /etc/systemd/system/docker.service.d/http-proxy.conf
[root@master ~]# cat /etc/systemd/system/docker.service.d/http-proxy.conf
[Service]
Environment="HTTPS_PROXY=http://192.168.3.31:7897"
[root@master ~]# systemctl daemon-reload
[root@master ~]# systemctl restart docker
[root@master ~]# systemctl show --property=Environment docker
Environment=HTTPS_PROXY=http://192.168.3.31:7897
配置代理后,再次尝试下载镜像:

9、安装 CRI-Dockerd(两个节点都需要)
由于 Kubernetes 自 1.24 版本起移除了对 Docker 的直接支持,我们需要安装 cri-dockerd 这个适配器。
[root@master ~]# wget https://github.com/Mirantis/cri-dockerd/releases/download/v0.3.16/cri-dockerd-0.3.16.amd64.tgz
[root@master ~]# tar xf cri-dockerd-0.3.16.amd64.tgz
[root@master ~]# cp cri-dockerd/cri-dockerd /usr/bin/
[root@master ~]# systemctl enable cri-docker --now
[root@master ~]# systemctl enable cri-docker.socket --now
[root@master ~]# systemctl status cri-docker
涉及的服务文件 cri-docker.service 和 cri-docker.socket 内容如下(通常安装过程会自动生成):
[root@master ~]# cat /etc/systemd/system/cri-docker.service
[Unit]
Description=CRI Interface for Docker Application Container Engine
Documentation=https://docs.mirantis.com
After=network-online.target firewalld.service docker.service
Wants=network-online.target
Requires=cri-docker.socket
[Service]
Type=notify
ExecStart=/usr/bin/cri-dockerd --container-runtime-endpoint fd://
ExecReload=/bin/kill -s HUP $MAINPID
TimeoutSec=0
RestartSec=2
Restart=always
# Note that StartLimit* options were moved from “Service” to “Unit” in systemd 229.
# Both the old, and new location are accepted by systemd 229 and up, so using the old location
# to make them work for either version of systemd.
StartLimitBurst=3
# Note that StartLimitInterval was renamed to StartLimitIntervalSec in systemd 230.
# Both the old, and new name are accepted by systemd 230 and up, so using the old name to make
# this option work for either version of systemd.
StartLimitInterval=60s
# Having non-zero Limit*s causes performance problems due to accounting overhead
# in the kernel. We recommend using cgroups to do container-local accounting.
LimitNOFILE=infinity
LimitNPROC=infinity
LimitCORE=infinity
# Comment TasksMax if your systemd version does not support it.
# Only systemd 226 and above support this option.
TasksMax=infinity
Delegate=yes
KillMode=process
[Install]
WantedBy=multi-user.target
[root@master ~]# cat /etc/systemd/system/cri-docker.socket
[Unit]
Description=CRI Docker Socket for the API
PartOf=cri-docker.service
[Socket]
ListenStream=%t/cri-dockerd.sock
SocketMode=0660
SocketUser=root
SocketGroup=docker
[Install]
WantedBy=sockets.target
在两个节点上都验证 cri-dockerd 服务正常运行后,继续下一步。
10、安装 Kubernetes 组件(两个节点都需要)
cat << EOF > /etc/yum.repos.d/kubernetes.repo
[kubernetes]
name=Kubernetes
baseurl=https://mirrors.aliyun.com/kubernetes-new/core/stable/v1.35/rpm/
enabled=1
gpgcheck=1
gpgkey=https://mirrors.aliyun.com/kubernetes-new/core/stable/v1.35/rpm/repodata/repomd.xml.key
exclude=kubelet kubeadm kubectl cri-tools kubernetes-cni
EOF
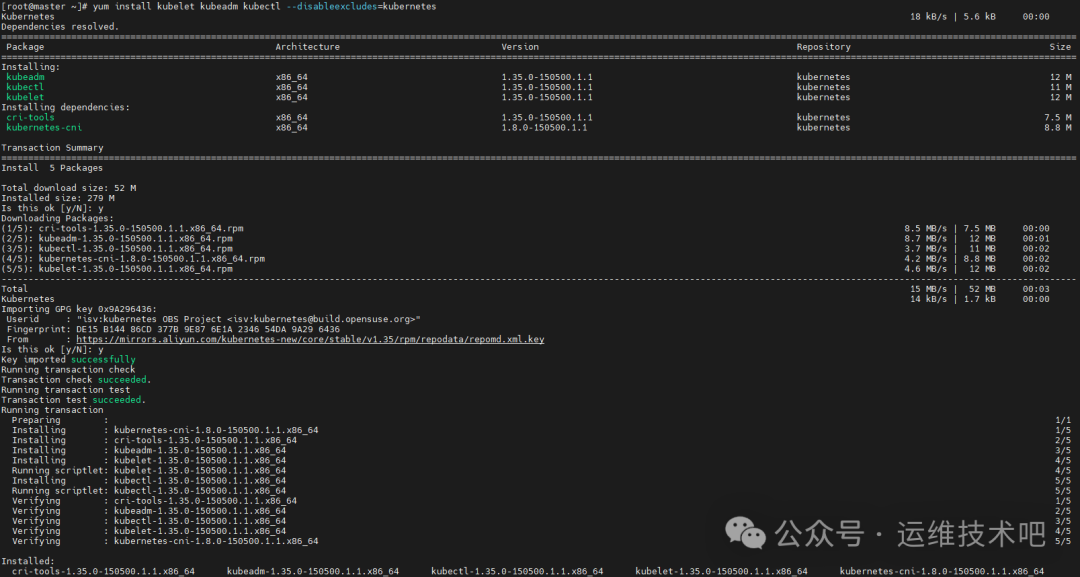
--disableexcludes=kubernetes 标志确保在安装过程中不会排除 Kubernetes 仓库中的软件包。
yum install -y kubelet kubeadm kubectl --disableexcludes=kubernetes
[root@master ~]# systemctl enable --now kubelet.service
11、初始化 Kubernetes 控制平面(仅在 master 节点操作)
[root@master ~]# kubeadm init --apiserver-advertise-address=192.168.213.30 --image-repository registry.aliyuncs.com/google_containers --service-cidr=10.96.0.0/16 --pod-network-cidr=10.244.0.0/16 --cri-socket unix:///var/run/cri-dockerd.sock
命令输出:
[root@master ~]# kubeadm init --apiserver-advertise-address=192.168.213.30 --image-repository registry.aliyuncs.com/google_containers --service-cidr=10.96.0.0/16 --pod-network-cidr=10.244.0.0/16 --cri-socket unix:///var/run/cri-dockerd.sock
[init] Using Kubernetes version: v1.35.0
[preflight] Running pre-flight checks
        [WARNING ContainerRuntimeVersion]: You must update your container runtime to a version that supports the CRI method RuntimeConfig. Falling back to using cgroupDriver from kubelet config will be removed in 1.36. For more information, see https://git.k8s.io/enhancements/keps/sig-node/4033-group-driver-detection-over-cri
        [WARNING SystemVerification]: kernel release 5.14.0-665.el9.x86_64 is unsupported. Supported LTS versions from the 5.x series are 5.4, 5.10 and 5.15. Any 6.x version is also supported. For cgroups v2 support, the recommended version is 5.10 or newer
        [WARNING Hostname]: hostname “master” could not be reached
        [WARNING Hostname]: hostname “master”: lookup master on 192.168.213.2:53: no such host
[preflight] Pulling images required for setting up a Kubernetes cluster
[preflight] This might take a minute or two, depending on the speed of your internet connection
[preflight] You can also perform this action beforehand using ‘kubeadm config images pull’
W0131 22:35:18.560702   59468 checks.go:906] detected that the sandbox image “registry.k8s.io/pause:3.9” of the container runtime is inconsistent with that used by kubeadm. It is recommended to use “registry.aliyuncs.com/google_containers/pause:3.10.1” as the CRI sandbox image.
[certs] Using certificateDir folder “/etc/kubernetes/pki”
[certs] Generating “ca” certificate and key
[certs] Generating “apiserver” certificate and key
[certs] apiserver serving cert is signed for DNS names [kubernetes kubernetes.default kubernetes.default.svc kubernetes.default.svc.cluster.local master] and IPs [10.96.0.1 192.168.213.30]
[certs] Generating “apiserver-kubelet-client” certificate and key
[certs] Generating “front-proxy-ca” certificate and key
[certs] Generating “front-proxy-client” certificate and key
[certs] Generating “etcd/ca” certificate and key
[certs] Generating “etcd/server” certificate and key
[certs] etcd/server serving cert is signed for DNS names [localhost master] and IPs [192.168.213.30 127.0.0.1 ::1]
[certs] Generating “etcd/peer” certificate and key
[certs] etcd/peer serving cert is signed for DNS names [localhost master] and IPs [192.168.213.30 127.0.0.1 ::1]
[certs] Generating “etcd/healthcheck-client” certificate and key
[certs] Generating “apiserver-etcd-client” certificate and key
[certs] Generating “sa” key and public key
[kubeconfig] Using kubeconfig folder “/etc/kubernetes”
[kubeconfig] Writing “admin.conf” kubeconfig file
[kubeconfig] Writing “super-admin.conf” kubeconfig file
[kubeconfig] Writing “kubelet.conf” kubeconfig file
[kubeconfig] Writing “controller-manager.conf” kubeconfig file
[kubeconfig] Writing “scheduler.conf” kubeconfig file
[etcd] Creating static Pod manifest for local etcd in “/etc/kubernetes/manifests”
[control-plane] Using manifest folder “/etc/kubernetes/manifests”
[control-plane] Creating static Pod manifest for “kube-apiserver”
[control-plane] Creating static Pod manifest for “kube-controller-manager”
[control-plane] Creating static Pod manifest for “kube-scheduler”
[kubelet-start] Writing kubelet environment file with flags to file “/var/lib/kubelet/kubeadm-flags.env”
[kubelet-start] Writing kubelet configuration to file “/var/lib/kubelet/instance-config.yaml”
[patches] Applied patch of type “application/strategic-merge-patch+json” to target “kubeletconfiguration”
[kubelet-start] Writing kubelet configuration to file “/var/lib/kubelet/config.yaml”
[kubelet-start] Starting the kubelet
[wait-control-plane] Waiting for the kubelet to boot up the control plane as static Pods from directory “/etc/kubernetes/manifests”
[kubelet-check] Waiting for a healthy kubelet at http://127.0.0.1:10248/healthz. This can take up to 4m0s
[kubelet-check] The kubelet is healthy after 1.002242613s
[control-plane-check] Waiting for healthy control plane components. This can take up to 4m0s
[control-plane-check] Checking kube-apiserver at https://192.168.213.30:6443/livez
[control-plane-check] Checking kube-controller-manager at https://127.0.0.1:10257/healthz
[control-plane-check] Checking kube-scheduler at https://127.0.0.1:10259/livez
[control-plane-check] kube-controller-manager is healthy after 8.506861505s
[control-plane-check] kube-scheduler is healthy after 9.943662123s
[control-plane-check] kube-apiserver is healthy after 12.004015281s
[upload-config] Storing the configuration used in ConfigMap “kubeadm-config” in the “kube-system” Namespace
[kubelet] Creating a ConfigMap “kubelet-config” in namespace kube-system with the configuration for the kubelets in the cluster
[upload-certs] Skipping phase. Please see --upload-certs
[mark-control-plane] Marking the node master as control-plane by adding the labels: [node-role.kubernetes.io/control-plane node.kubernetes.io/exclude-from-external-load-balancers]
[mark-control-plane] Marking the node master as control-plane by adding the taints [node-role.kubernetes.io/control-plane:NoSchedule]
[bootstrap-token] Using token: eydjwt.nrde0uu9mslzfc13
[bootstrap-token] Configuring bootstrap tokens, cluster-info ConfigMap, RBAC Roles
[bootstrap-token] Configured RBAC rules to allow Node Bootstrap tokens to get nodes
[bootstrap-token] Configured RBAC rules to allow Node Bootstrap tokens to post CSRs in order for nodes to get long term certificate credentials
[bootstrap-token] Configured RBAC rules to allow the csrapprover controller automatically approve CSRs from a Node Bootstrap Token
[bootstrap-token] Configured RBAC rules to allow certificate rotation for all node client certificates in the cluster
[bootstrap-token] Creating the “cluster-info” ConfigMap in the “kube-public” namespace
[kubelet-finalize] Updating “/etc/kubernetes/kubelet.conf” to point to a rotatable kubelet client certificate and key
[addons] Applied essential addon: CoreDNS
[addons] Applied essential addon: kube-proxy
Your Kubernetes control-plane has initialized successfully!
To start using your cluster, you need to run the following as a regular user:
    mkdir -p $HOME/.kube
    sudo cp -i /etc/kubernetes/admin.conf $HOME/.kube/config
    sudo chown $(id -u):$(id -g) $HOME/.kube/config
Alternatively, if you are the root user, you can run:
    export KUBECONFIG=/etc/kubernetes/admin.conf
You should now deploy a pod network to the cluster.
Run “kubectl apply -f [podnetwork].yaml” with one of the options listed at:
    https://kubernetes.io/docs/concepts/cluster-administration/addons/
Then you can join any number of worker nodes by running the following on each as root:
kubeadm join 192.168.213.30:6443 --token eydjwt.nrde0uu9mslzfc13 \
        --discovery-token-ca-cert-hash sha256:288c17b1953041849daa0fd2f2c6ddf3d717c4ae994afbf555eef880e036228b
初始化成功后,根据提示执行以下操作来配置 kubectl:
[root@master ~]# mkdir -p $HOME/.kube
[root@master ~]# sudo cp -i /etc/kubernetes/admin.conf $HOME/.kube/config
[root@master ~]# sudo chown $(id -u):$(id -g) $HOME/.kube/config
查看节点状态,此时应为 NotReady,因为网络插件尚未安装:
[root@master ~]# kubectl get nodes
NAME     STATUS     ROLES           AGE     VERSION
master   NotReady   control-plane   2m41s   v1.35.0
接下来,将工作节点 worker1 加入集群。使用上面初始化输出中提供的 kubeadm join 命令(注意添加 --cri-socket 参数):
[root@worker1 ~]# kubeadm join 192.168.213.30:6443 --token eydjwt.nrde0uu9mslzfc13 --discovery-token-ca-cert-hash sha256:288c17b1953041849daa0fd2f2c6ddf3d717c4ae994afbf555eef880e036228b --cri-socket unix:///var/run/cri-dockerd.sock
在 master 节点上查看,现在两个节点都已加入,但状态仍是 NotReady:
[root@master ~]# kubectl get nodes
NAME      STATUS     ROLES           AGE   VERSION
master    NotReady   control-plane   26m   v1.35.0
worker1   NotReady   <none>          35s   v1.35.0
12、安装网络插件 Calico
我们需要安装网络插件来实现集群中各个 Pod 之间的联网。这里选择 Calico。
首先,部署 Tigera Operator:
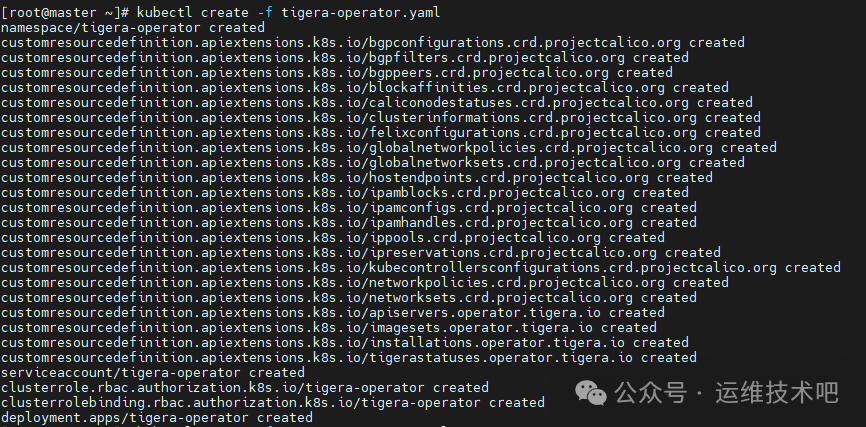
[root@master ~]# wget https://raw.githubusercontent.com/projectcalico/calico/v3.26.1/manifests/tigera-operator.yaml
[root@master ~]# kubectl create -f tigera-operator.yaml
然后,下载自定义 Calico 资源配置文件,并修改其中的 Pod 子网 CIDR,使其与 kubeadm init 时指定的 --pod-network-cidr 一致:
[root@master ~]# wget https://raw.githubusercontent.com/projectcalico/calico/v3.26.1/manifests/custom-resources.yaml
[root@master ~]# sed -i ‘s/cidr: 192\.168\.0\.0\/16/cidr: 10.244.0.0\/16/g’ custom-resources.yaml
[root@master ~]# kubectl create -f custom-resources.yaml
installation.operator.tigera.io/default created
apiserver.operator.tigera.io/default created
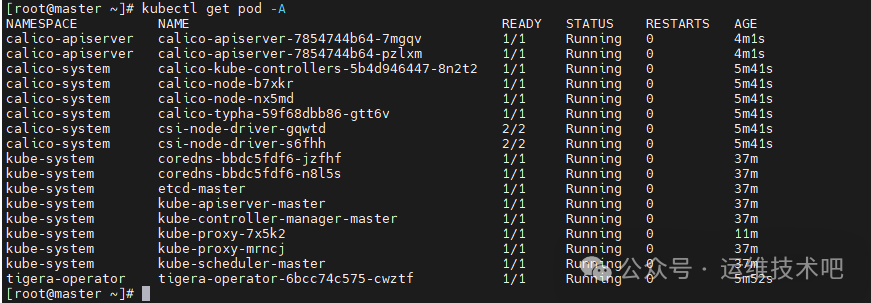
等待片刻,Calico 相关的 Pod 会陆续启动。查看所有命名空间下的 Pod 状态,等待它们全部变为 Running:
再次验证节点状态,现在应该都变为 Ready:
[root@master ~]# kubectl get nodes
NAME      STATUS   ROLES           AGE   VERSION
master    Ready    control-plane   37m   v1.35.0
worker1   Ready    <none>          12m   v1.35.0
至此,一个两节点的 Kubernetes 1.35 集群已在 CentOS 9 上成功安装完成。
测试集群功能
我们创建一个简单的 Nginx 应用来测试集群是否工作正常。
首先,创建一个 Deployment 定义文件 nginx-deploy.yaml:
apiVersion: apps/v1
kind: Deployment
metadata:
    name: nginx-deployment
    labels:
    app: nginx
spec:
    replicas: 1
    selector:
    matchLabels:
        app: nginx
    template:
    metadata:
        labels:
        app: nginx
    spec:
        containers:
        - name: nginx
        image: nginx:latest
        ports:
        - containerPort: 80
部署这个应用:
[root@master ~]# kubectl create -f nginx-deploy.yaml
查看 Pod 状态:
[root@master ~]# kubectl get pod
NAME                                READY   STATUS    RESTARTS   AGE
nginx-deployment-59f86b59ff-hm8d5   1/1     Running   0          32s
为了从集群外部访问这个 Nginx 服务,我们创建一个 NodePort 类型的 Service。创建文件 nginx-svc.yaml:
apiVersion: v1
kind: Service
metadata:
    name: nginx-service
spec:
    selector:
    app: nginx
    ports:
    - protocol: TCP
        port: 80
        targetPort: 80
    type: NodePort
应用这个 Service 配置:
[root@master ~]# kubectl apply -f nginx-svc.yaml
查看 Service,可以看到系统为它分配了一个 NodePort(例如 32694):
[root@master ~]# kubectl get svc
NAME            TYPE        CLUSTER-IP     EXTERNAL-IP   PORT(S)        AGE
kubernetes      ClusterIP   10.96.0.1      <none>        443/TCP        43m
nginx-service   NodePort    10.96.74.125   <none>        80:32694/TCP   4s
现在,你可以通过浏览器或 curl 访问集群任意节点(master 或 worker1)的 IP 地址加上 32694 端口(例如 http://192.168.213.30:32694)来访问 Nginx 的欢迎页面。
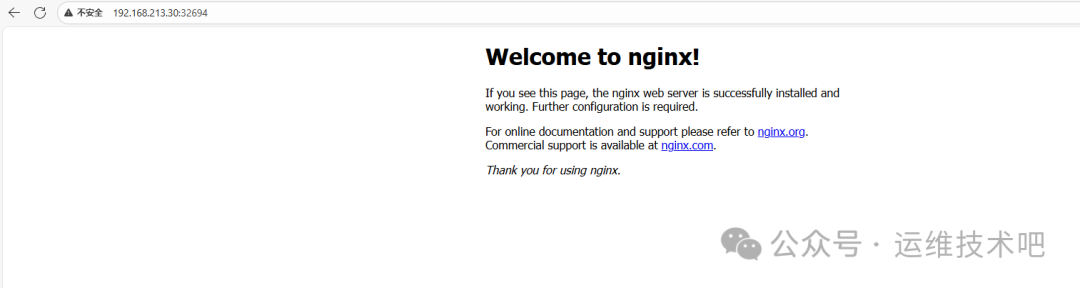
测试成功!这表明你的 Kubernetes 集群已经可以正常部署和管理容器化应用了。
总结
本指南详细介绍了在 CentOS 9 系统上安装 Kubernetes 1.35 集群的完整步骤,涵盖了节点初始化、Docker及CRI-Dockerd配置、Kubernetes组件安装、控制平面初始化以及Calico网络插件的部署。这是一个经典且实用的运维配置流程。如果你在安装过程中遇到问题,或在云栈社区有更多关于K8s高级特性的探讨需求,欢迎分享你的实践经验。
 发表于 2026-2-7 16:20:30
|
查看: 250|
回复: 0
发表于 2026-2-7 16:20:30
|
查看: 250|
回复: 0
