在鸿蒙原生应用(ArkUI)中集成 React Native 页面,是实现跨平台混合开发的高效手段。本文将以一个航班页面为例,详细介绍如何通过 MultiBundle 加载方案实现 React Native 页面的动态加载与路由跳转。本文涉及的核心技术栈包括 React-Native 跨端框架与鸿蒙 ArkUI 声明式开发。
首先,我们来看鸿蒙端承载 React Native 页面的核心组件 Flight.ets。这是一个基于 @rnoh/react-native-openharmony SDK 构建的页面级组件。
import {
RNApp,
RNOHErrorDialog,
RNOHLogger,
RNOHCoreContext,
RNInstance,
ResourceJSBundleProvider
} from '@rnoh/react-native-openharmony';
import { RNInstanceManager } from "../rn/RNInstanceManager";
import { buildCustomRNComponent } from "../rn/CustomRNComponent";
const wrappedCustomRNComponentBuilder = wrapBuilder(buildCustomRNComponent);
@Entry
@Component
struct Flight {
@StorageLink('RNOHCoreContext') private rnohCoreContext: RNOHCoreContext | undefined = undefined;
@State shouldShow: boolean = false;
private logger!: RNOHLogger;
private rnInstance: RNInstance | undefined;
async aboutToAppear() {
this.logger = this.rnohCoreContext!.logger.clone("Flight");
const stopTracing = this.logger.clone("aboutToAppear").startTracing();
this.rnInstance = await RNInstanceManager.getInstance("Flight");
this.shouldShow = true;
stopTracing();
}
onBackPress(): boolean | undefined {
this.rnohCoreContext!.dispatchBackPress();
return true;
}
build() {
Column() {
if (this.rnohCoreContext && this.shouldShow) {
if (this.rnohCoreContext?.isDebugModeEnabled) {
RNOHErrorDialog({ ctx: this.rnohCoreContext });
}
RNApp({
rnInstanceConfig: {
rnInstance: this.rnInstance as RNInstance,
},
initialProps: { "foo": "bar" } as Record<string, string>,
appKey: "flight",
wrappedCustomRNComponentBuilder: wrappedCustomRNComponentBuilder,
onSetUp: (rnInstance) => {
rnInstance.enableFeatureFlag("ENABLE_RN_INSTANCE_CLEAN_UP");
},
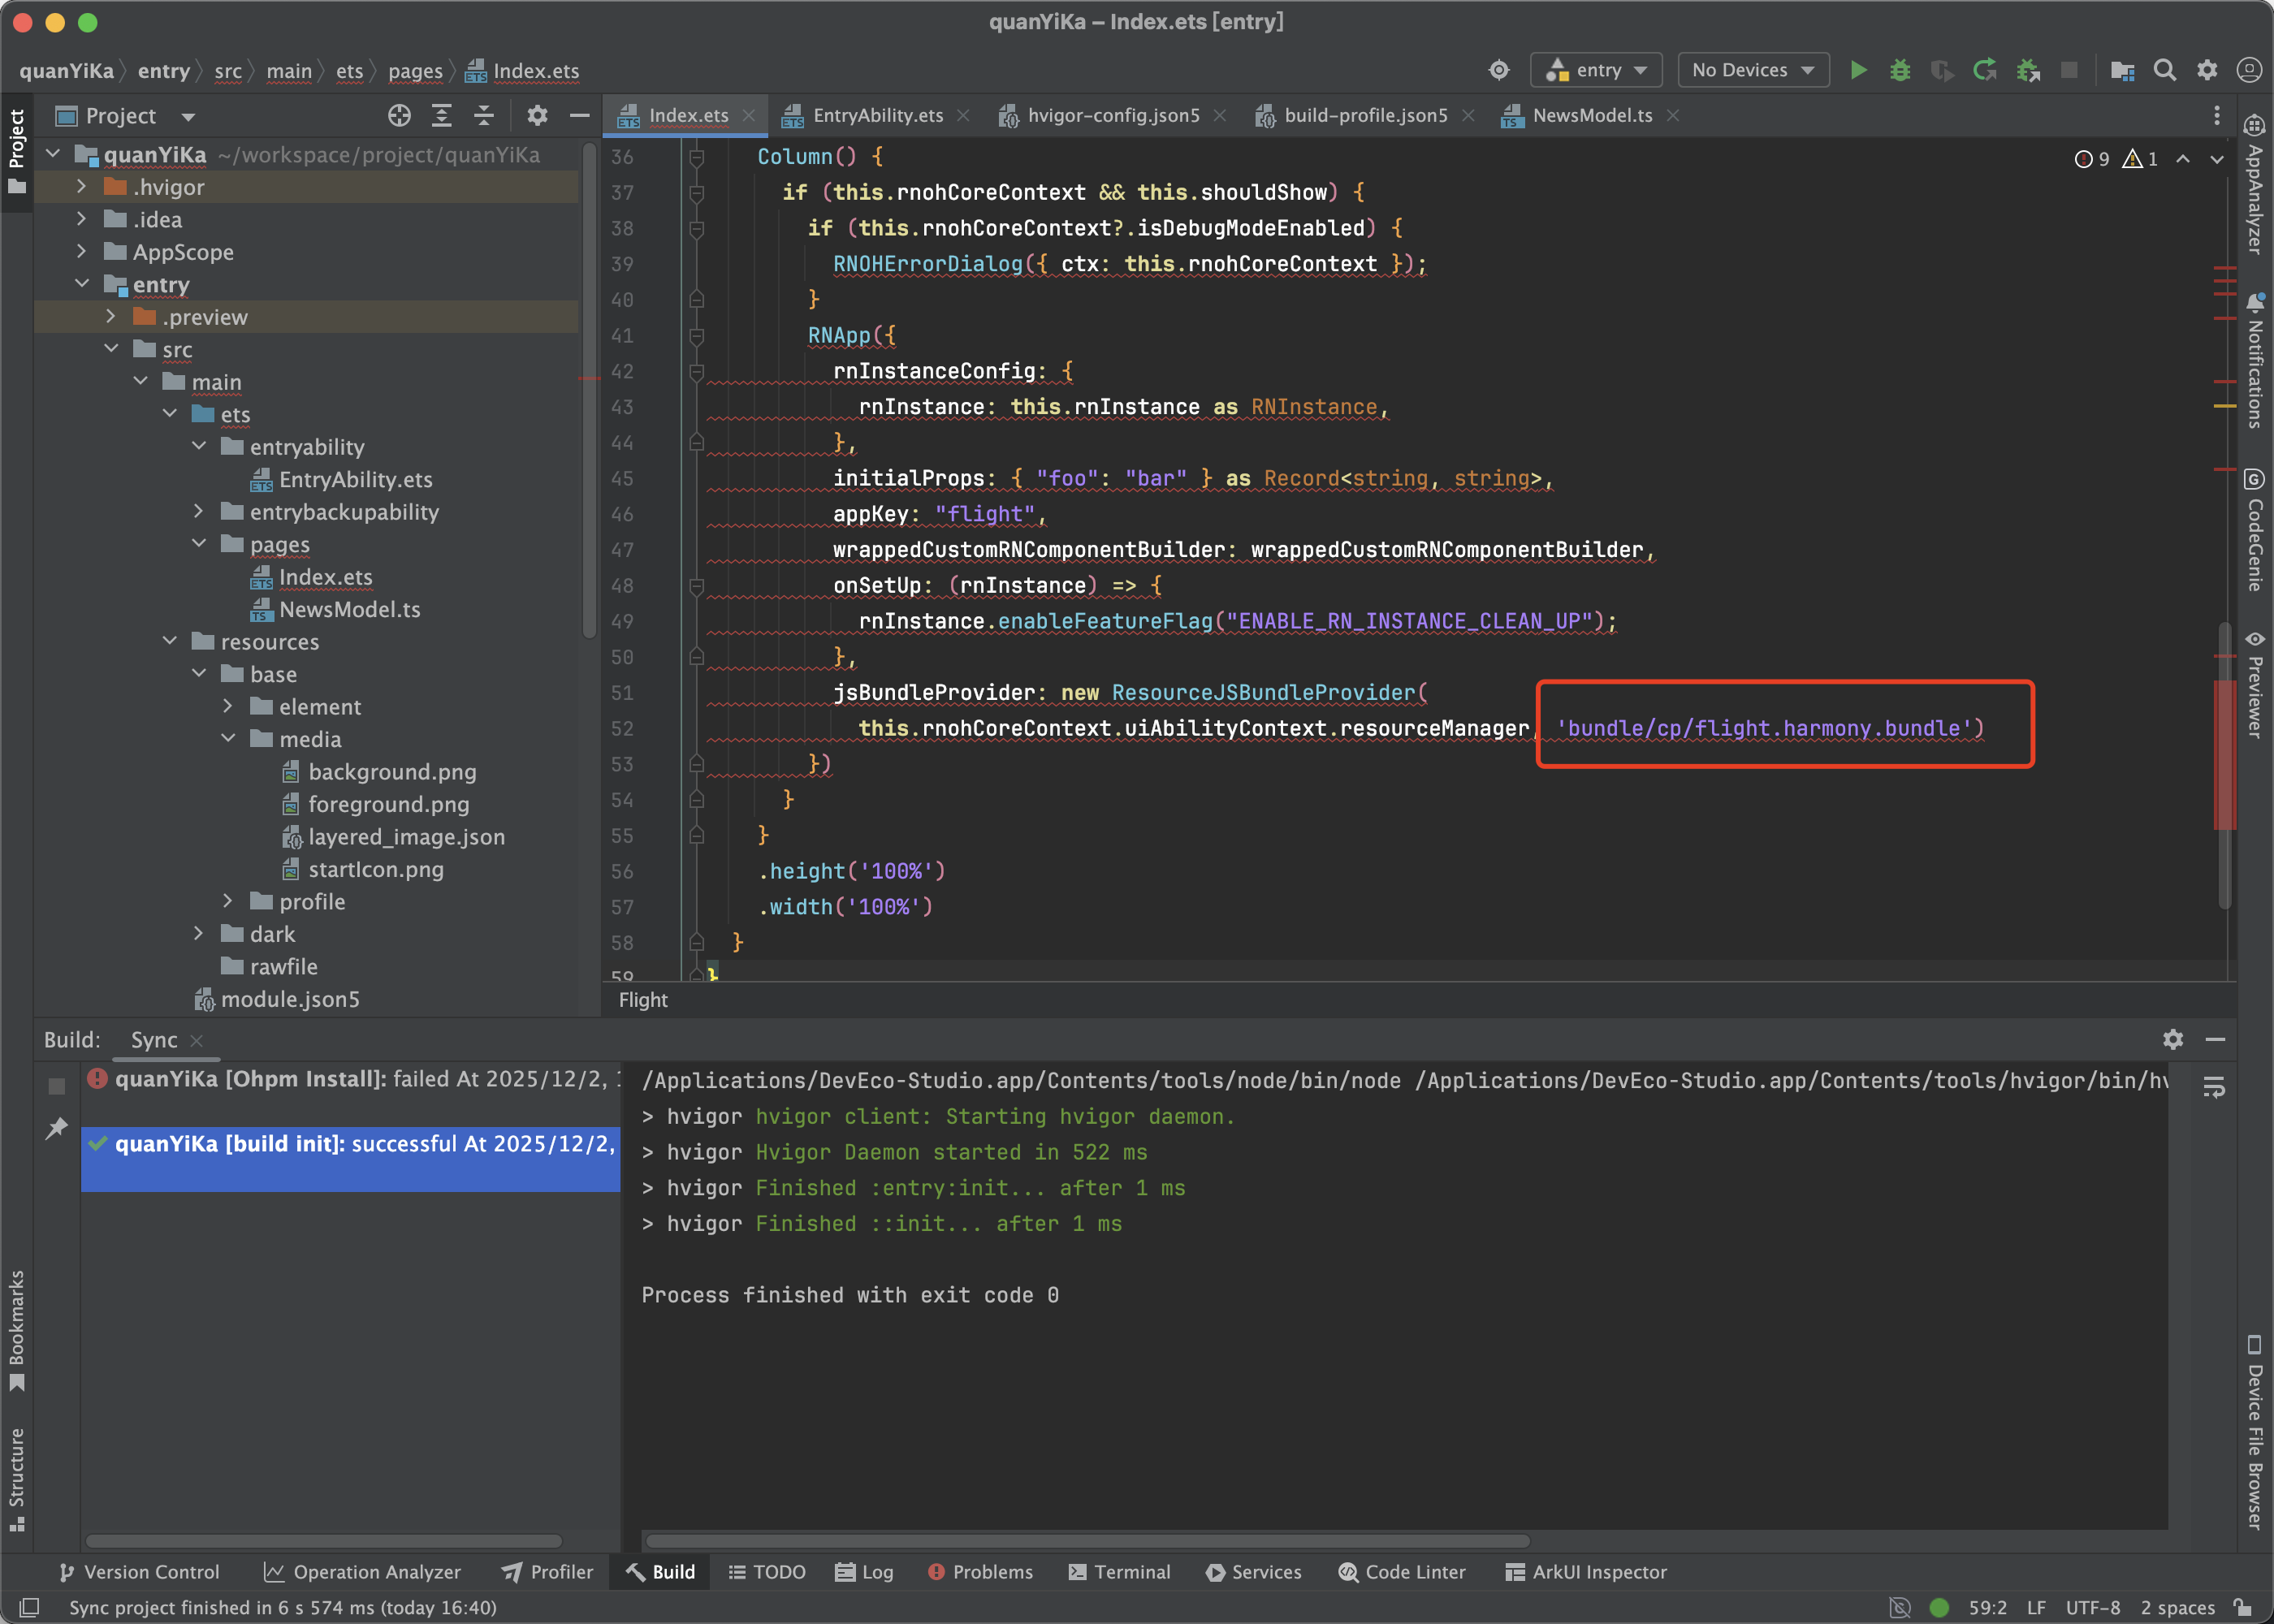
jsBundleProvider: new ResourceJSBundleProvider(
this.rnohCoreContext.uiAbilityContext.resourceManager, 'bundle/cp/flight.harmony.bundle')
})
}
}
.height('100%')
.width('100%')
}
}
核心代码解析
1. 组件生命周期与状态管理
aboutToAppear:此异步生命周期函数负责页面初始化。它通过 RNInstanceManager 按名称(”Flight”)获取对应的 React Native 实例,并进行性能追踪。准备好后,将 shouldShow 状态置为 true,触发 UI 渲染。onBackPress:重写了物理返回键事件,将其转发给 React Native 上下文处理,确保导航栈行为一致。@StorageLink 与 @State:rnohCoreContext 通过 @StorageLink 与全局应用存储绑定,用于共享核心上下文;shouldShow 是组件内部状态,控制 RNApp 的渲染时机。
2. RNApp 容器配置
RNApp 是渲染 React Native 内容的核心容器,其配置项是关键:
rnInstance:传入管理好的 React Native 运行时实例。appKey:必须与 React Native 项目中注册的组件名称(如 AppRegistry.registerComponent(‘flight’, ...))完全一致。jsBundleProvider:指定了 JavaScript 代码包的加载来源。此处使用 ResourceJSBundleProvider 从鸿蒙应用的 resources/rawfile 目录下加载名为 flight.harmony.bundle 的独立 Bundle 文件,这正是 MultiBundle 方案的核心——每个业务页面可以拥有独立的 Bundle。
3. 调试与错误处理
在调试模式下,RNOHErrorDialog 组件会被渲染,它可以捕获并展示 React Native 运行时的红屏错误,极大提升开发体验。
 上图为配置独立 Bundle 路径的代码截图:
bundle(‘cp/flight.harmony.bundle’)
打包与加载流程
- 打包 React Native 代码:在 React Native 项目中,通过
npm run harmony 等定制命令,将航班页面的相关代码打包成独立的 flight.harmony.bundle 文件。
- 集成至鸿蒙项目:将生成的 Bundle 文件放置于鸿蒙工程的
resources/rawfile/bundle/cp/ 目录下,作为应用资源。
- 动态加载:当导航到航班页面时,
ResourceJSBundleProvider 会动态加载该路径下的 Bundle 文件,并交由 RNApp 容器解析执行。
 执行
执行 npm run harmony 命令,使用 Metro 打包器生成鸿蒙可用的 Bundle 文件。
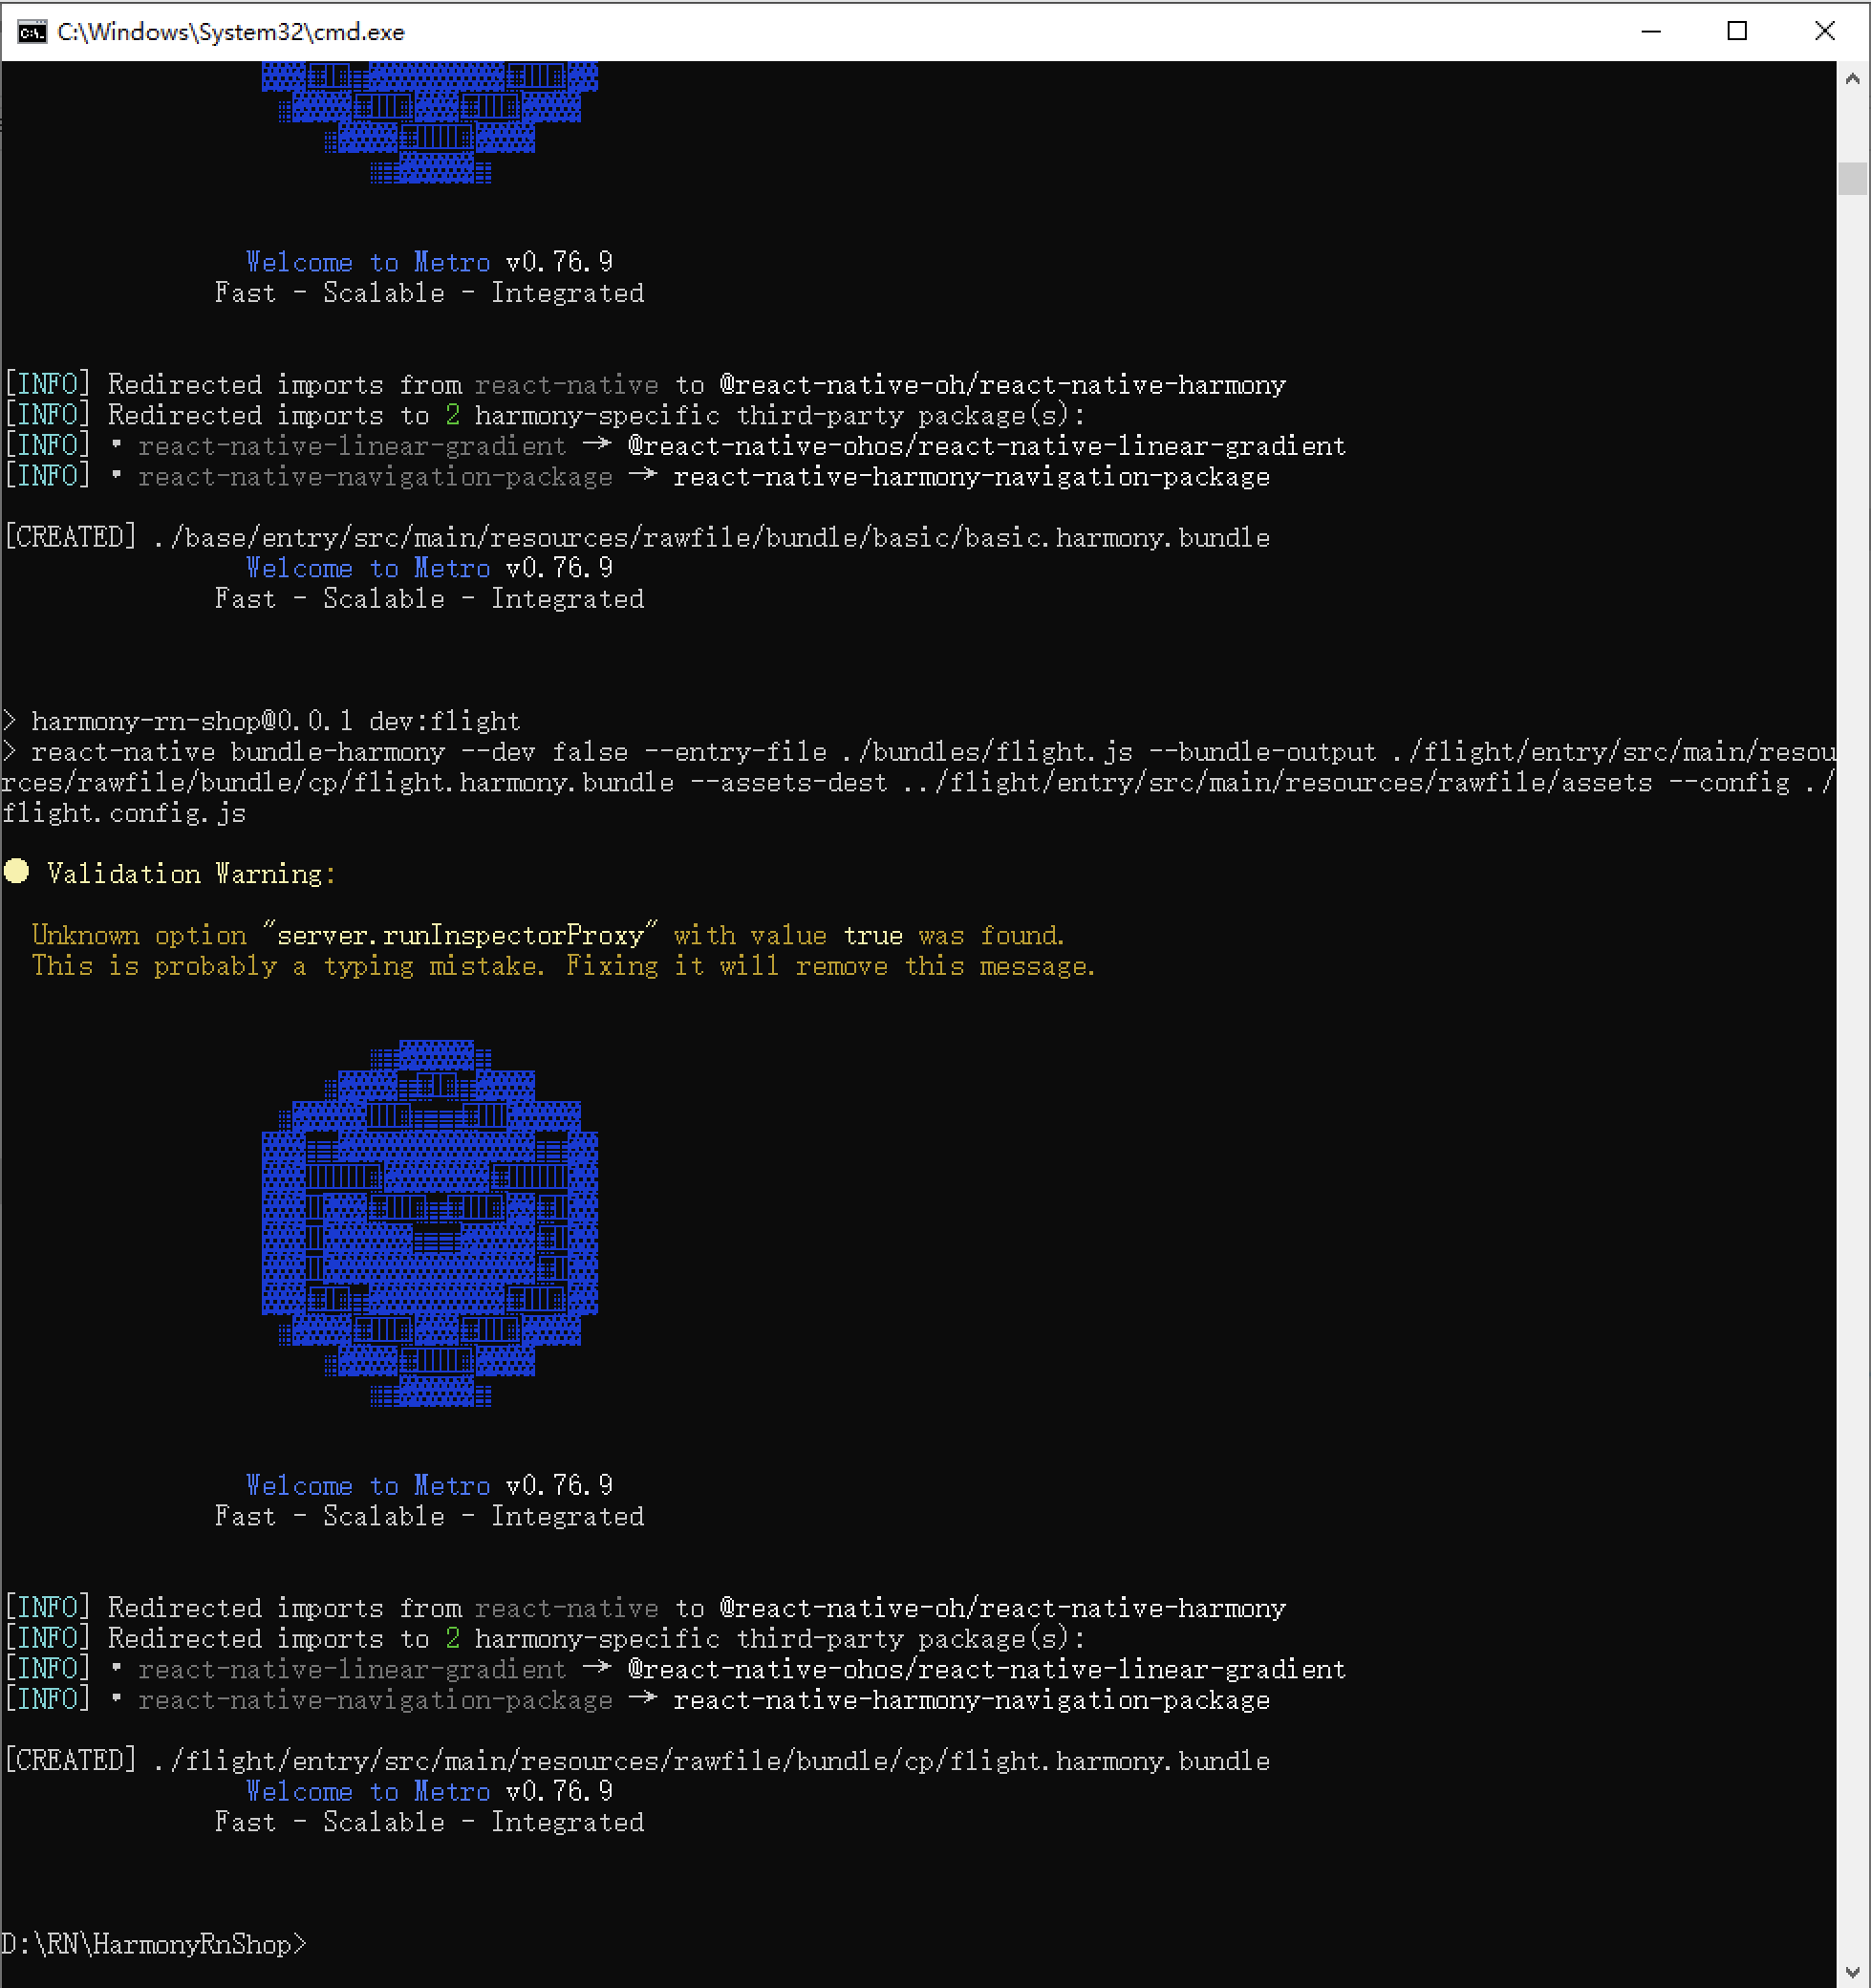 打包成功后的终端输出,显示 Metro 版本及构建完成信息。
方案优势与总结
通过上述 MultiBundle 方案,我们实现了:
- 业务解耦:航班、酒店等不同业务模块的代码可分别打包,独立维护和更新。
- 按需加载:只有在访问特定页面时才加载对应的 Bundle,优化应用启动速度和内存占用。
- 原生融合:充分利用了鸿蒙 ArkUI 的声明式 UI 能力和系统特性,同时复用了 React Native 的跨端业务逻辑。
该方案非常适合大型跨平台应用,在保持 TypeScript 开发效率的同时,实现了更精细化的性能和资源管理。
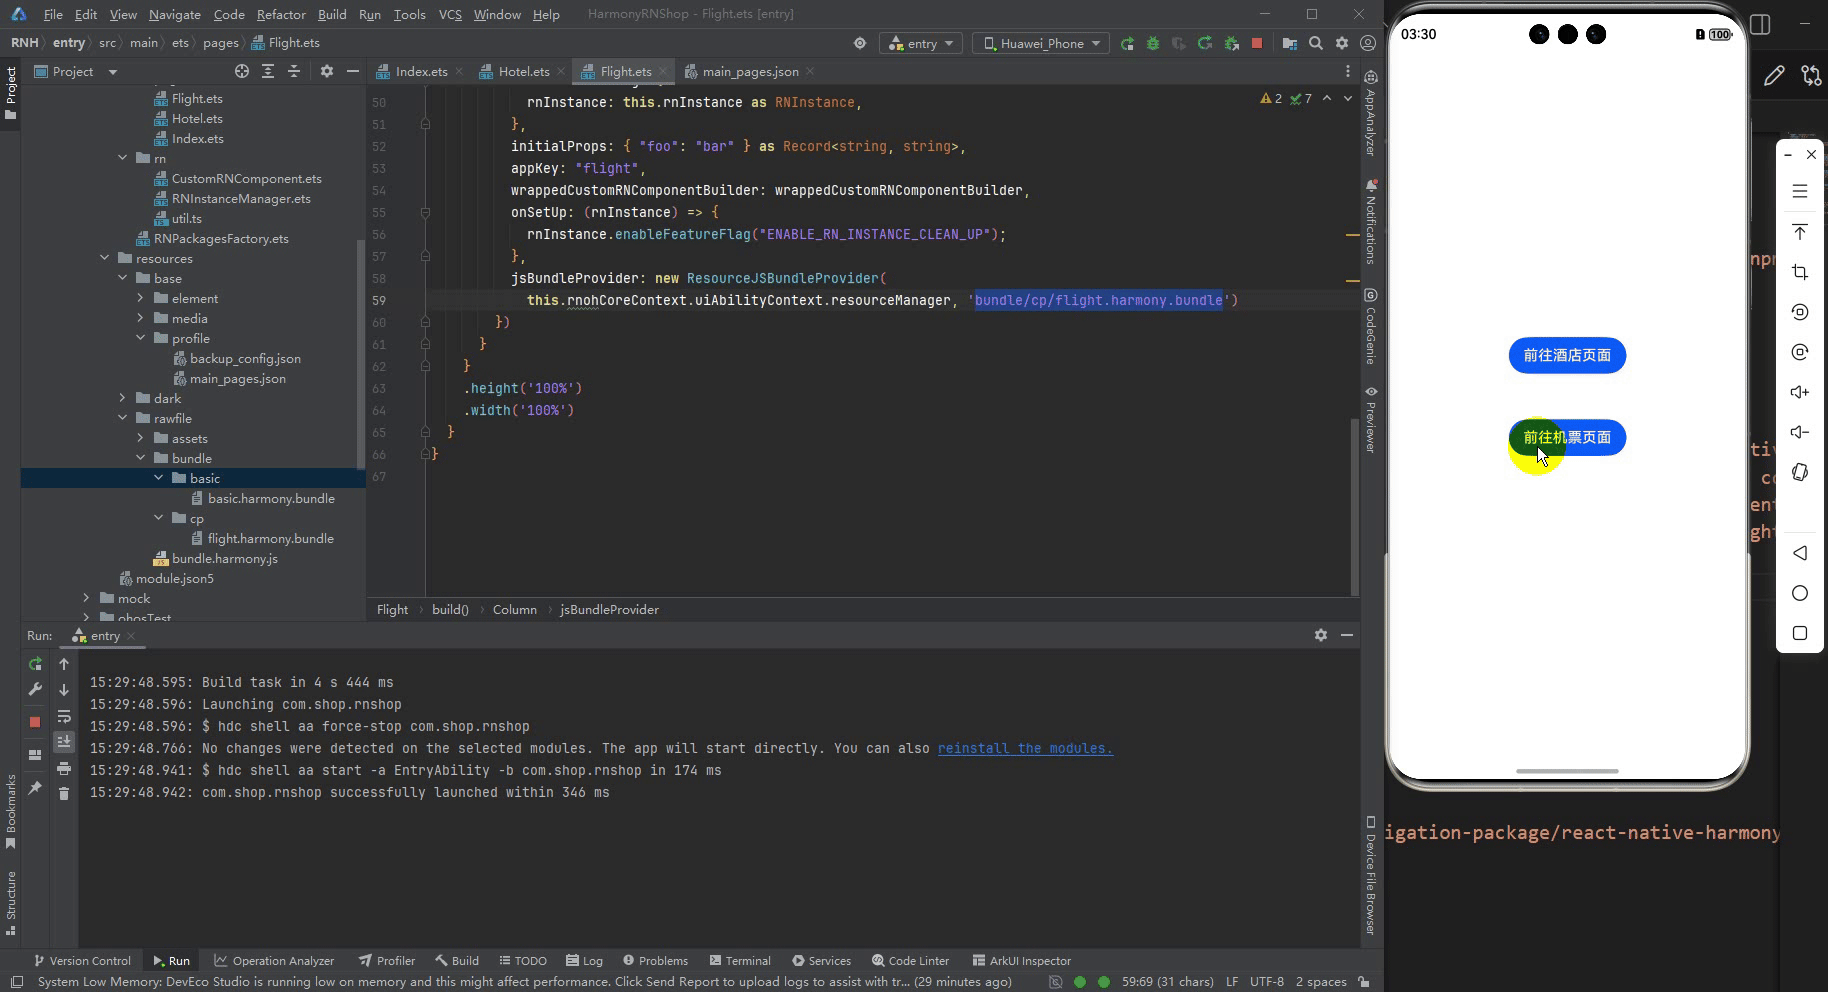 最终实现效果:在鸿蒙应用中成功加载并运行独立的 React Native 航班页面 Bundle。
|  发表于 2025-12-14 04:32:31
|
查看: 273|
回复: 0
发表于 2025-12-14 04:32:31
|
查看: 273|
回复: 0
