MyBatis-Plus (简称 MP) 作为 MyBatis 的强大增强工具,在保留 MyBatis 所有特性的基础上,提供了大量便捷的功能,其核心宗旨是“只做增强不做改变”,旨在简化开发、提升效率。它内置了通用的 CRUD 操作、强大的条件构造器、主键策略、分页插件等,可以极大地减少开发者的重复工作。
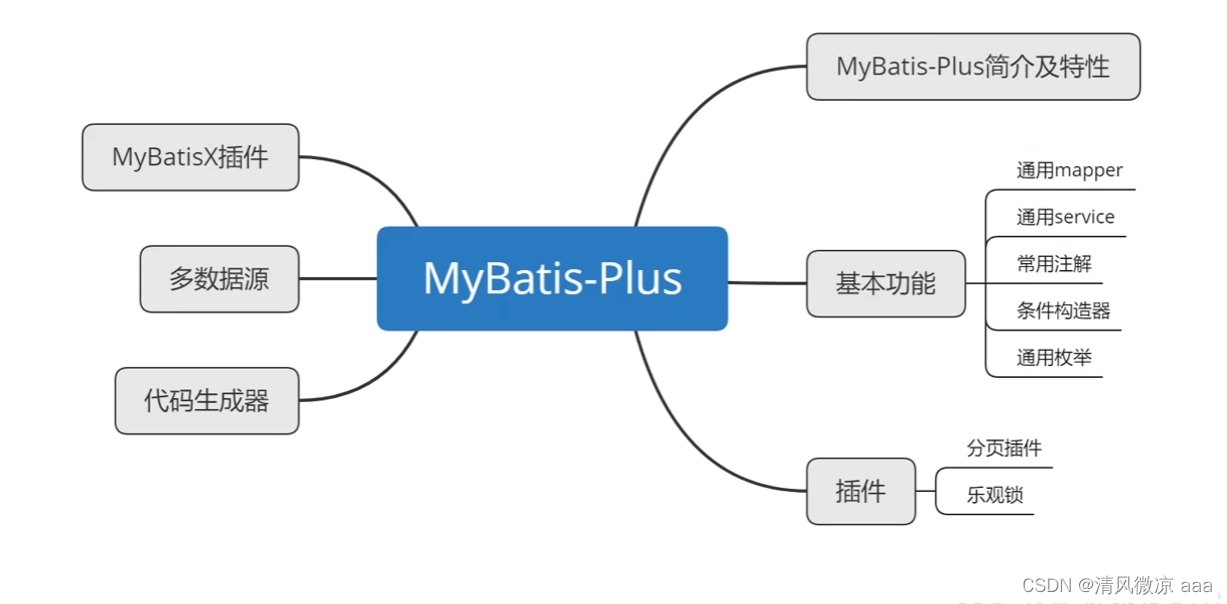
上图清晰地展示了 MyBatis-Plus 的整体知识架构,涵盖了从简介、核心功能到高级特性的所有内容。
一、MyBatis-Plus 核心特性与简介
1. 框架简介与愿景
MyBatis-Plus 在 MyBatis 的基础上进行了功能增强,但完全无侵入,对现有工程没有任何影响。其愿景是成为 MyBatis 最好的搭档,如同魂斗罗中的 1P 与 2P,协作搭配,效率倍增。

2. 主要特性
- 无侵入:引入后不会对现有工程产生任何影响。
- 损耗小:启动即自动注入基础 CRUD,性能几乎无损。
- 强大的 CRUD:内置通用 Mapper 和 Service,少量配置即可实现大部分单表操作。
- 支持 Lambda:通过 Lambda 表达式编写查询条件,无需担心字段拼写错误。
- 主键自动生成:支持多种主键策略,包含分布式唯一 ID 生成器(雪花算法)。
- 内置分页插件:基于 MyBatis 物理分页,配置后分页查询如同普通 List 查询。
- 内置代码生成器:可快速生成 Mapper、Model、Service、Controller 层代码。
3. 支持数据库
支持所有能使用 MyBatis 进行 CRUD 并遵循标准 SQL 的数据库,包括 MySQL、Oracle、PostgreSQL、SQL Server 等主流数据库。
4. 框架工作原理
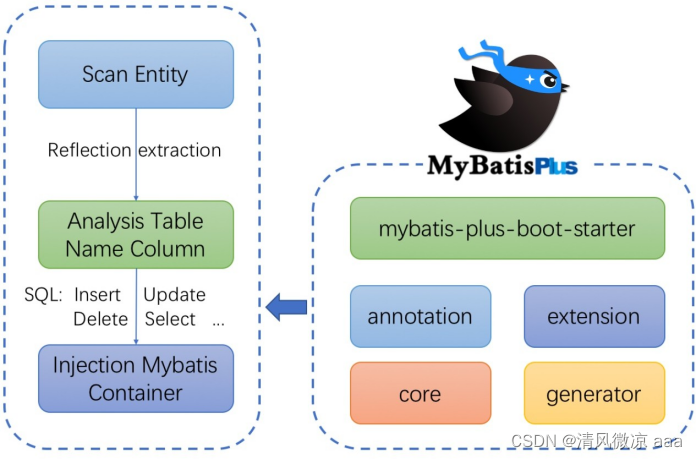
MyBatis-Plus 通过扫描实体类,利用反射提取表名和字段信息,自动构建基础的 SQL 语句(Insert, Update, Delete, Select),从而让开发者能够直接面向对象进行操作。
二、Spring Boot 整合 MyBatis-Plus 入门
1. 环境准备与数据库创建
- 开发环境:IDEA, JDK 8+, Maven, MySQL 5.7+, Spring Boot 2.6.3, MyBatis-Plus 3.5.1。
首先创建数据库和用户表:
CREATE DATABASE `mybatis_plus` /*!40100 DEFAULT CHARACTER SET utf8mb4 */;
USE `mybatis_plus`;
CREATE TABLE `user` (
    `id` bigint(20) NOT NULL COMMENT '主键ID',
    `name` varchar(30) DEFAULT NULL COMMENT '姓名',
    `age` int(11) DEFAULT NULL COMMENT '年龄',
    `email` varchar(50) DEFAULT NULL COMMENT '邮箱',
    PRIMARY KEY (`id`)
) ENGINE=InnoDB DEFAULT CHARSET=utf8;

INSERT INTO user (id, name, age, email) VALUES
(1, 'Jone', 18, 'test1@baomidou.com'),
(2, 'Jack', 20, 'test2@baomidou.com'),
(3, 'Tom', 28, 'test3@baomidou.com'),
(4, 'Sandy', 21, 'test4@baomidou.com'),
(5, 'Billie', 24, 'test5@baomidou.com');

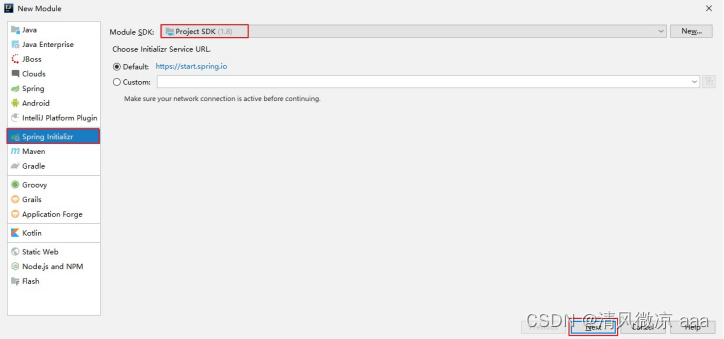
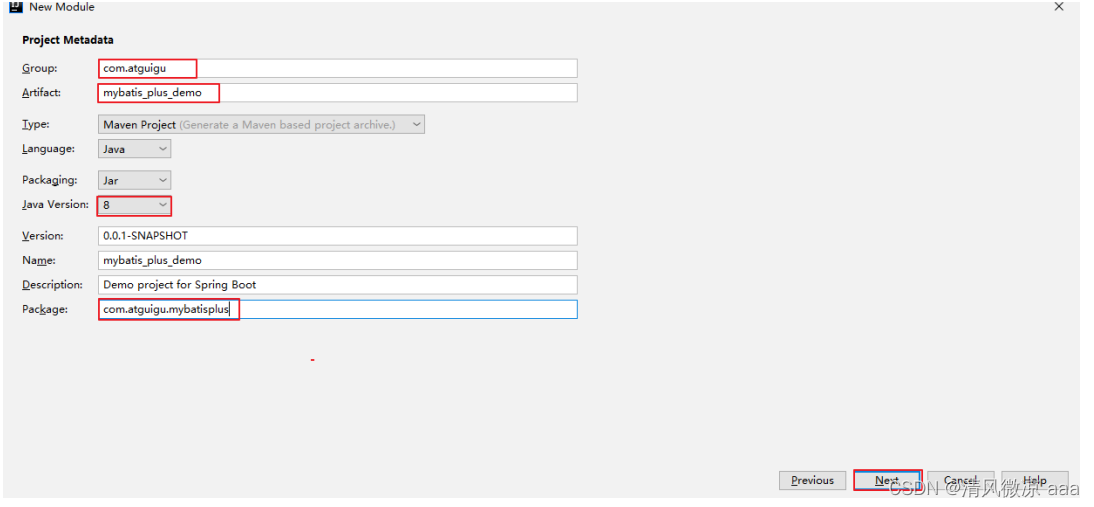
2. 创建 Spring Boot 工程并引入依赖
使用 Spring Initializr 快速创建工程,并添加必要依赖。
在 pom.xml 中添加 MyBatis-Plus 等依赖:
<dependencies>
    <!-- MyBatis-Plus 启动器 -->
    <dependency>
        <groupId>com.baomidou</groupId>
        <artifactId>mybatis-plus-boot-starter</artifactId>
        <version>3.5.1</version>
    </dependency>
    <!-- Lombok -->
    <dependency>
        <groupId>org.projectlombok</groupId>
        <artifactId>lombok</artifactId>
        <optional>true</optional>
    </dependency>
    <!-- MySQL 驱动 -->
    <dependency>
        <groupId>mysql</groupId>
        <artifactId>mysql-connector-java</artifactId>
        <scope>runtime</scope>
    </dependency>
    <!-- Spring Boot 基础依赖 -->
    <dependency>
        <groupId>org.springframework.boot</groupId>
        <artifactId>spring-boot-starter</artifactId>
    </dependency>
    <dependency>
        <groupId>org.springframework.boot</groupId>
        <artifactId>spring-boot-starter-test</artifactId>
        <scope>test</scope>
    </dependency>
</dependencies>
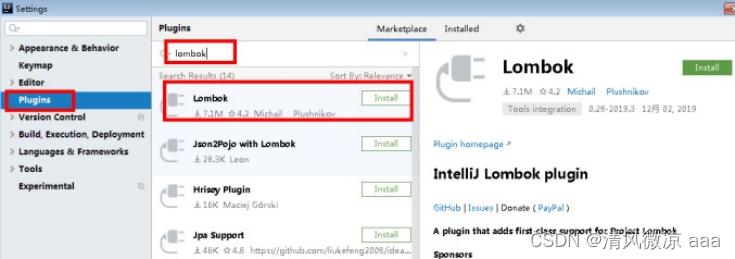
同时,需要在 IDEA 中安装 Lombok 插件。
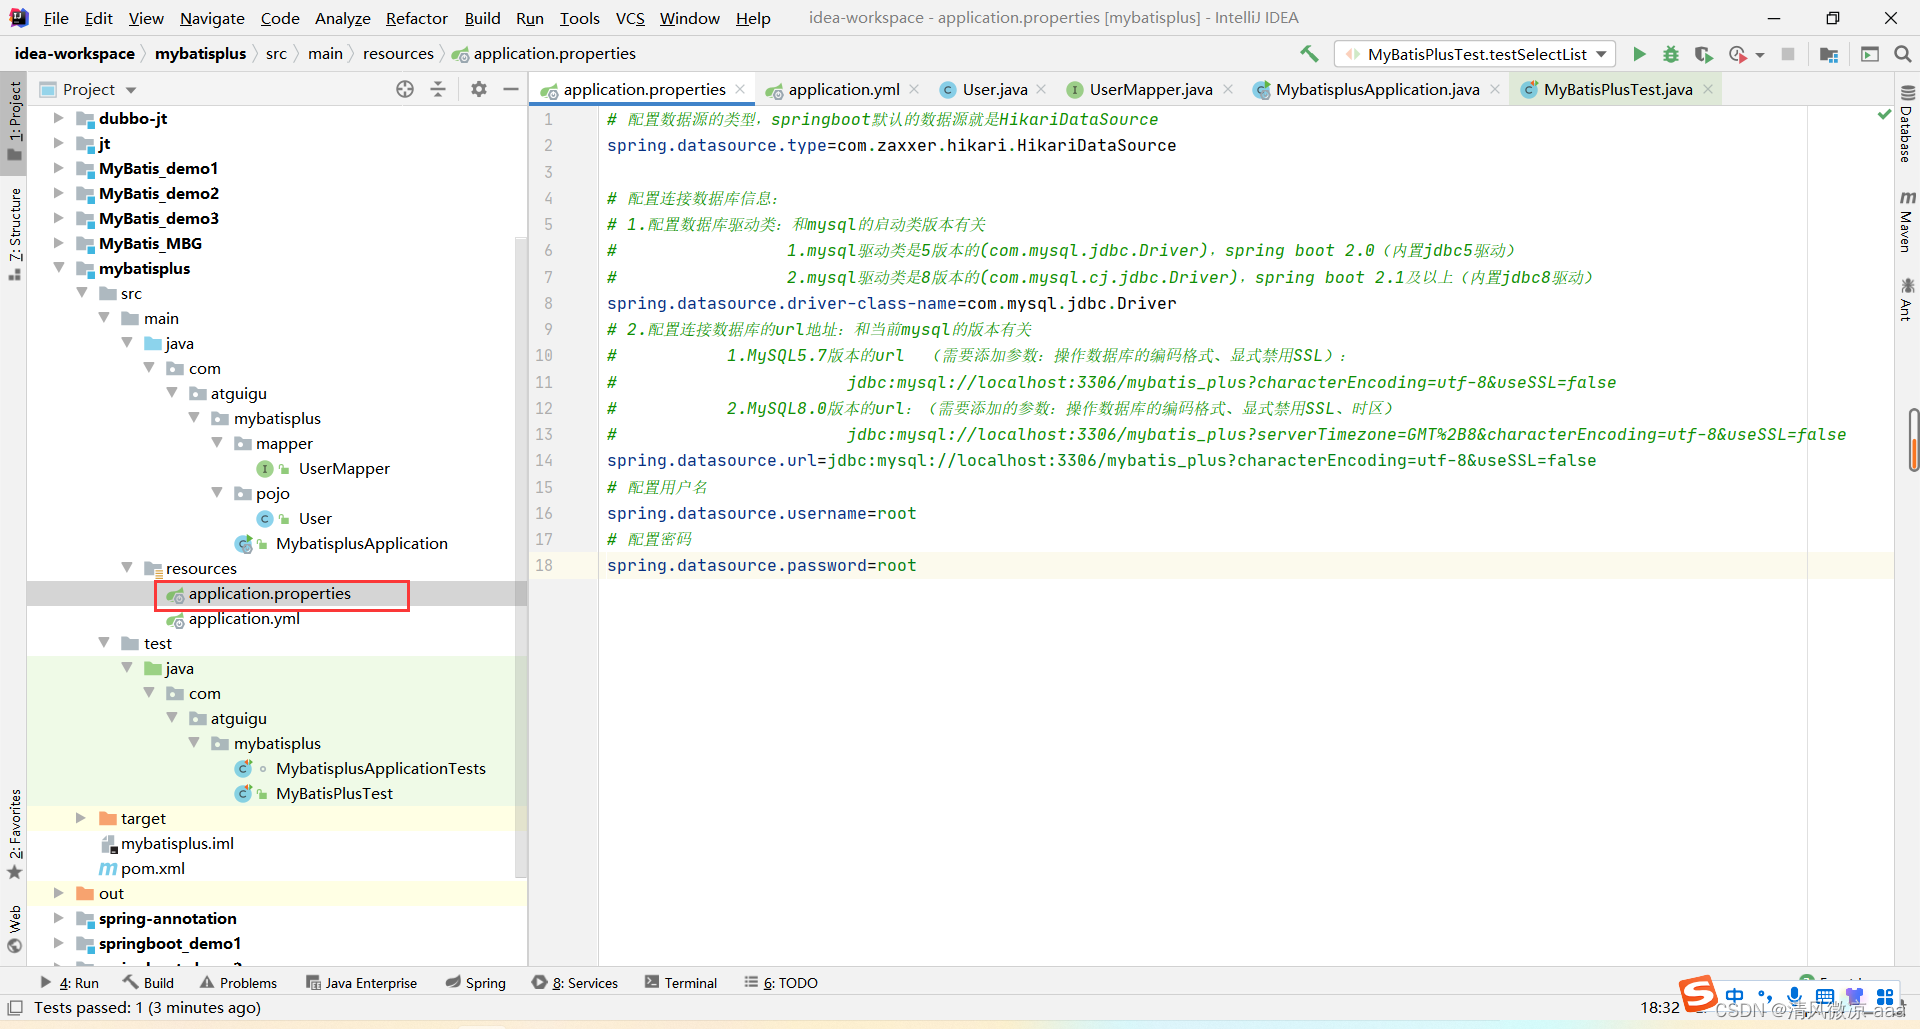
3. 配置数据源(驱动、URL与版本详解)
配置数据源时,需注意驱动类名和 URL 与 MySQL 版本的对应关系。
方式一:使用 application.properties
spring.datasource.type=com.zaxxer.hikari.HikariDataSource
# MySQL 5 驱动
spring.datasource.driver-class-name=com.mysql.jdbc.Driver
# MySQL 5.7 URL (需禁用SSL)
spring.datasource.url=jdbc:mysql://localhost:3306/mybatis_plus?characterEncoding=utf-8&useSSL=false
spring.datasource.username=root
spring.datasource.password=root
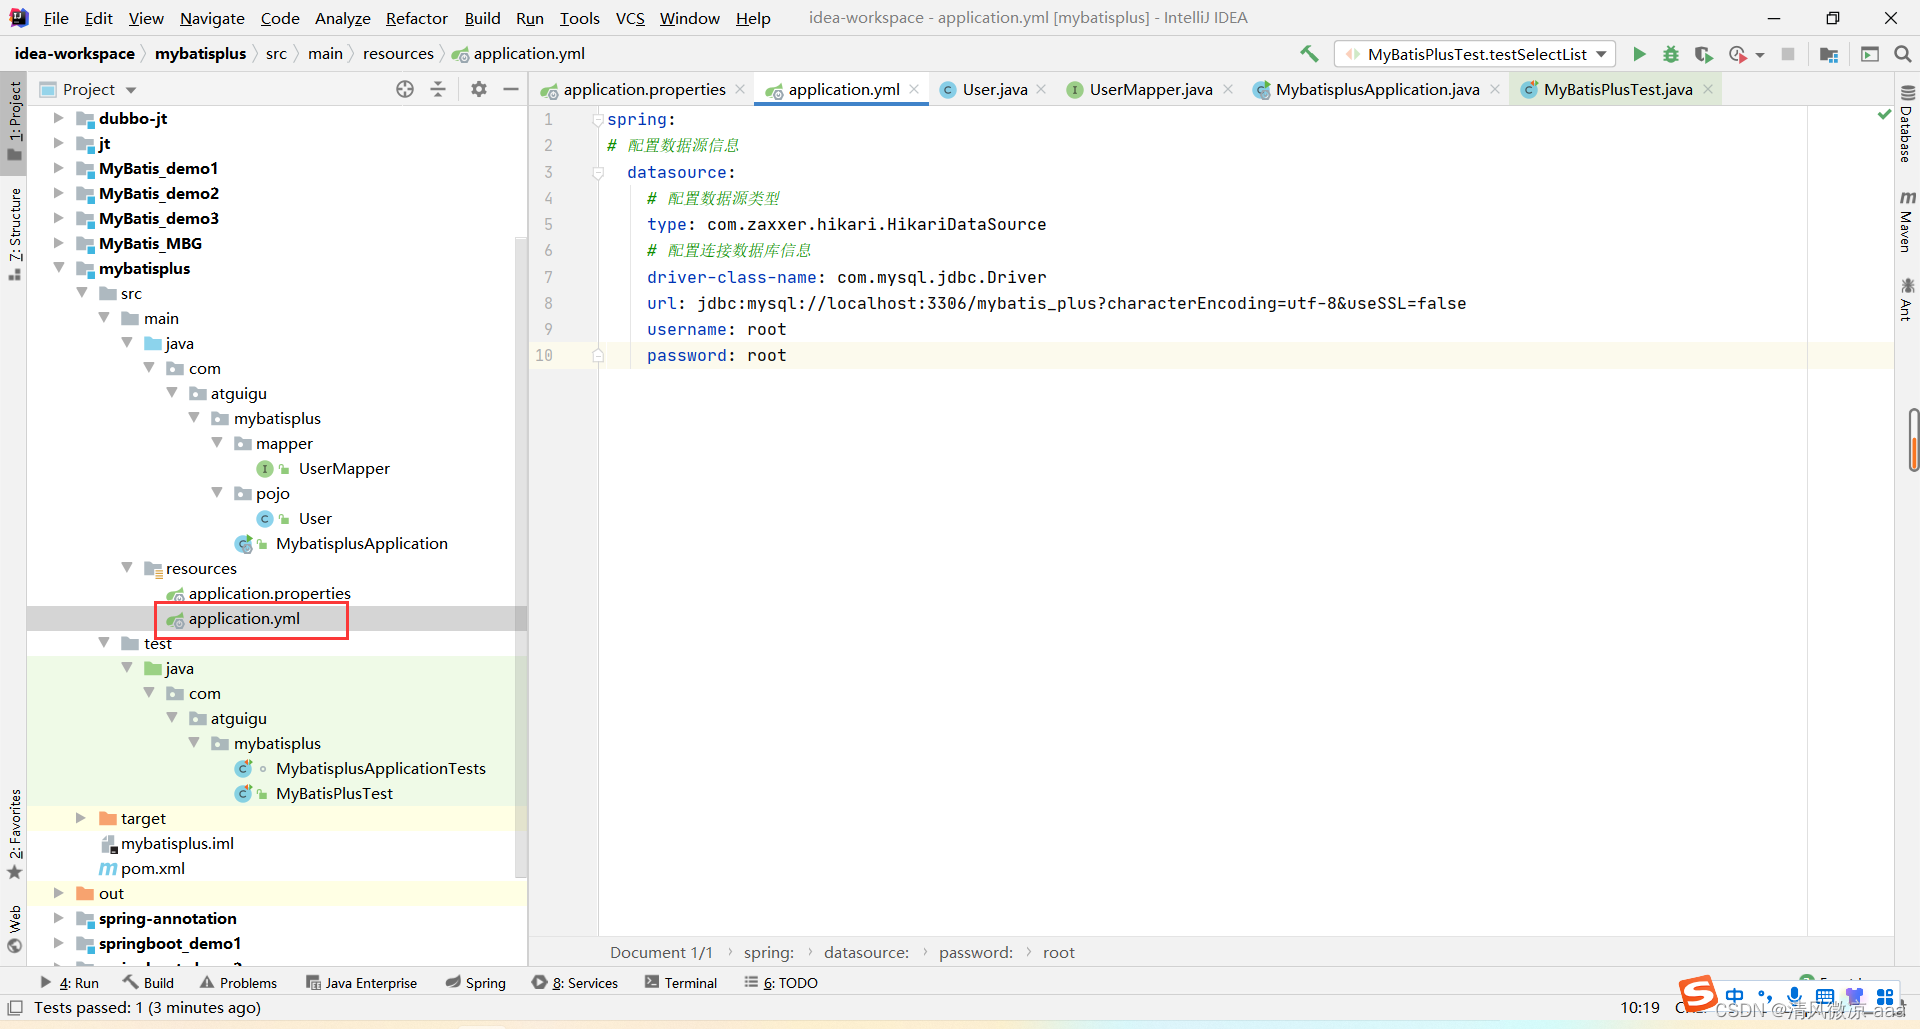
方式二:使用 application.yml(推荐)
spring:
  datasource:
    type: com.zaxxer.hikari.HikariDataSource
    driver-class-name: com.mysql.jdbc.Driver # MySQL 8 驱动为 `com.mysql.cj.jdbc.Driver`
    url: jdbc:mysql://localhost:3306/mybatis_plus?characterEncoding=utf-8&useSSL=false # MySQL 8 需添加时区参数 `&serverTimezone=GMT%2B8`
    username: root
    password: root
4. 编写核心代码
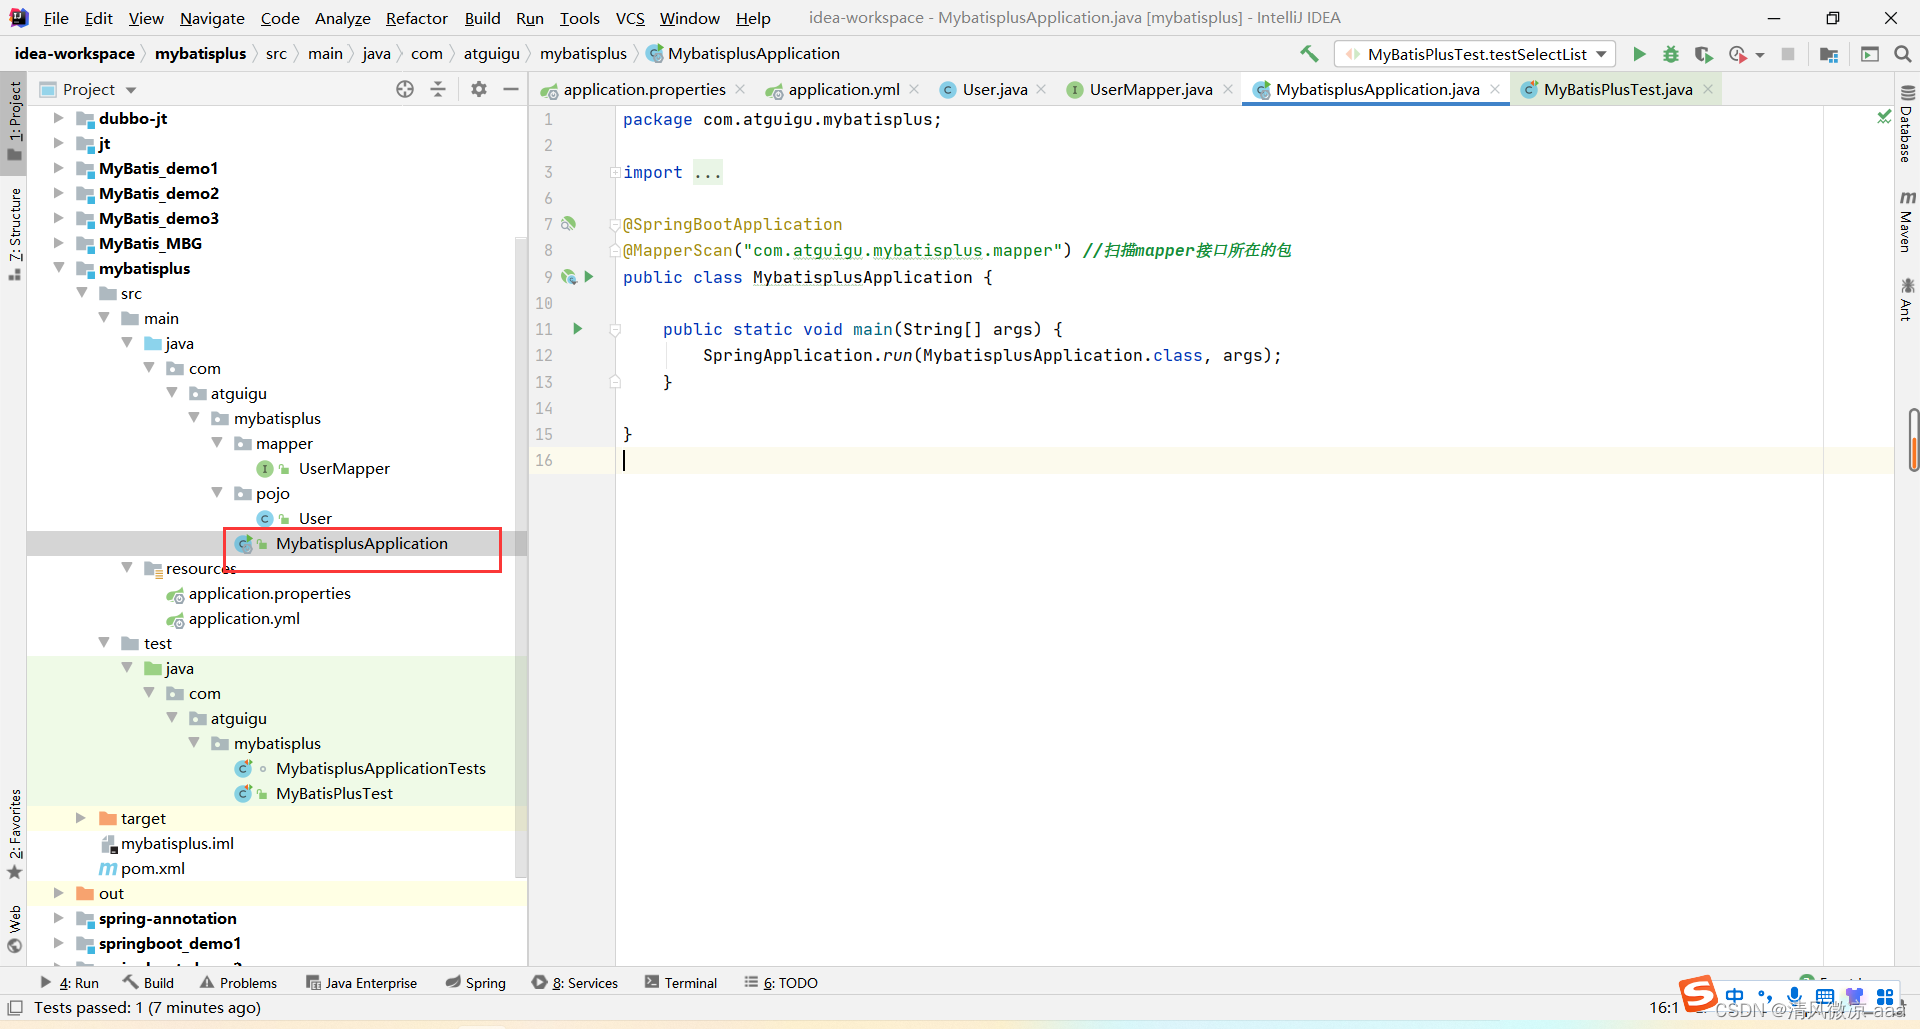
启动类:添加 @MapperScan 注解扫描 Mapper 接口。
@SpringBootApplication
@MapperScan("com.atguigu.mybatisplus.mapper")
public class MybatisplusApplication {
    public static void main(String[] args) {
        SpringApplication.run(MybatisplusApplication.class, args);
    }
}
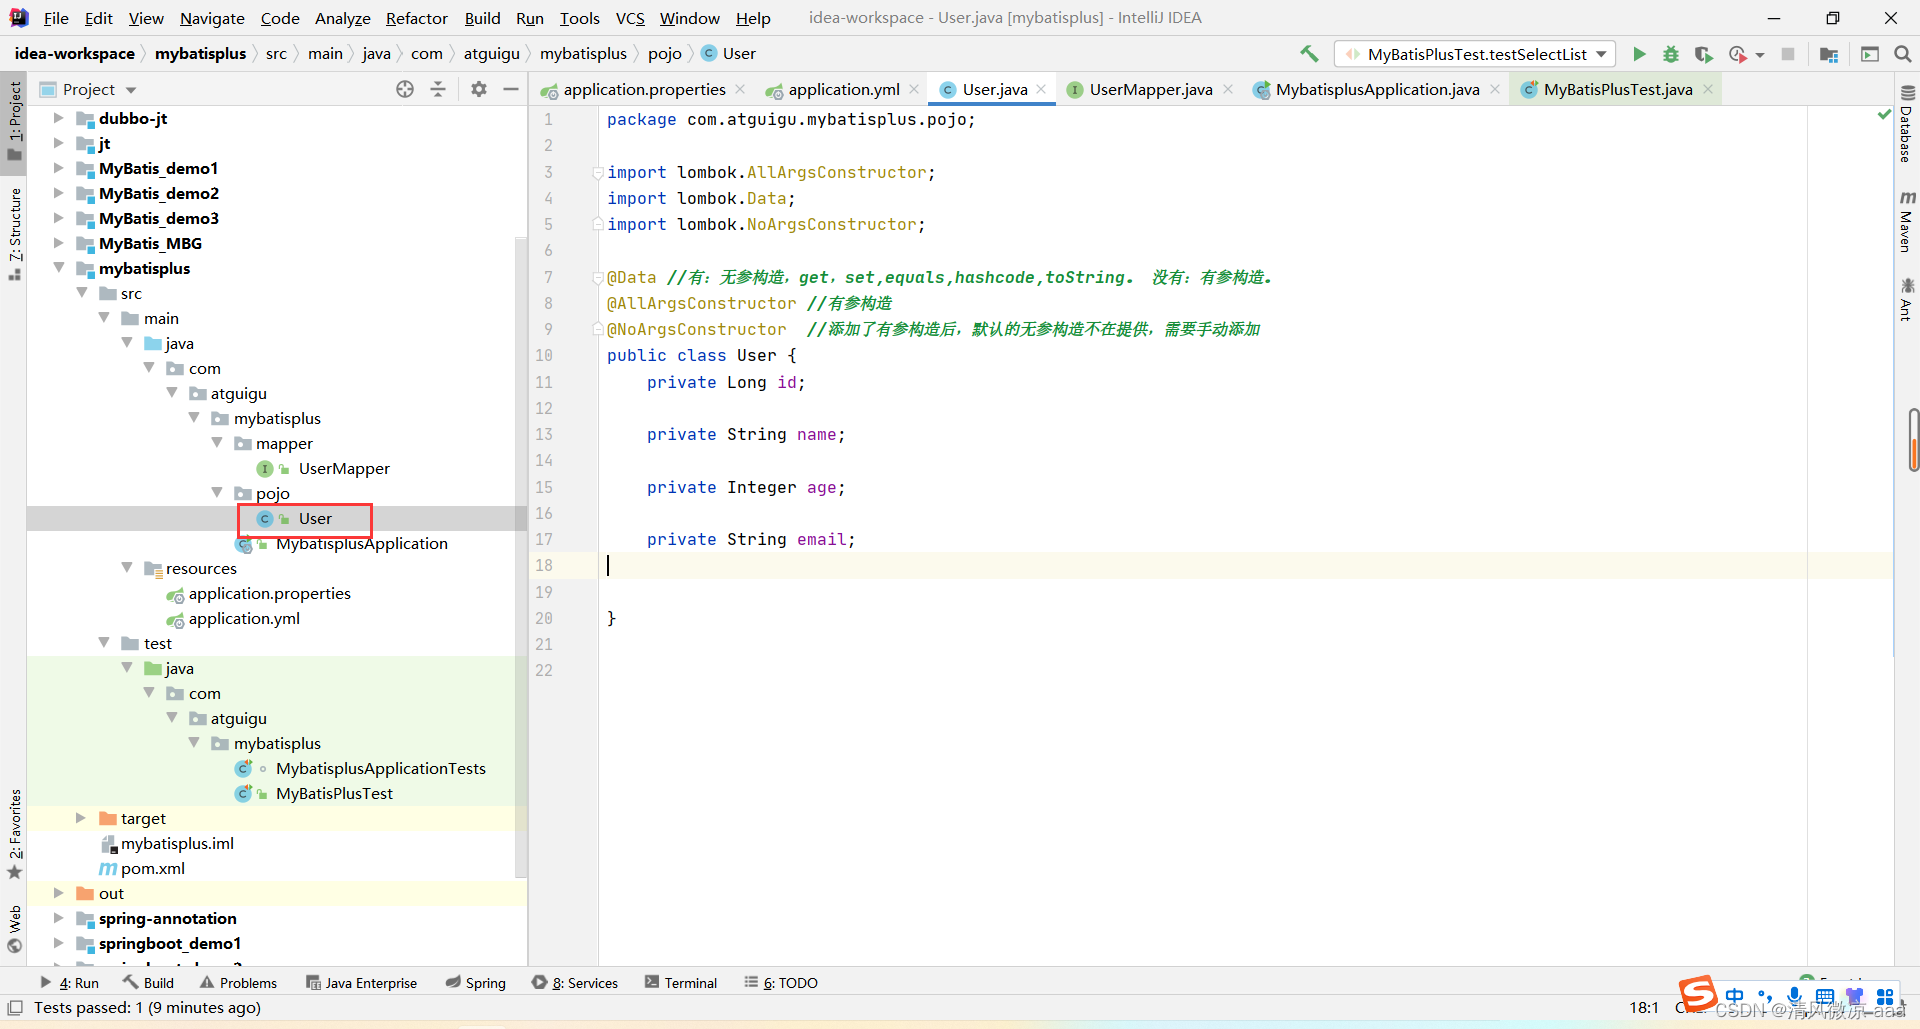
实体类:使用 Lombok 注解简化代码。
@Data
@AllArgsConstructor
@NoArgsConstructor
public class User {
    private Long id;
    private String name;
    private Integer age;
    private String email;
}
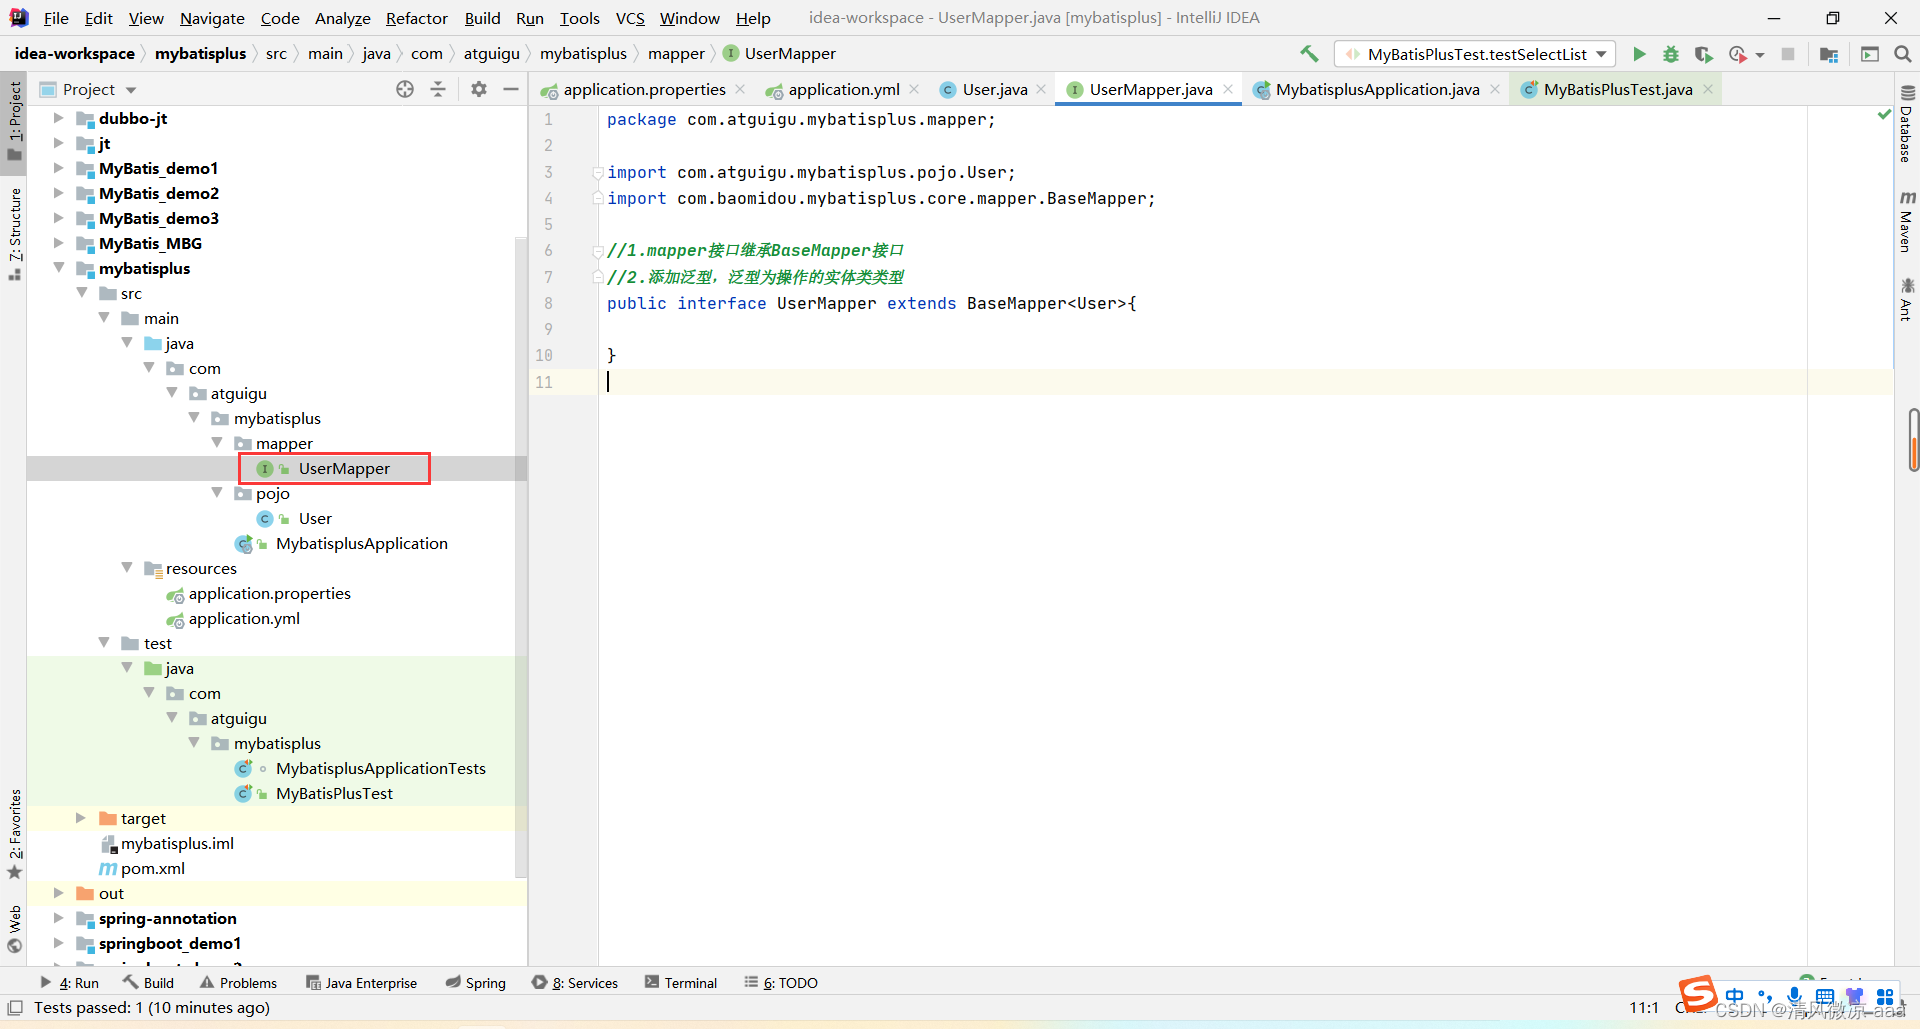
Mapper 接口:只需继承 MyBatis-Plus 提供的 BaseMapper 接口并指定泛型。
public interface UserMapper extends BaseMapper<User> {
}
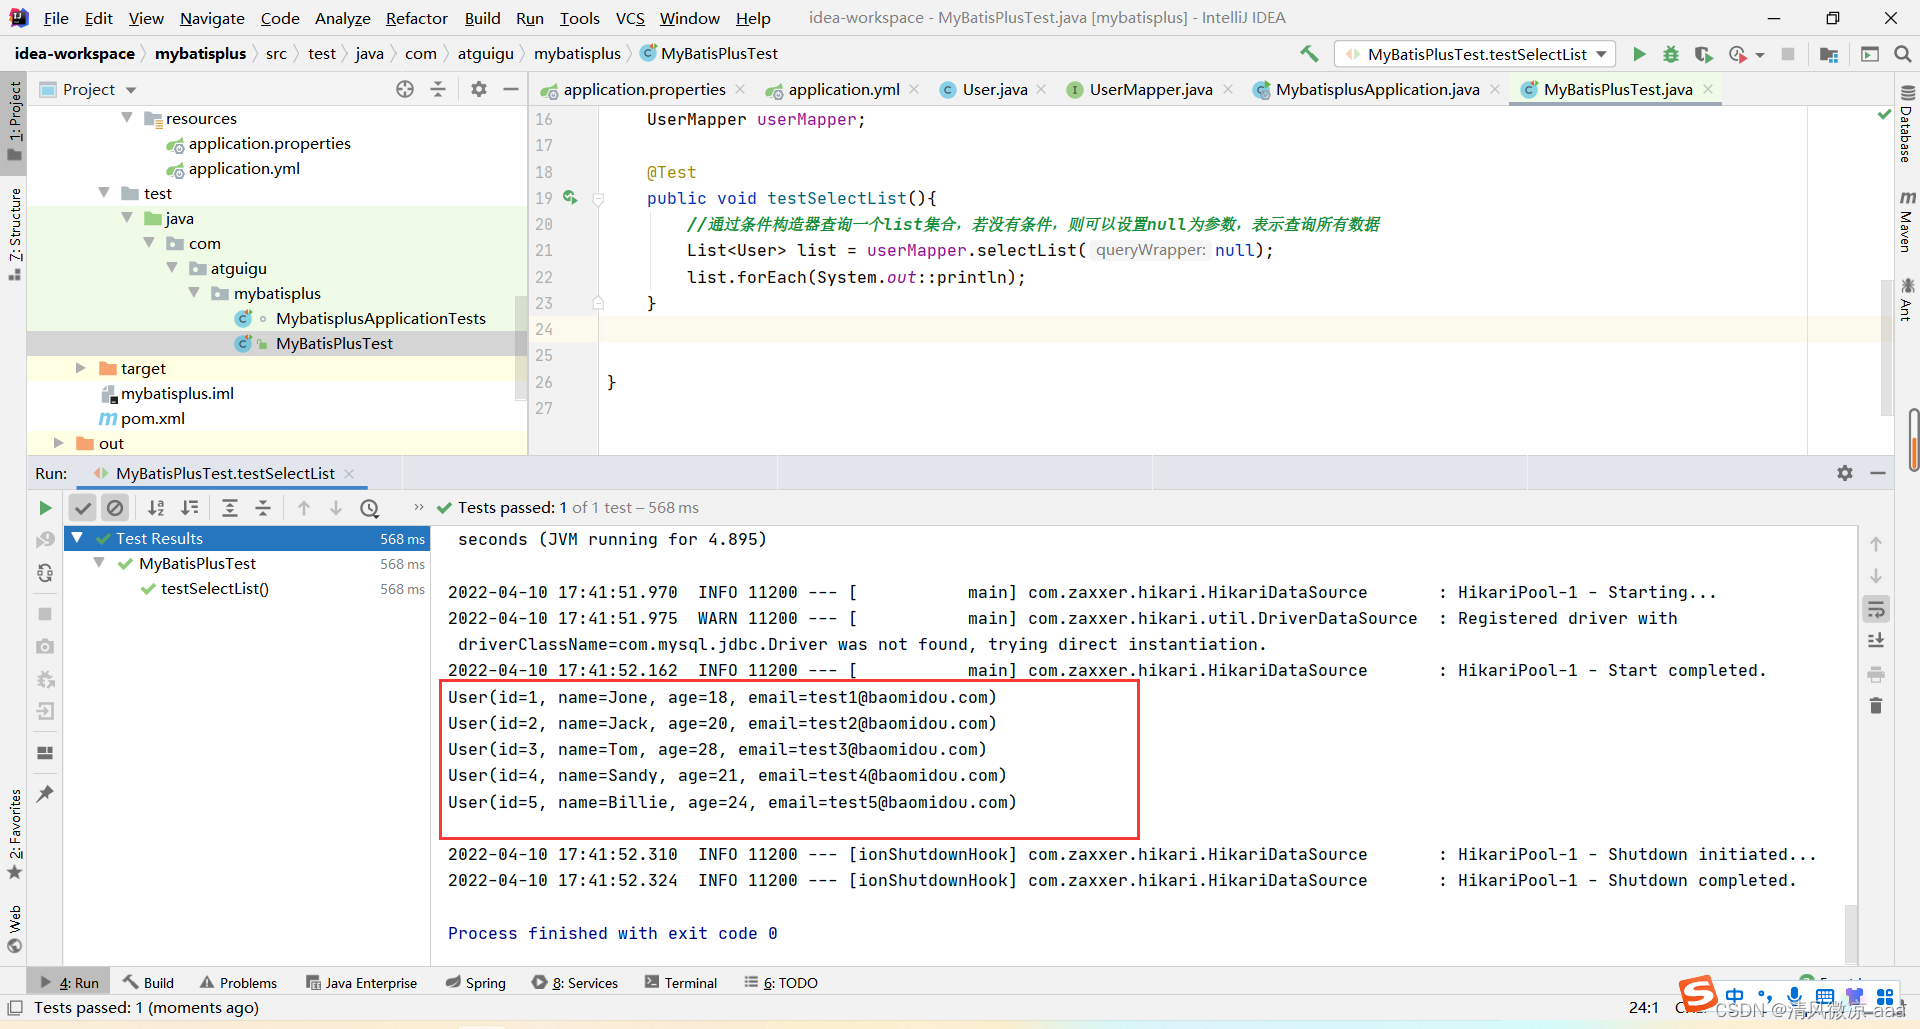
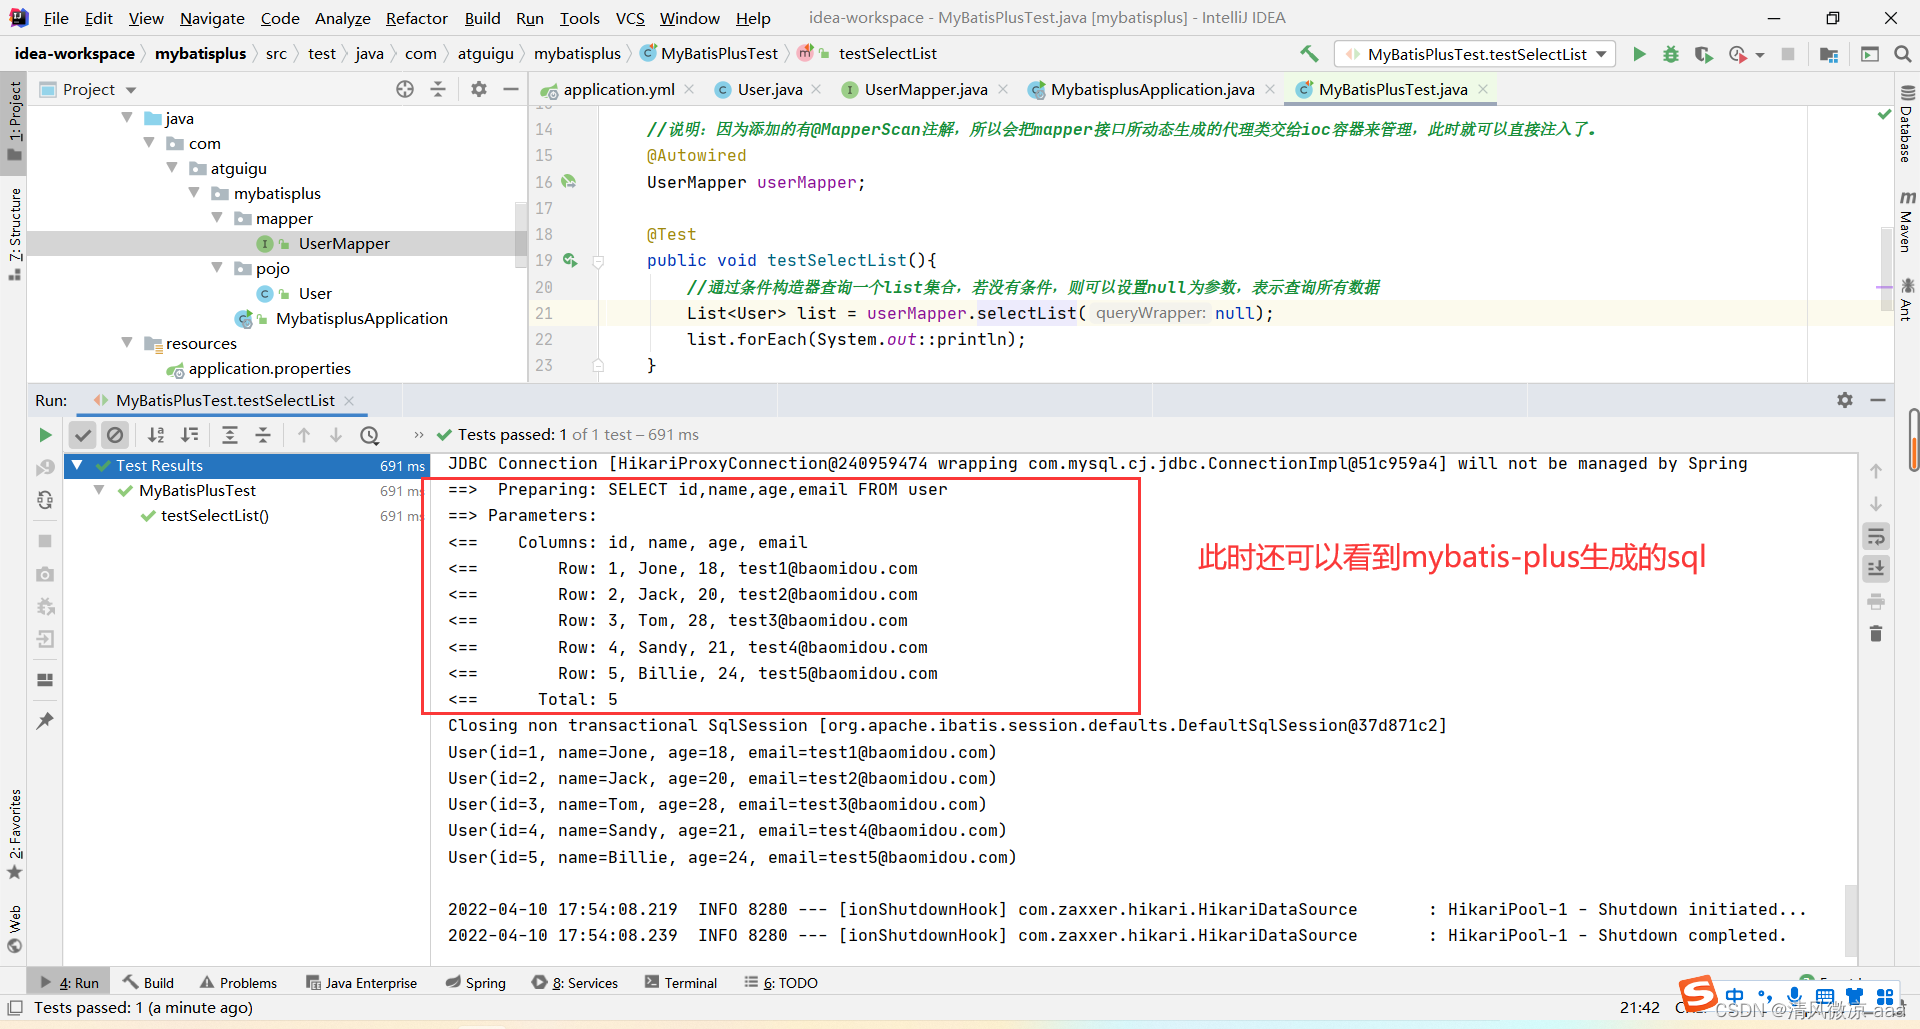
5. 测试查询与开启日志
编写测试类,查询所有用户。
@SpringBootTest
public class MyBatisPlusTest {
    @Autowired
    private UserMapper userMapper;

    @Test
    public void testSelectList(){
        List<User> list = userMapper.selectList(null); // 参数为 null 表示查询所有
        list.forEach(System.out::println);
    }
}
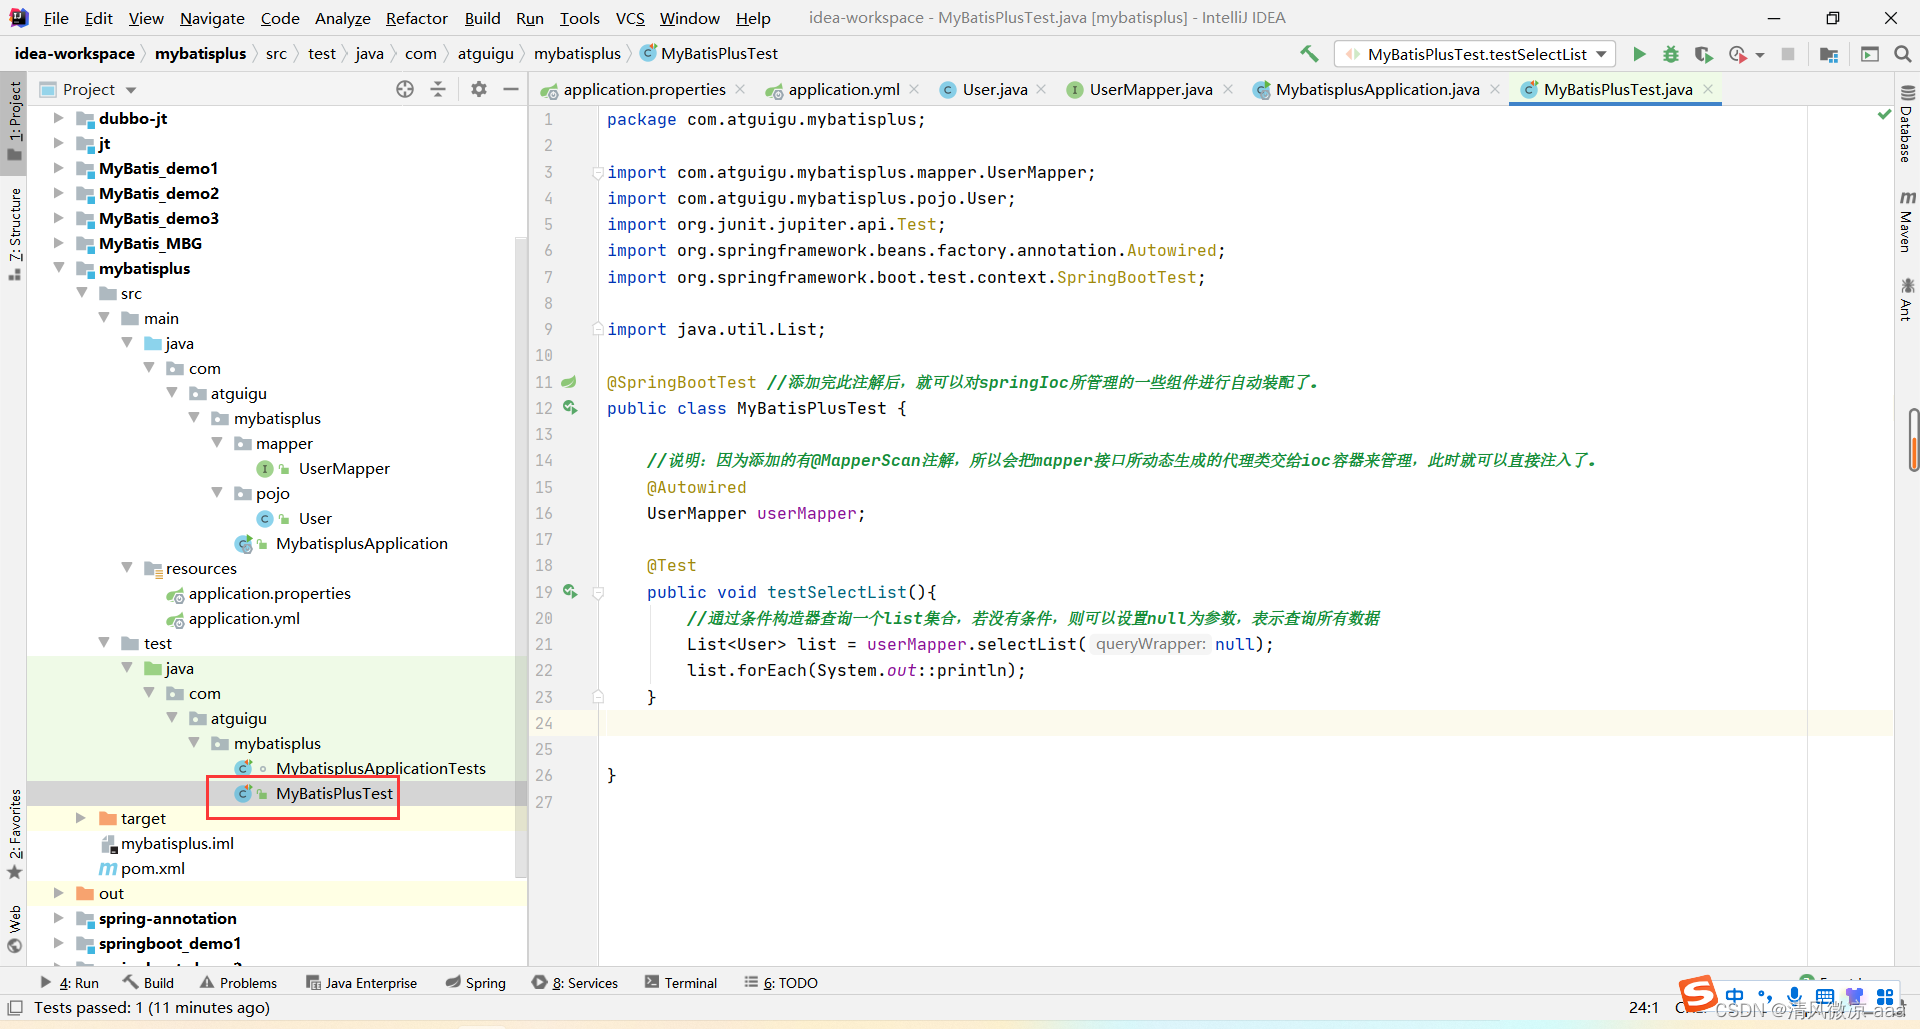
执行测试,成功输出用户列表。
开启 MyBatis 标准输出日志,方便查看执行的 SQL 语句:
mybatis-plus:
  configuration:
    log-impl: org.apache.ibatis.logging.stdout.StdOutImpl
三、核心功能详解
1. 基本 CRUD 操作
BaseMapper<T> 接口封装了丰富的单表 CRUD 方法,开箱即用。

-
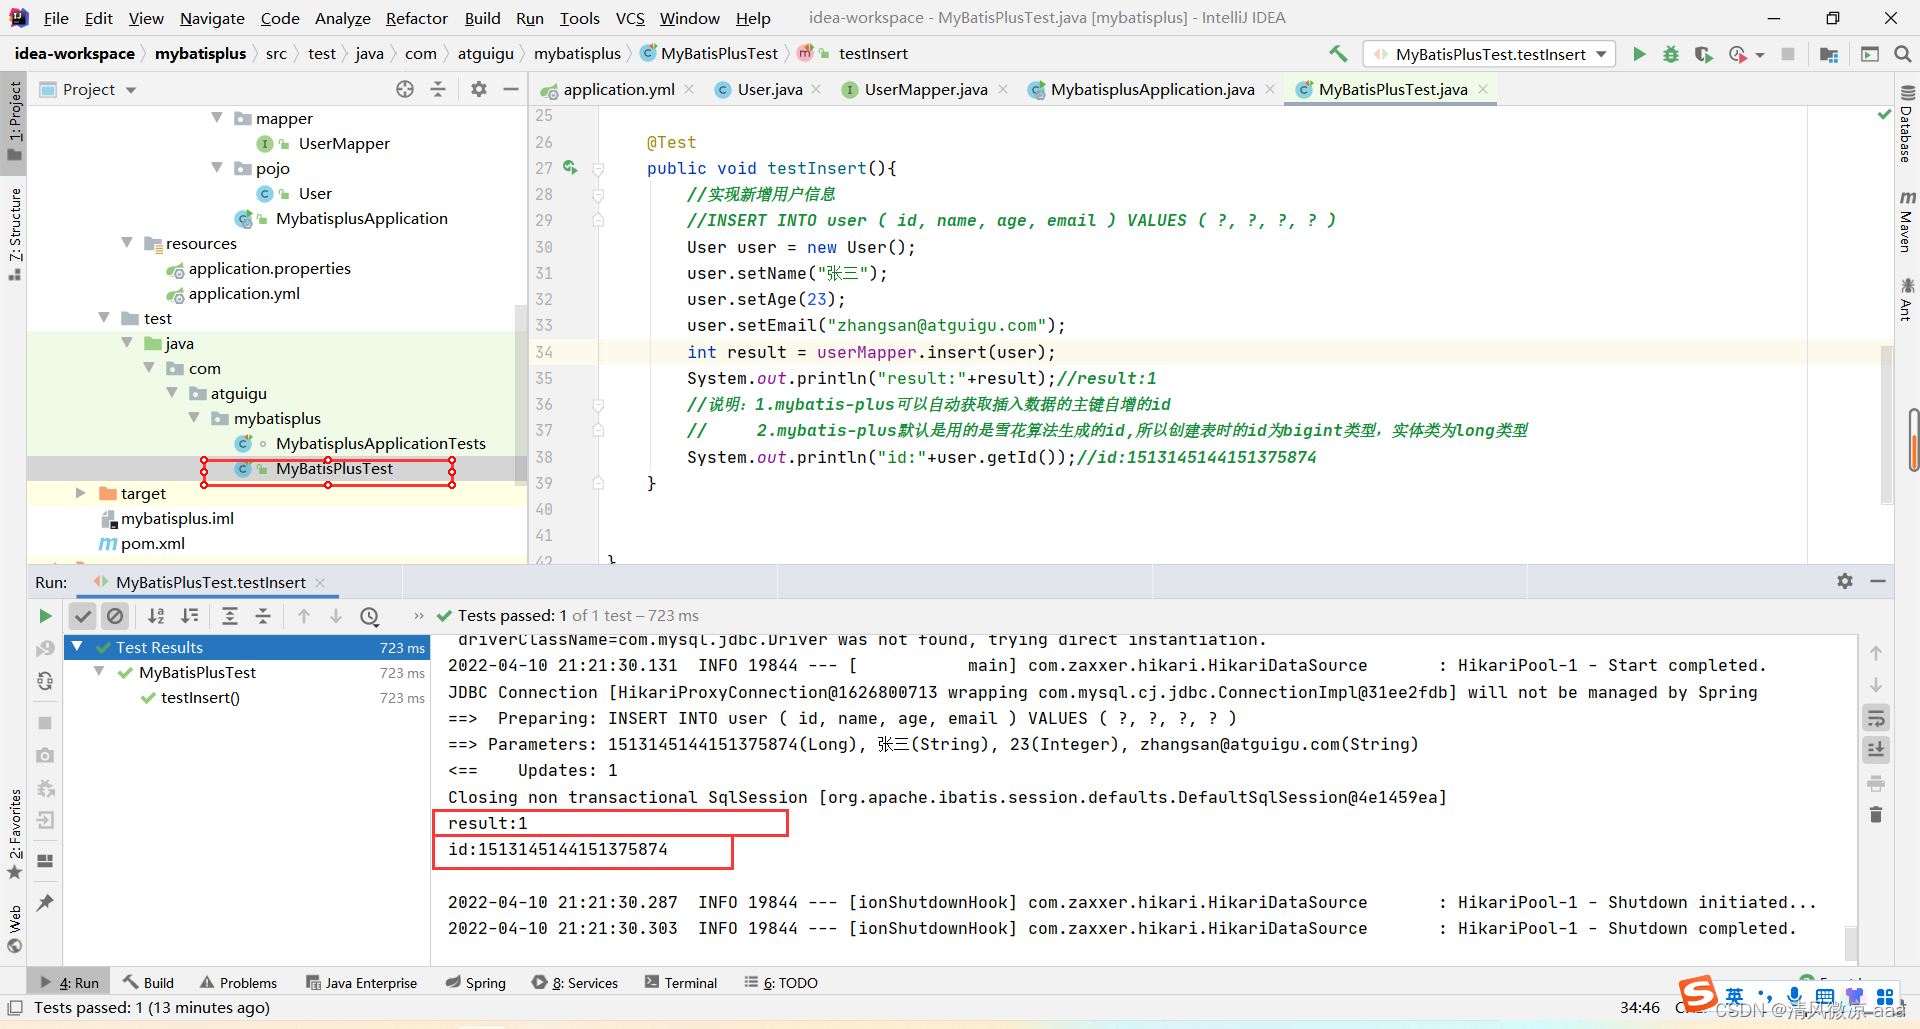
插入操作:insert(T entity)。默认使用雪花算法生成主键 ID。
@Test
public void testInsert(){
    User user = new User();
    user.setName("张三");
    user.setAge(23);
    user.setEmail("zhangsan@atguigu.com");
    int result = userMapper.insert(user);
    System.out.println("id:" + user.getId()); // 输出雪花算法生成的ID
}
-
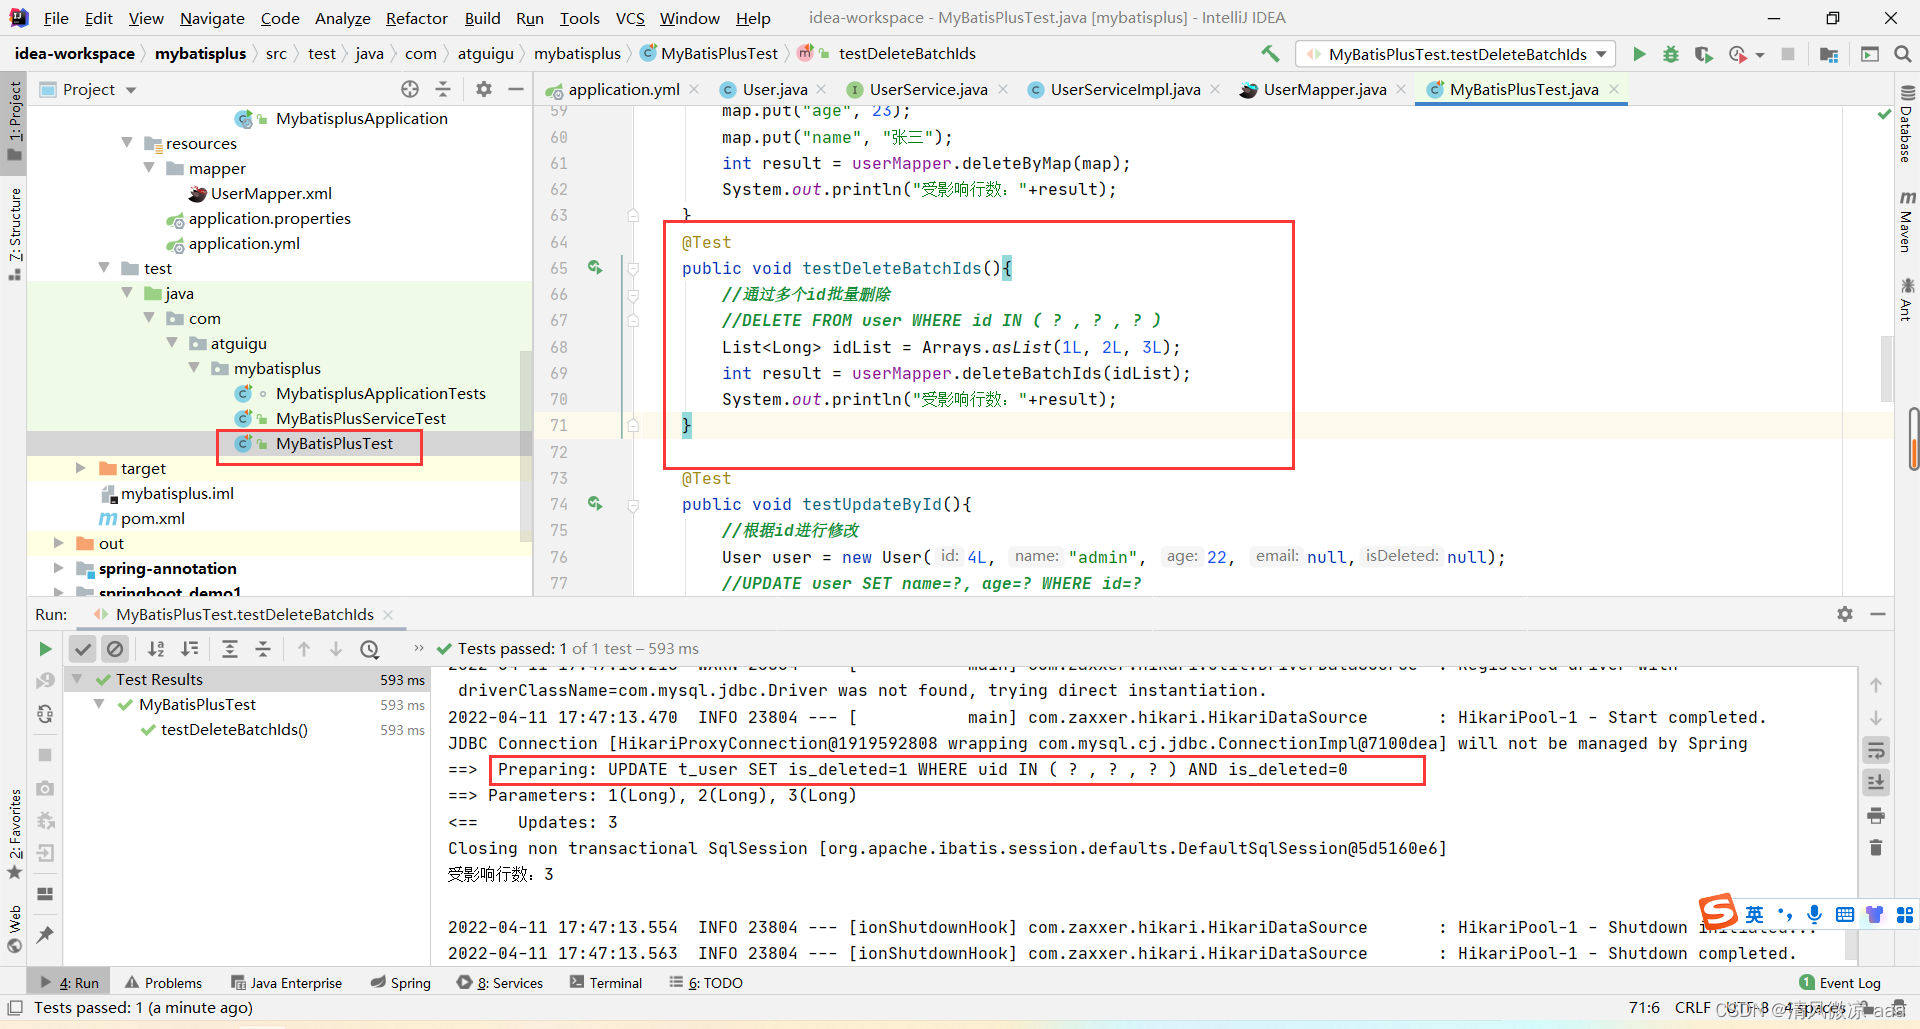
删除操作:deleteById, deleteBatchIds, deleteByMap。
// 根据ID删除
userMapper.deleteById(1L);
// 批量删除
userMapper.deleteBatchIds(Arrays.asList(1L, 2L, 3L));
// 根据 Map 条件删除
Map<String, Object> map = new HashMap<>();
map.put("age", 23);
map.put("name", "张三");
userMapper.deleteByMap(map);
-
修改操作:updateById(T entity)。
User user = new User(4L, "admin", 22, null);
userMapper.updateById(user);
-
查询操作:selectById, selectBatchIds, selectByMap, selectList 等。
User user = userMapper.selectById(4L);
List<User> users = userMapper.selectBatchIds(Arrays.asList(4L, 5L));
List<User> list = userMapper.selectList(null);
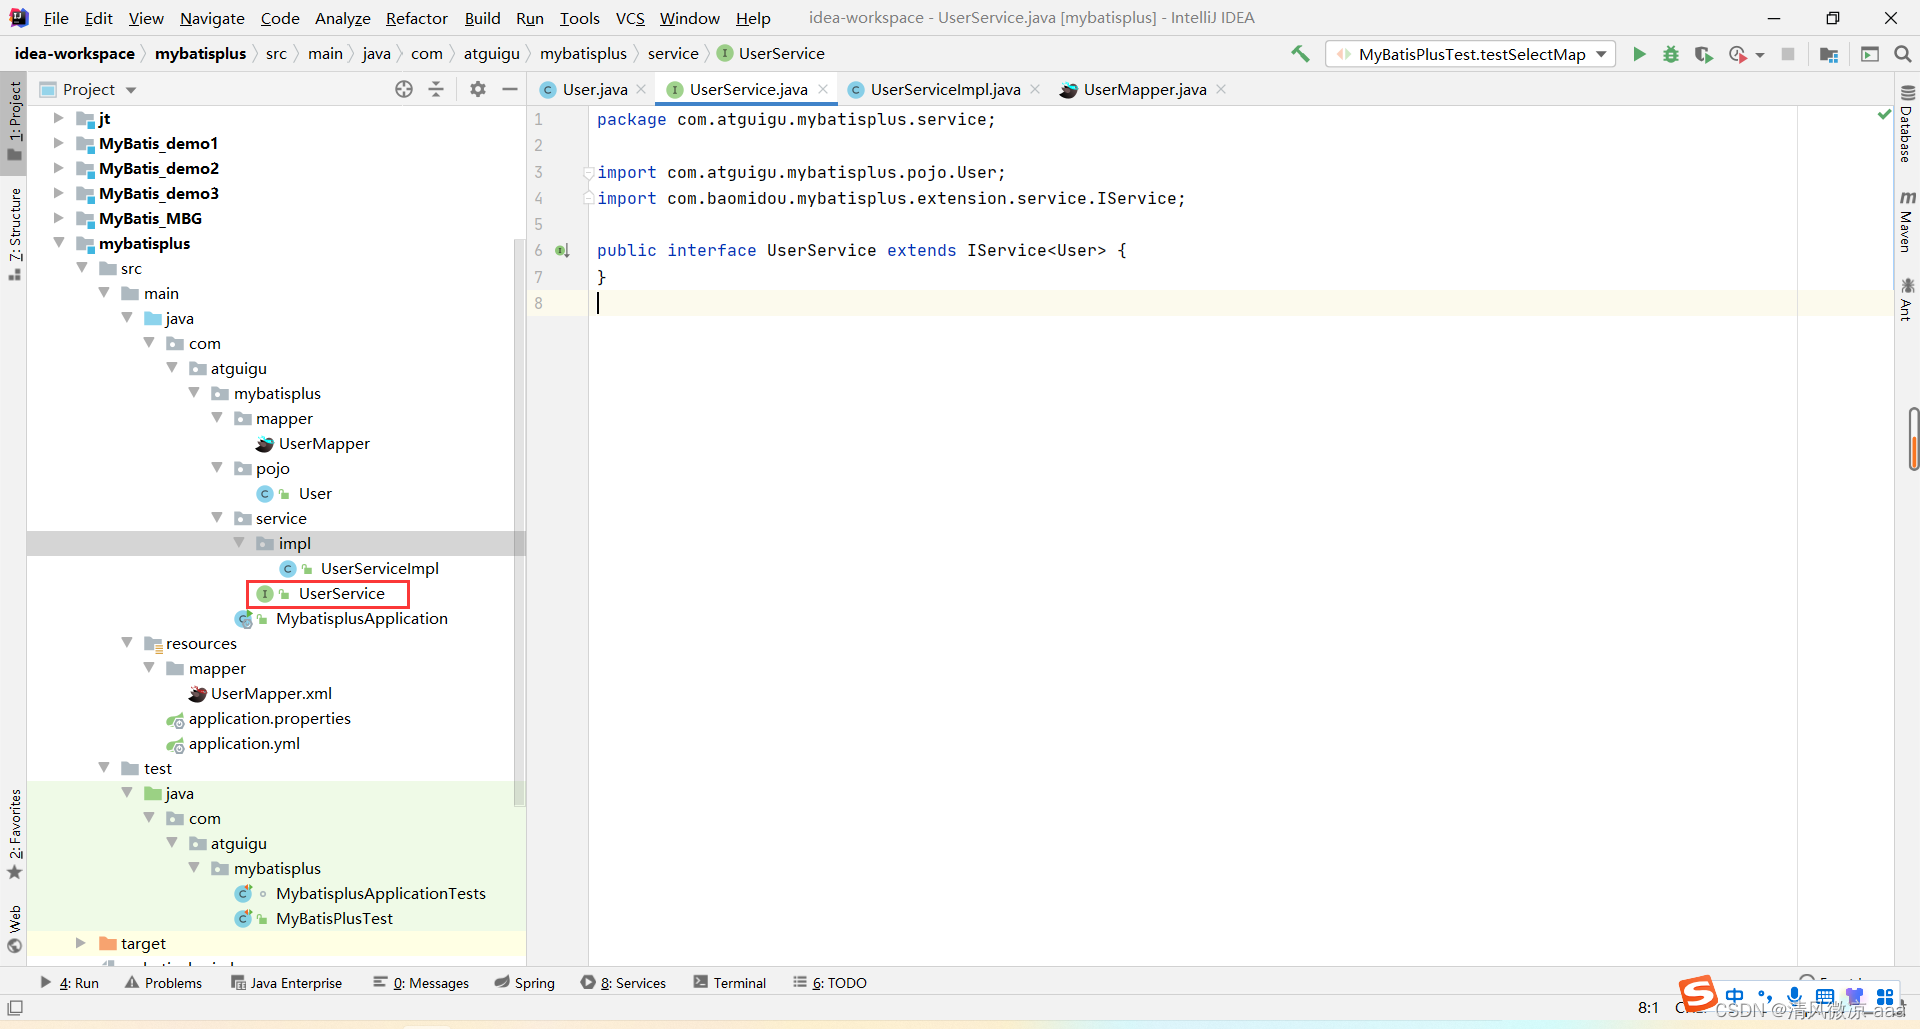
2. 通用 Service 接口
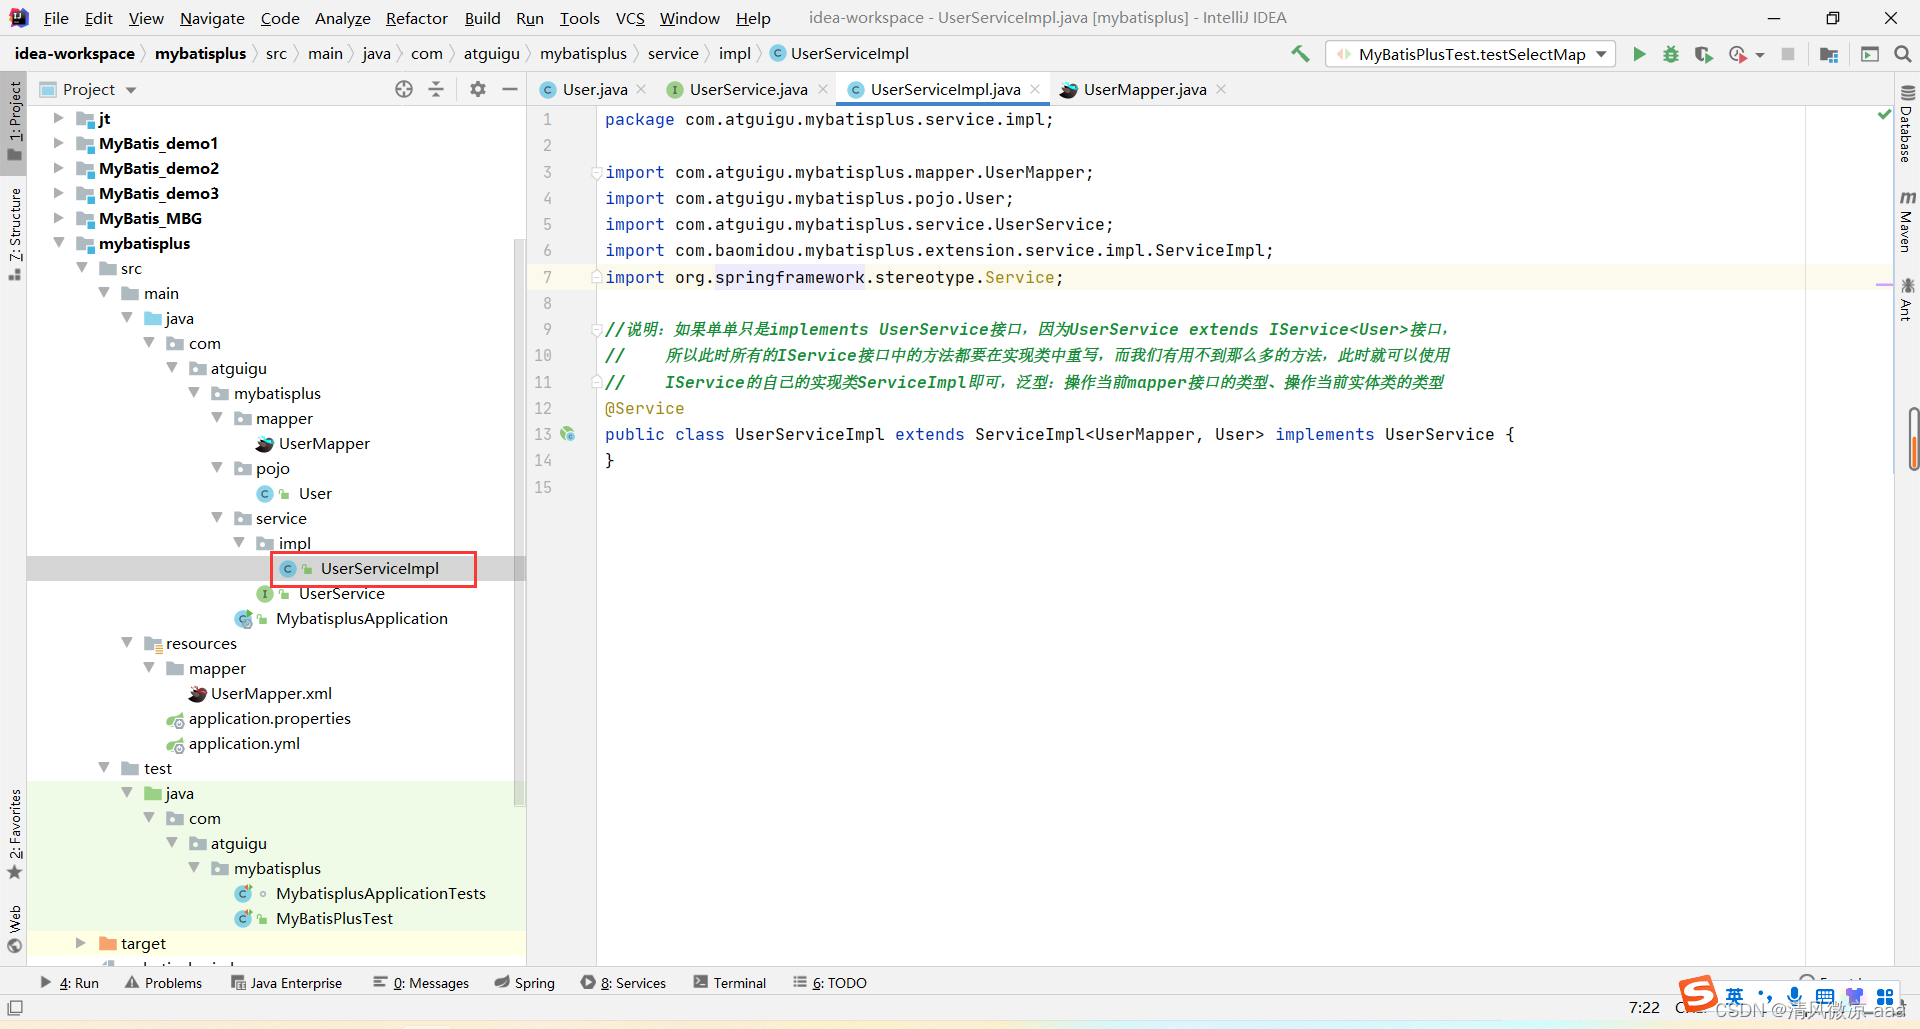
除了 Mapper,MyBatis-Plus 还提供了 IService 接口及其实现类 ServiceImpl,对业务层常用操作进行了进一步封装。
创建 Service 接口和实现类:
// UserService.java
public interface UserService extends IService<User> {
}

// UserServiceImpl.java
@Service
public class UserServiceImpl extends ServiceImpl<UserMapper, User> implements UserService {
}
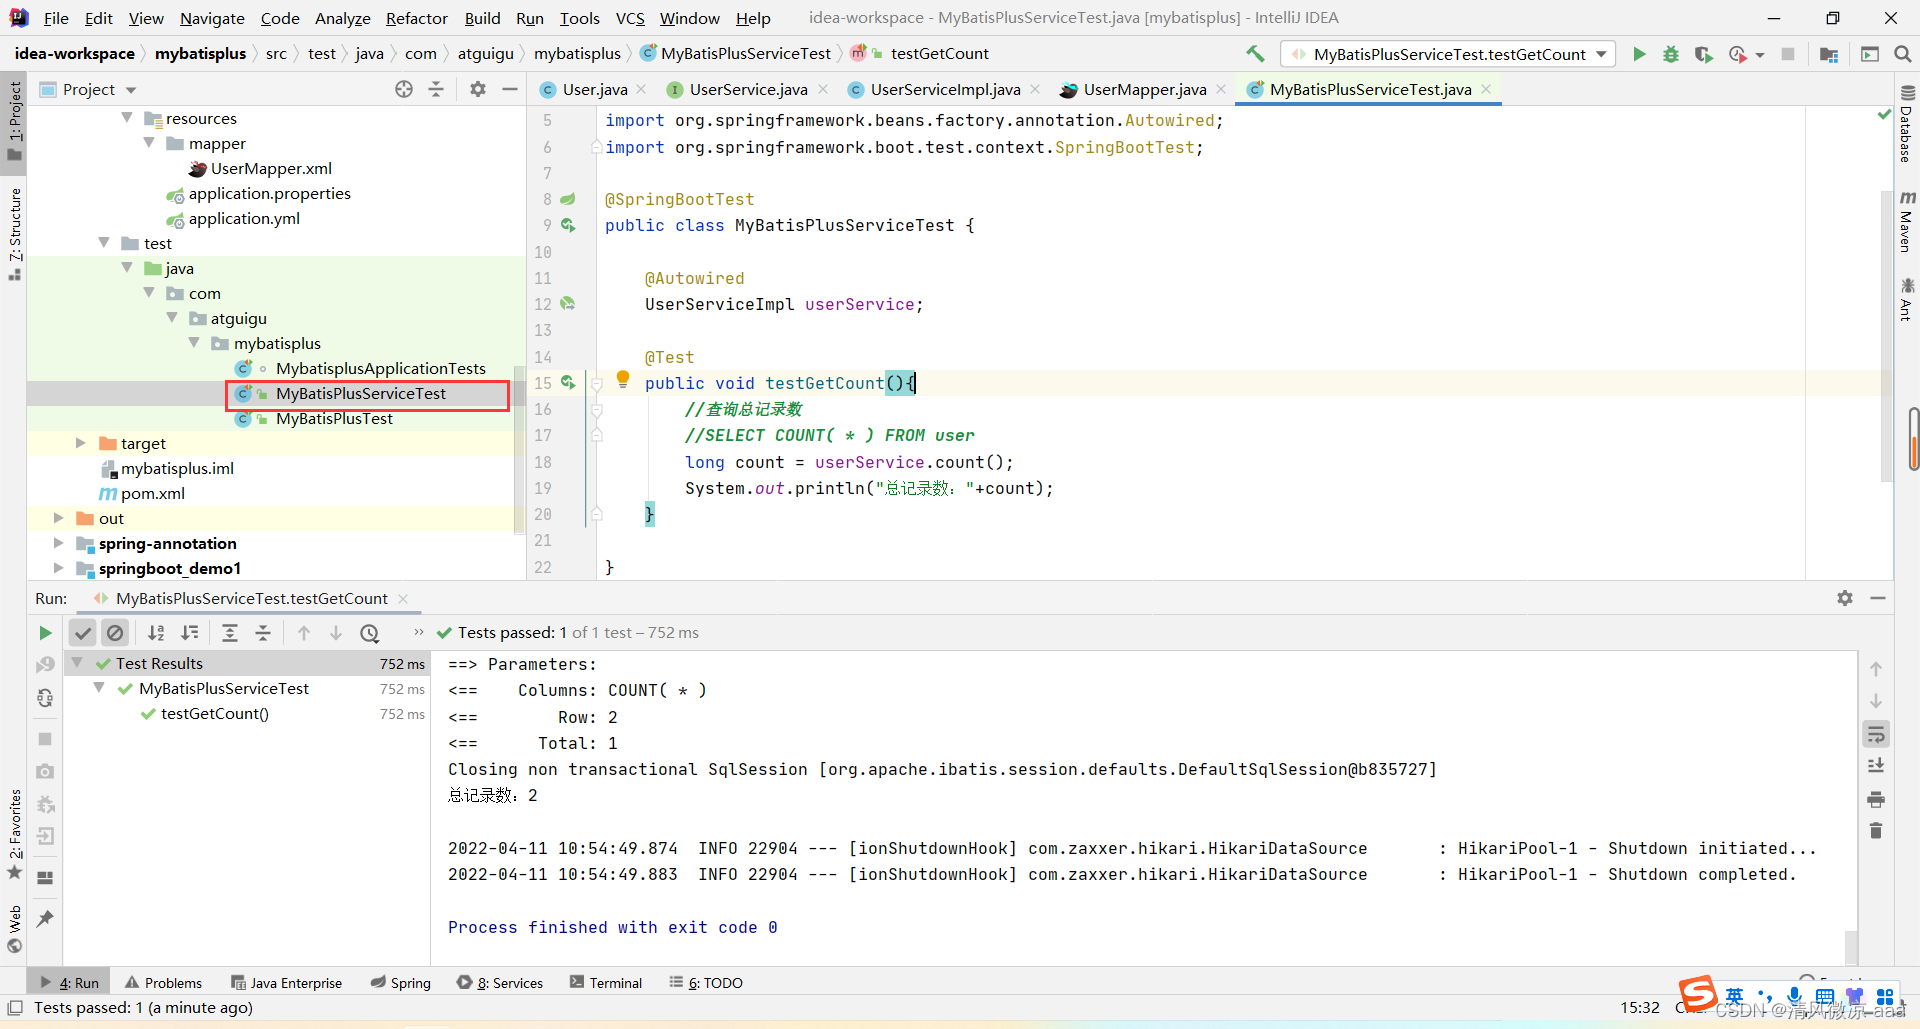
使用 Service 进行批量操作:
@SpringBootTest
public class MyBatisPlusServiceTest {
@Autowired
UserService userService;
@Test
public void testGetCount(){
long count = userService.count(); // 查询总记录数
System.out.println("总记录数:" + count);
}
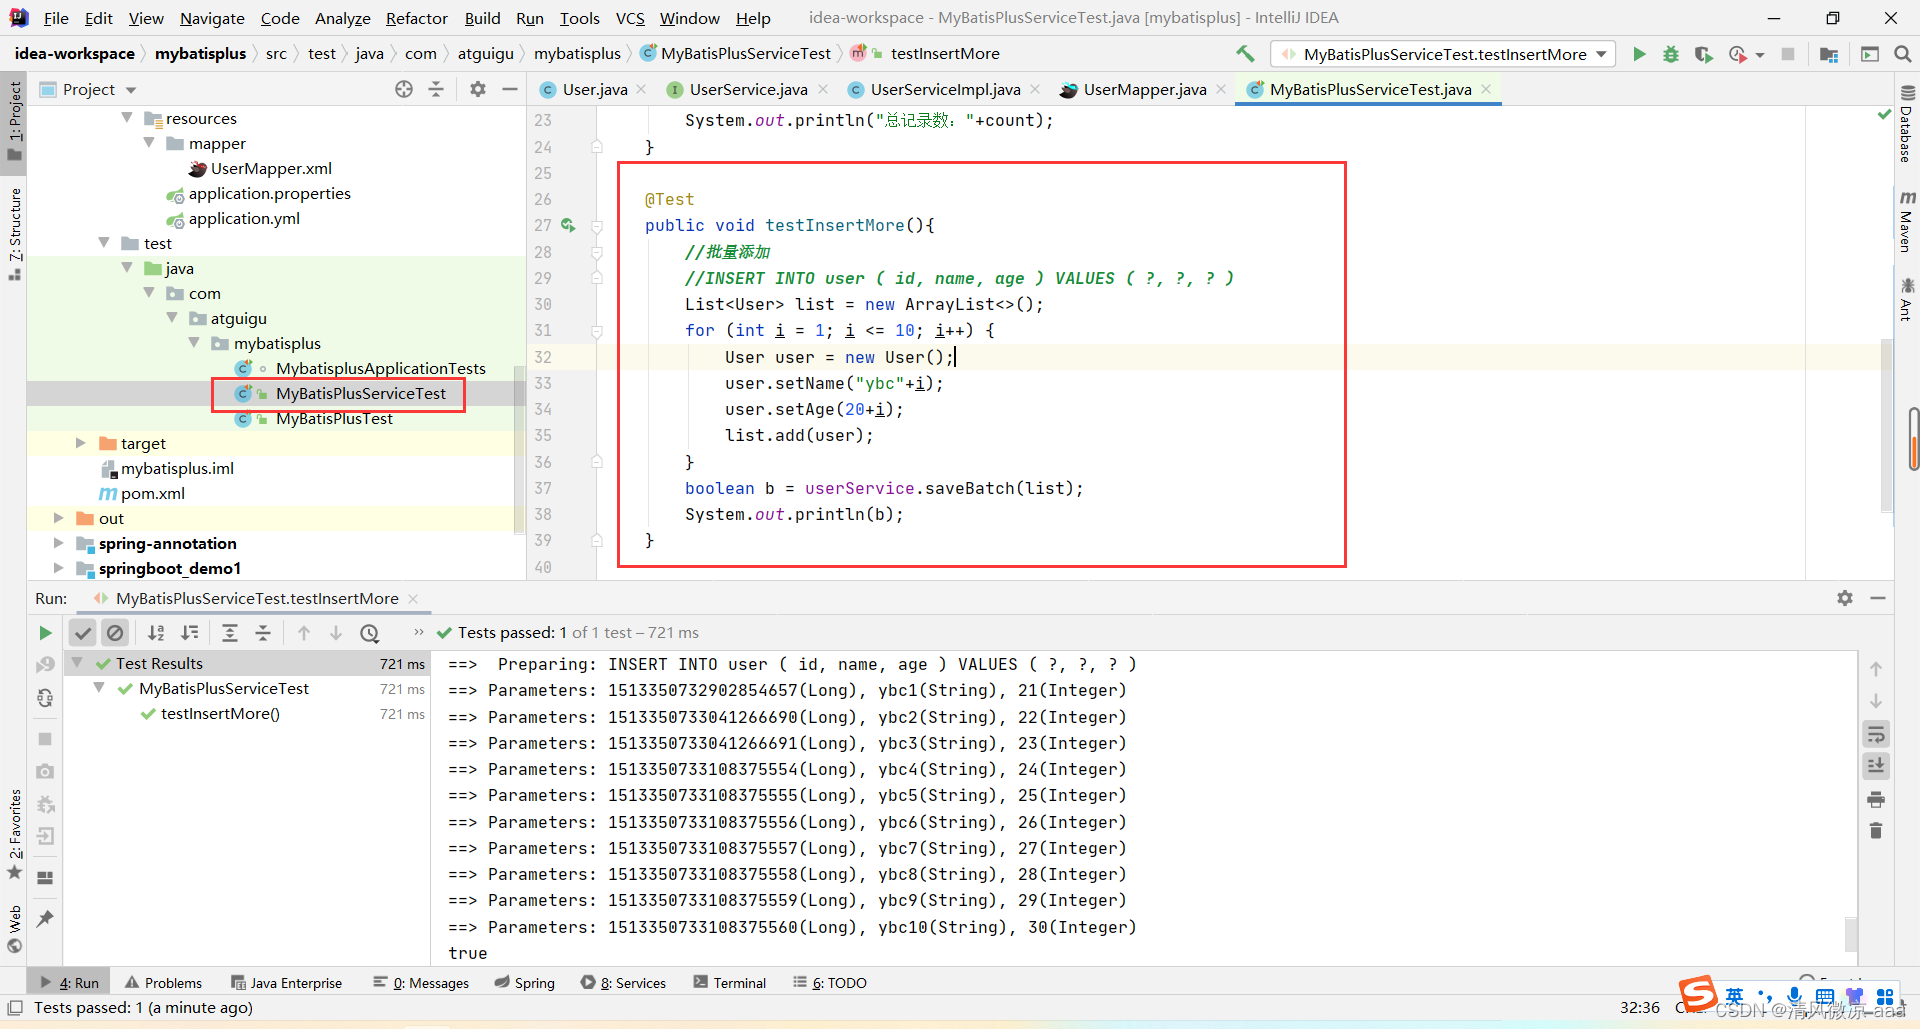
@Test
public void testInsertMore(){
List<User> list = new ArrayList<>();
for (int i = 1; i <= 10; i++) {
User user = new User();
user.setName("ybc" + i);
user.setAge(20 + i);
list.add(user);
}
boolean b = userService.saveBatch(list); // 批量插入
System.out.println(b);
}
}
四、常用注解与字段映射
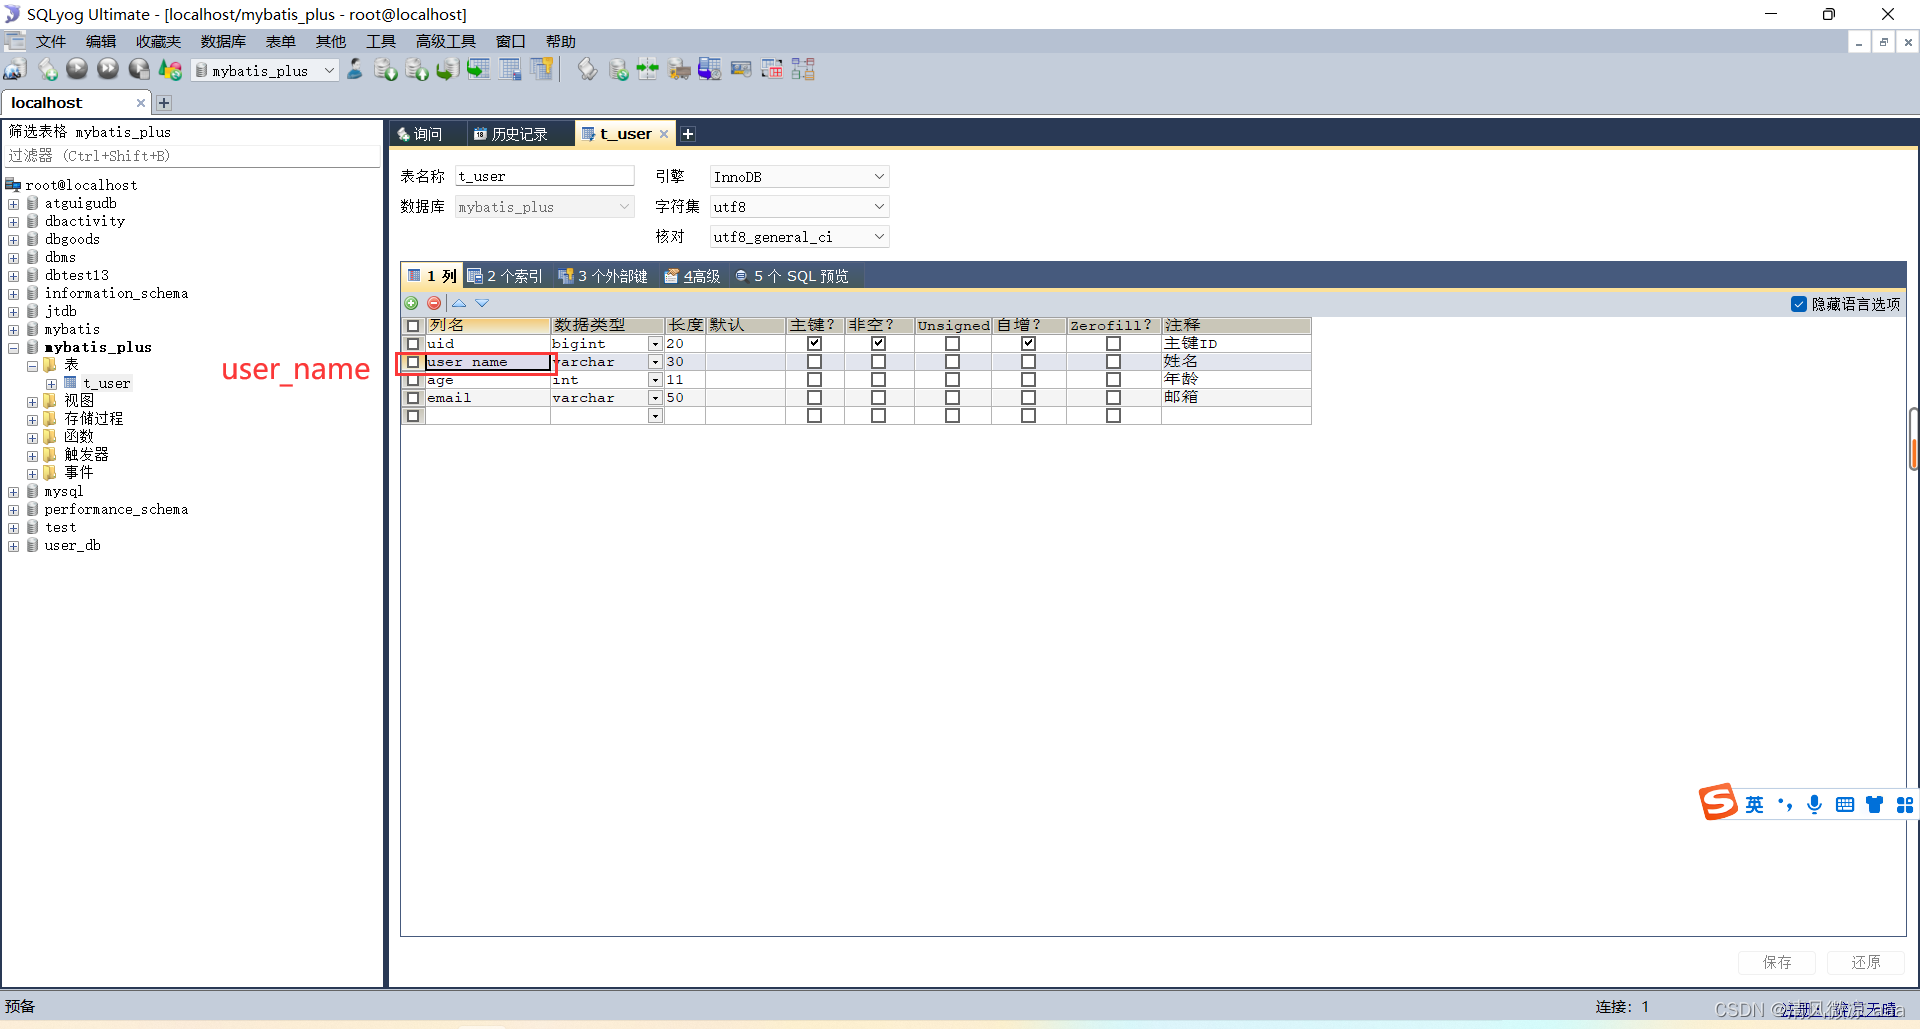
1. @TableName - 表名映射
当实体类名与数据库表名不一致时(如 User 对应 t_user),可使用此注解。
@TableName("t_user")
public class User { ... }
也可以通过全局配置为所有实体类对应的表添加统一前缀:
mybatis-plus:
  global-config:
    db-config:
      table-prefix: t_
2. @TableId - 主键映射
用于标识主键字段,并可指定主键生成策略 (type)。
IdType.ASSIGN_ID:默认,雪花算法。IdType.AUTO:数据库自增(需确保数据库字段设置为自增)。
public class User {
    @TableId(value = "uid", type = IdType.AUTO)
    private Long id;
    // ...
}
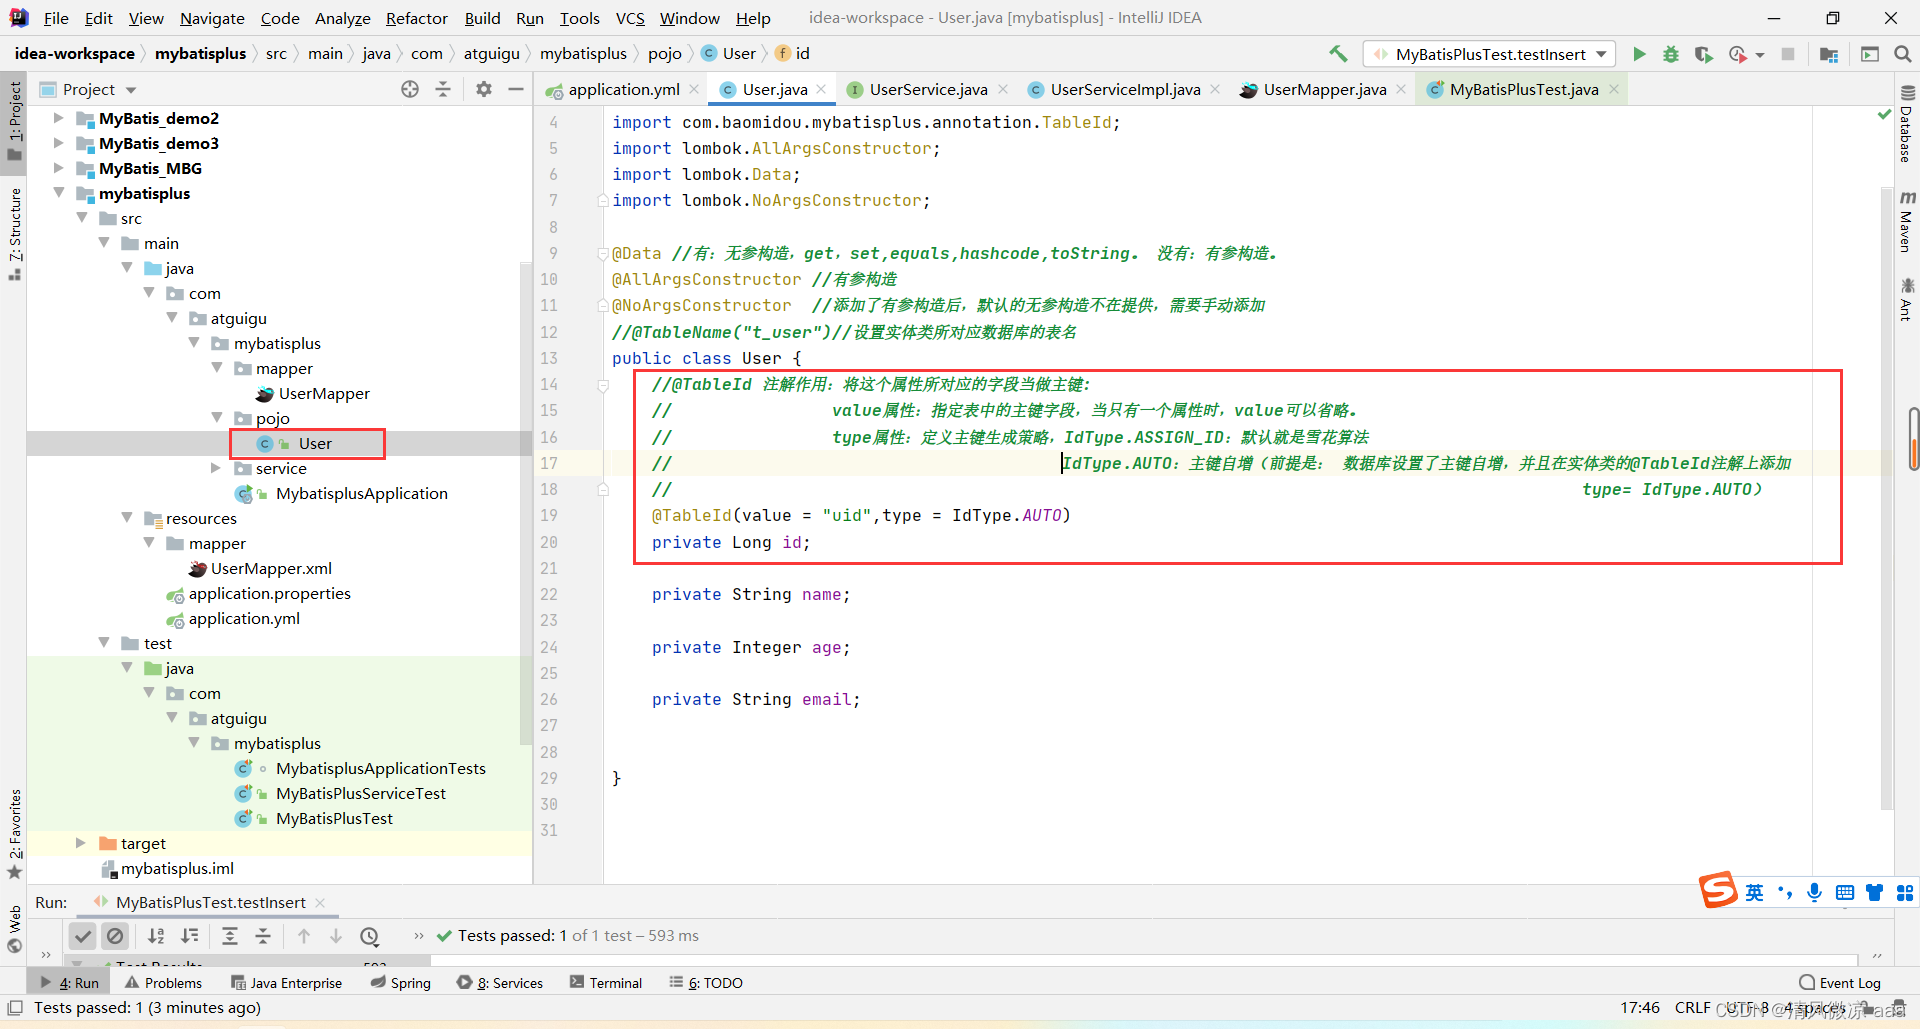
也可以在全局配置中统一设置主键策略:
mybatis-plus:
  global-config:
    db-config:
      id-type: auto
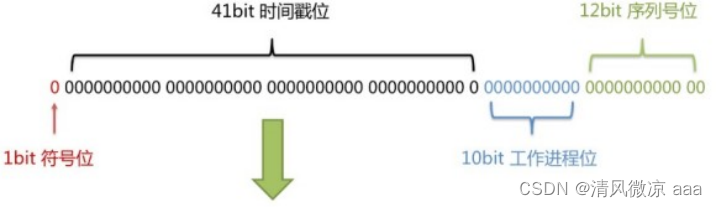
关于雪花算法:它是分布式系统生成唯一ID的经典方案,由时间戳、工作机器ID和序列号组成,保证了全局ID的有序性和唯一性,非常适合在分库分表场景下使用。
3. @TableField - 普通字段映射
用于处理字段名与属性名不一致的情况。
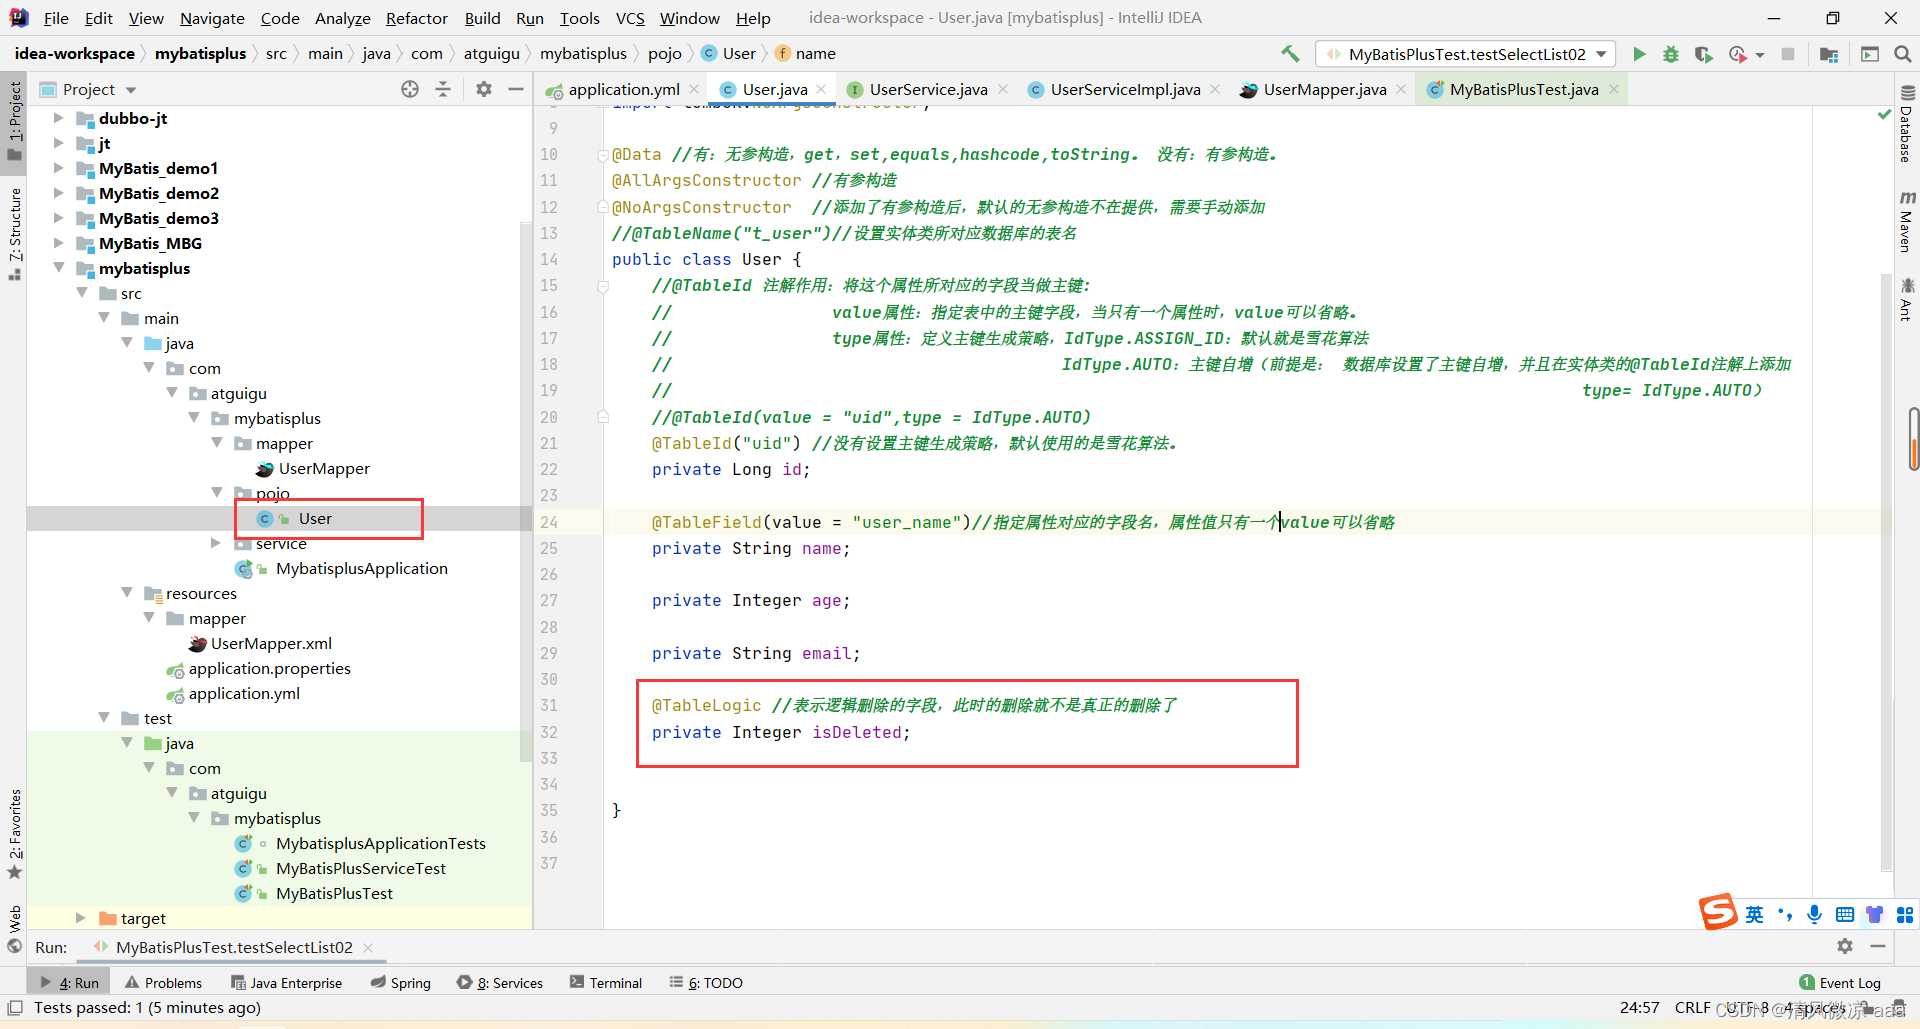
4. @TableLogic - 逻辑删除
实现逻辑删除(假删除),通过一个字段状态标记数据是否被删除。
- 数据库表添加
is_deleted 字段,默认值为 0。
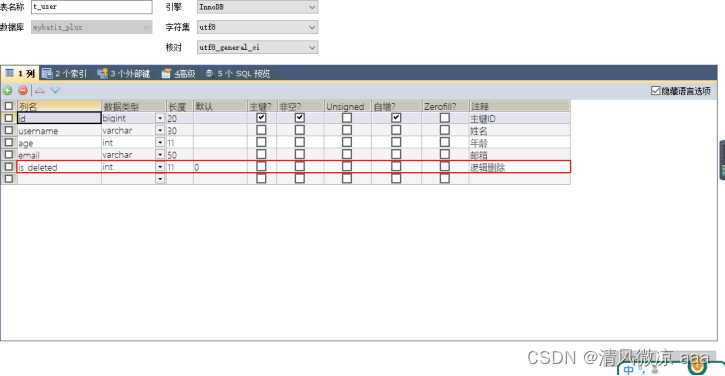
- 实体类添加逻辑删除属性并标记
@TableLogic。
@TableLogic
private Integer isDeleted;
- 效果:
- 执行
delete 操作时,实际执行的是 UPDATE ... SET is_deleted=1。
- 执行
select 操作时,自动附加条件 WHERE is_deleted=0。
五、条件构造器与复杂查询
MyBatis-Plus 提供了强大的条件构造器 Wrapper,用于动态构建 SQL 的 WHERE 条件。
1. QueryWrapper 示例
@SpringBootTest
public class MyBatisPlusWrapperTest {
    @Autowired
    private UserMapper userMapper;

    @Test
    public void test01(){
        // 查询:用户名包含a,年龄20-30之间,邮箱不为null
        QueryWrapper<User> queryWrapper = new QueryWrapper<>();
        queryWrapper.like("user_name", "a")
                   .between("age", 20, 30)
                   .isNotNull("email");
        List<User> list = userMapper.selectList(queryWrapper);
    }

    @Test
    public void test02(){
        // 排序:年龄降序,ID升序
        QueryWrapper<User> queryWrapper = new QueryWrapper<>();
        queryWrapper.orderByDesc("age")
                   .orderByAsc("uid");
        List<User> list = userMapper.selectList(queryWrapper);
    }

    @Test
    public void test04(){
        // 修改:(年龄>20且用户名含a) 或 邮箱为null 的用户
        QueryWrapper<User> queryWrapper = new QueryWrapper<>();
        queryWrapper.gt("age", 20)
                   .like("user_name", "a")
                   .or()
                   .isNull("email");
        User user = new User();
        user.setName("小明");
        int result = userMapper.update(user, queryWrapper);
    }
}
2. LambdaQueryWrapper (推荐)
使用 Lambda 表达式,避免字段名硬编码,更安全、优雅。
LambdaQueryWrapper<User> lambdaQueryWrapper = new LambdaQueryWrapper<>();
lambdaQueryWrapper.like(User::getName, "a")
                  .between(User::getAge, 20, 30)
                  .isNotNull(User::getEmail);
List<User> users = userMapper.selectList(lambdaQueryWrapper);
六、插件功能
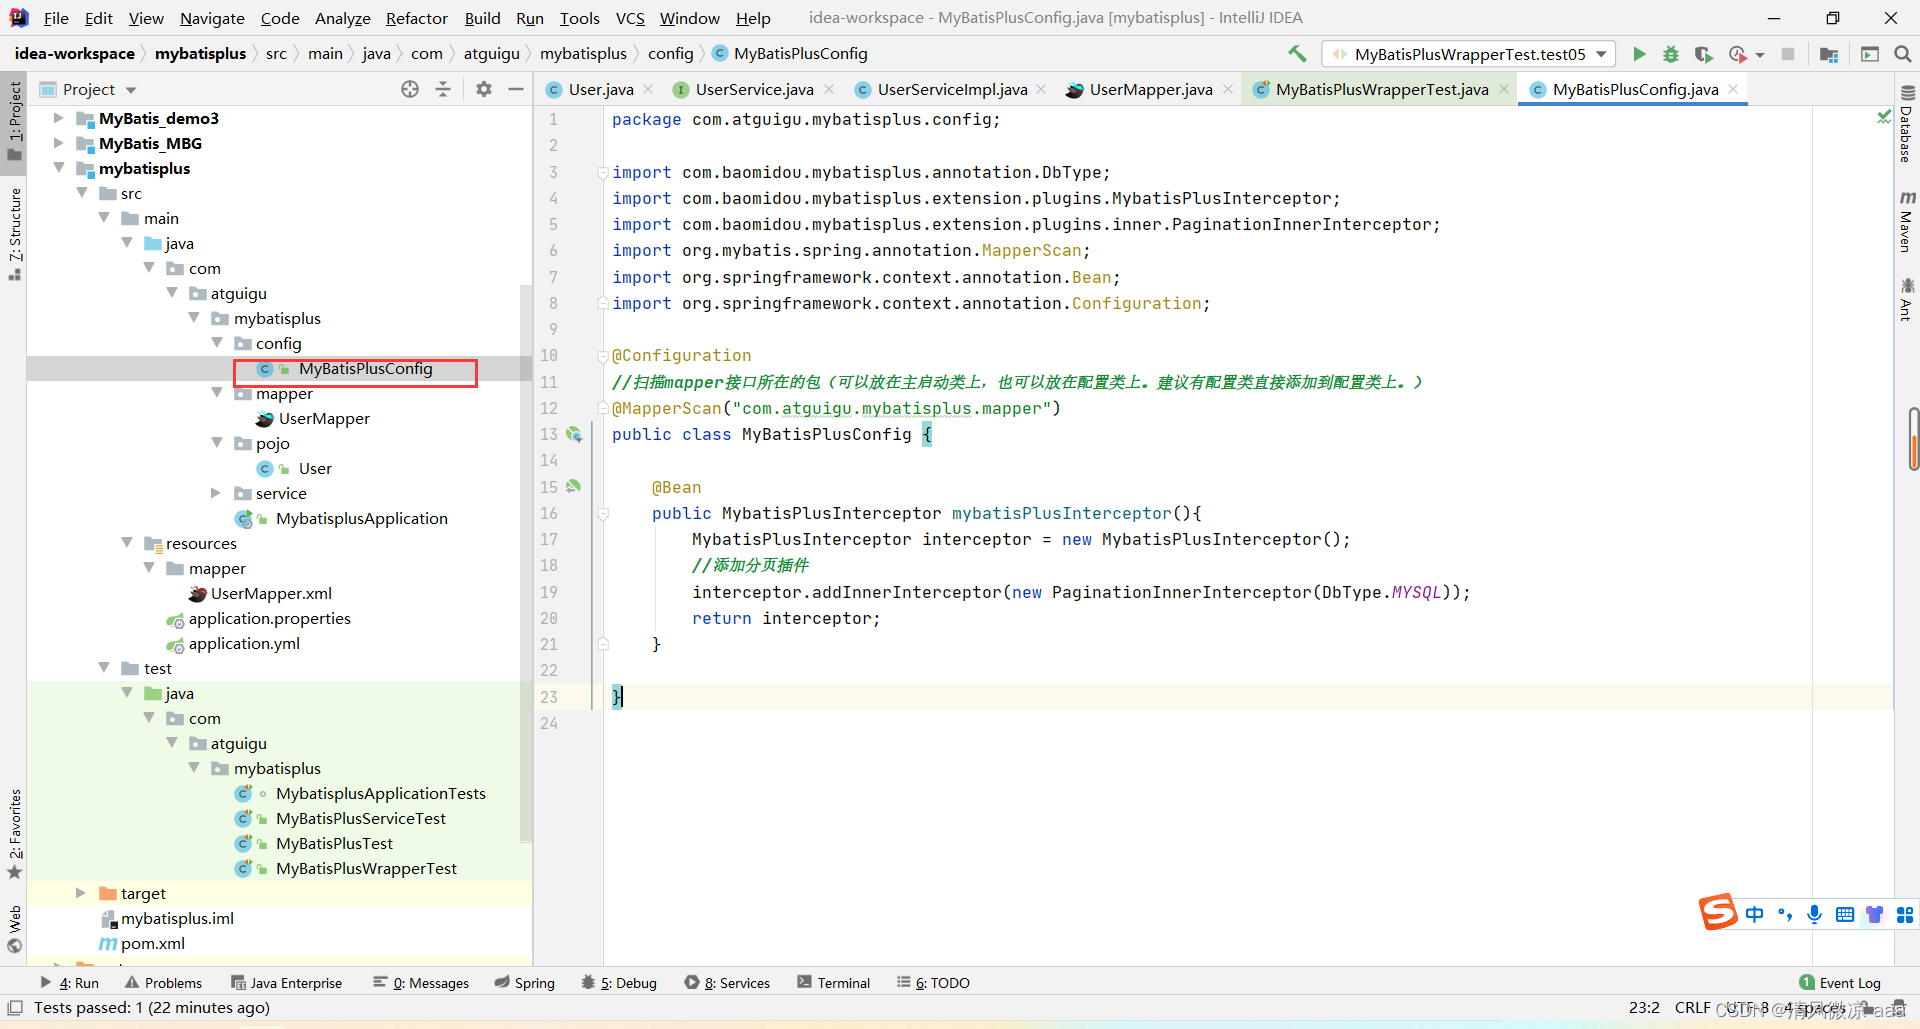
1. 分页插件
MyBatis-Plus 的分页是物理分页,需要先配置插件。
添加配置类:
@Configuration
@MapperScan("com.atguigu.mybatisplus.mapper")
public class MyBatisPlusConfig {
    @Bean
    public MybatisPlusInterceptor mybatisPlusInterceptor(){
        MybatisPlusInterceptor interceptor = new MybatisPlusInterceptor();
        // 添加分页插件
        interceptor.addInnerInterceptor(new PaginationInnerInterceptor(DbType.MYSQL));
        return interceptor;
    }
}
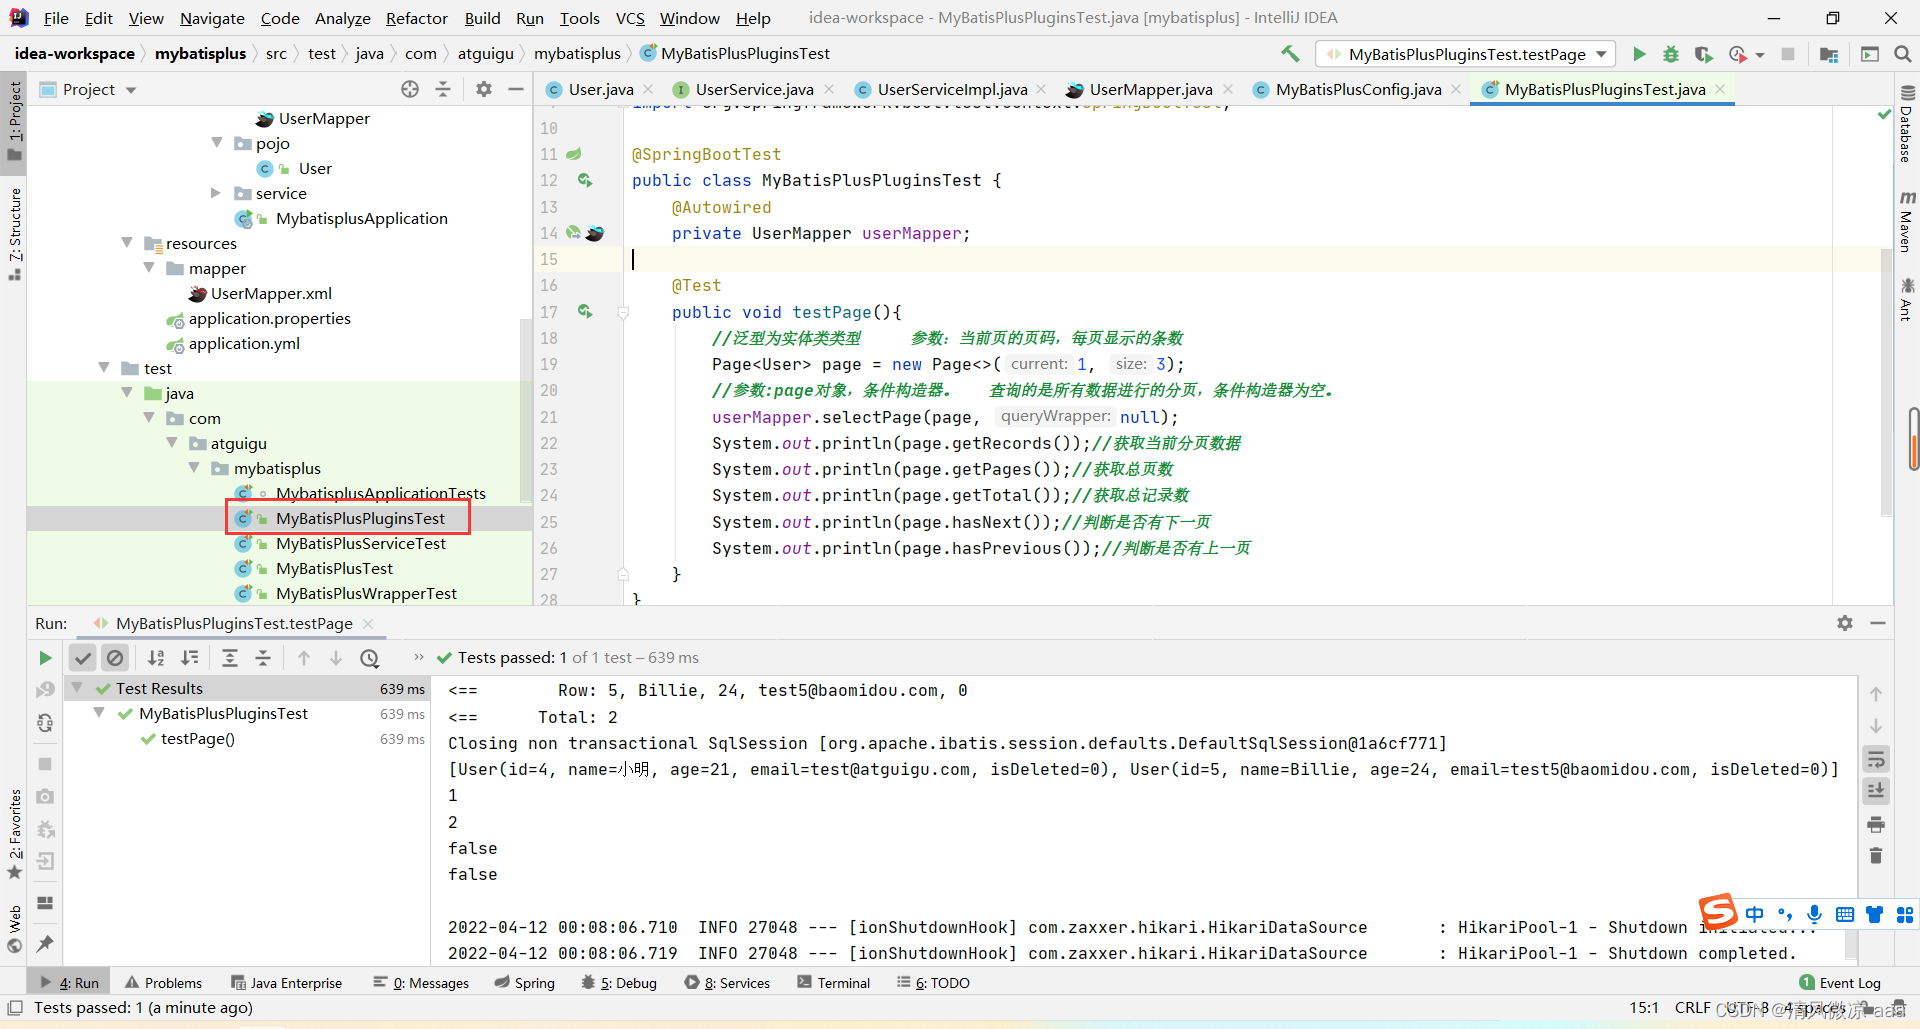
使用分页:
@Test
public void testPage(){
    Page<User> page = new Page<>(1, 3); // 当前页,每页大小
    userMapper.selectPage(page, null);
    System.out.println(page.getRecords()); // 当前页数据
    System.out.println(page.getTotal());   // 总记录数
    System.out.println(page.getPages());   // 总页数
}
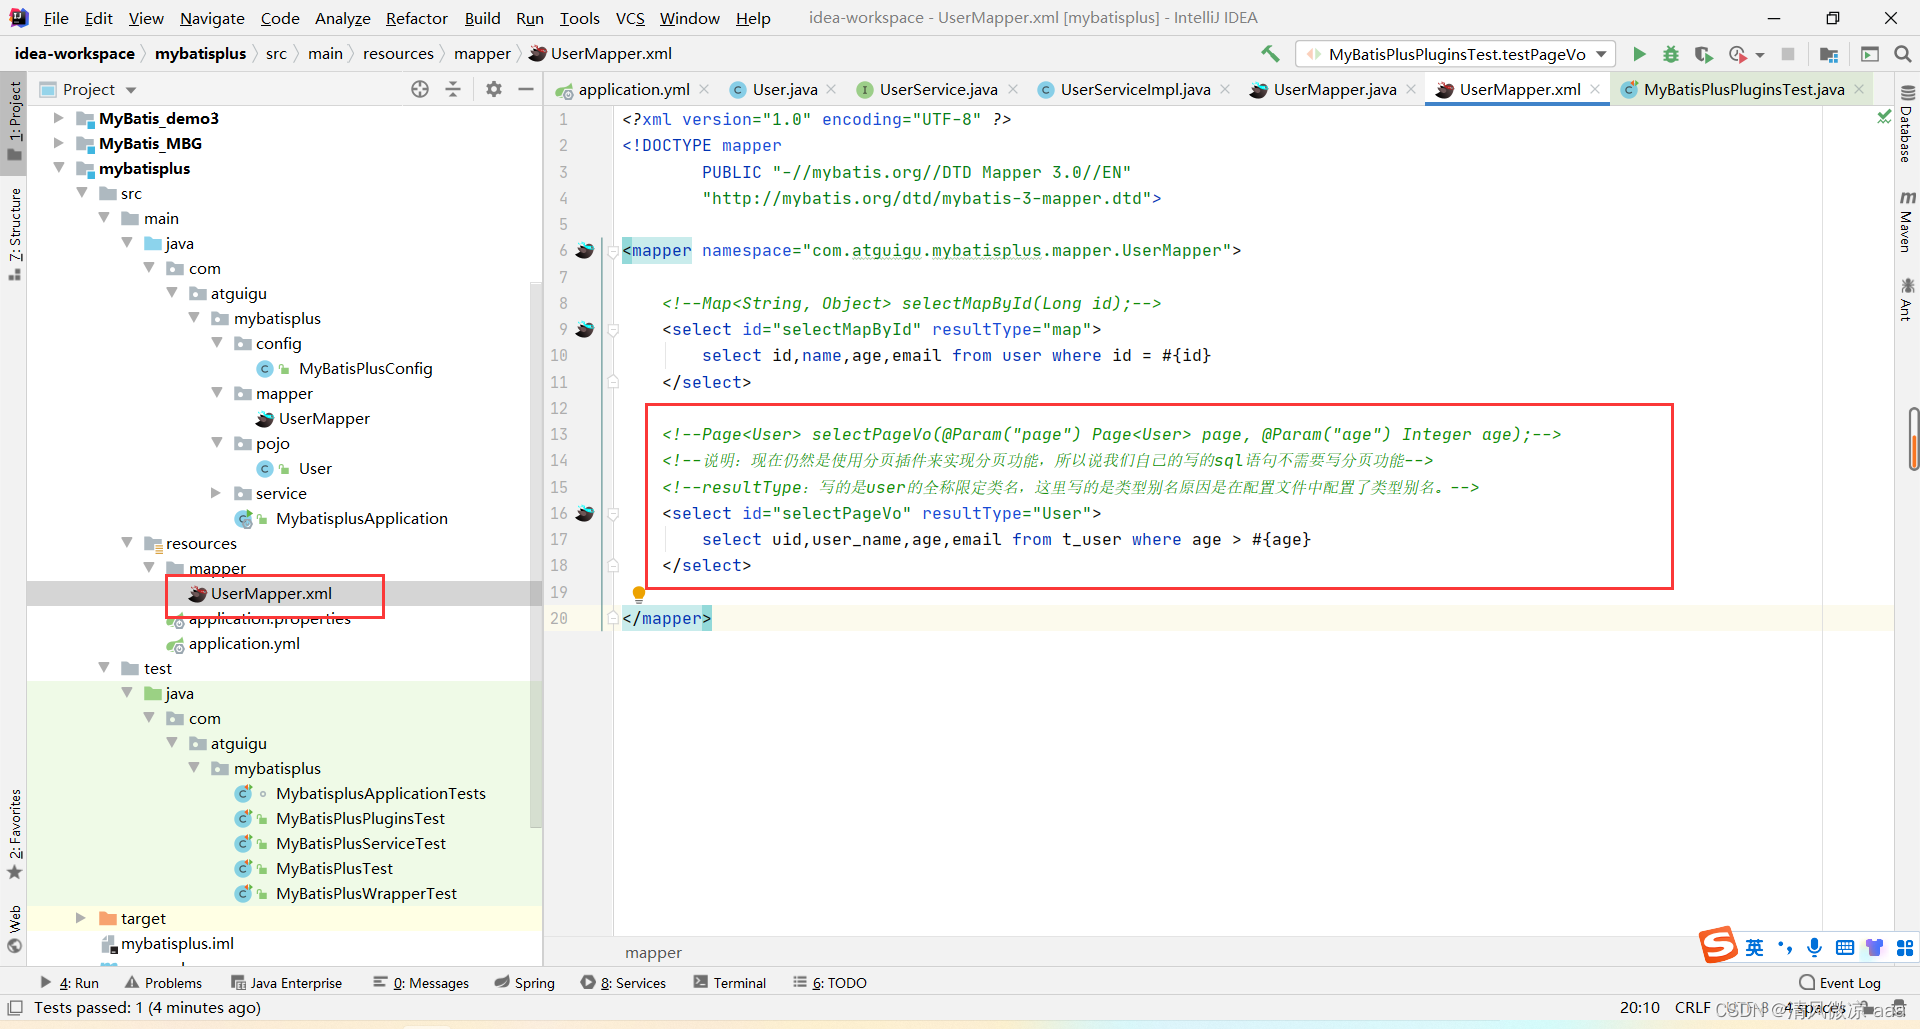
自定义SQL分页:
- Mapper 接口定义方法,第一个参数必须是
Page 对象。
Page<User> selectPageVo(@Param("page") Page<User> page, @Param("age") Integer age);
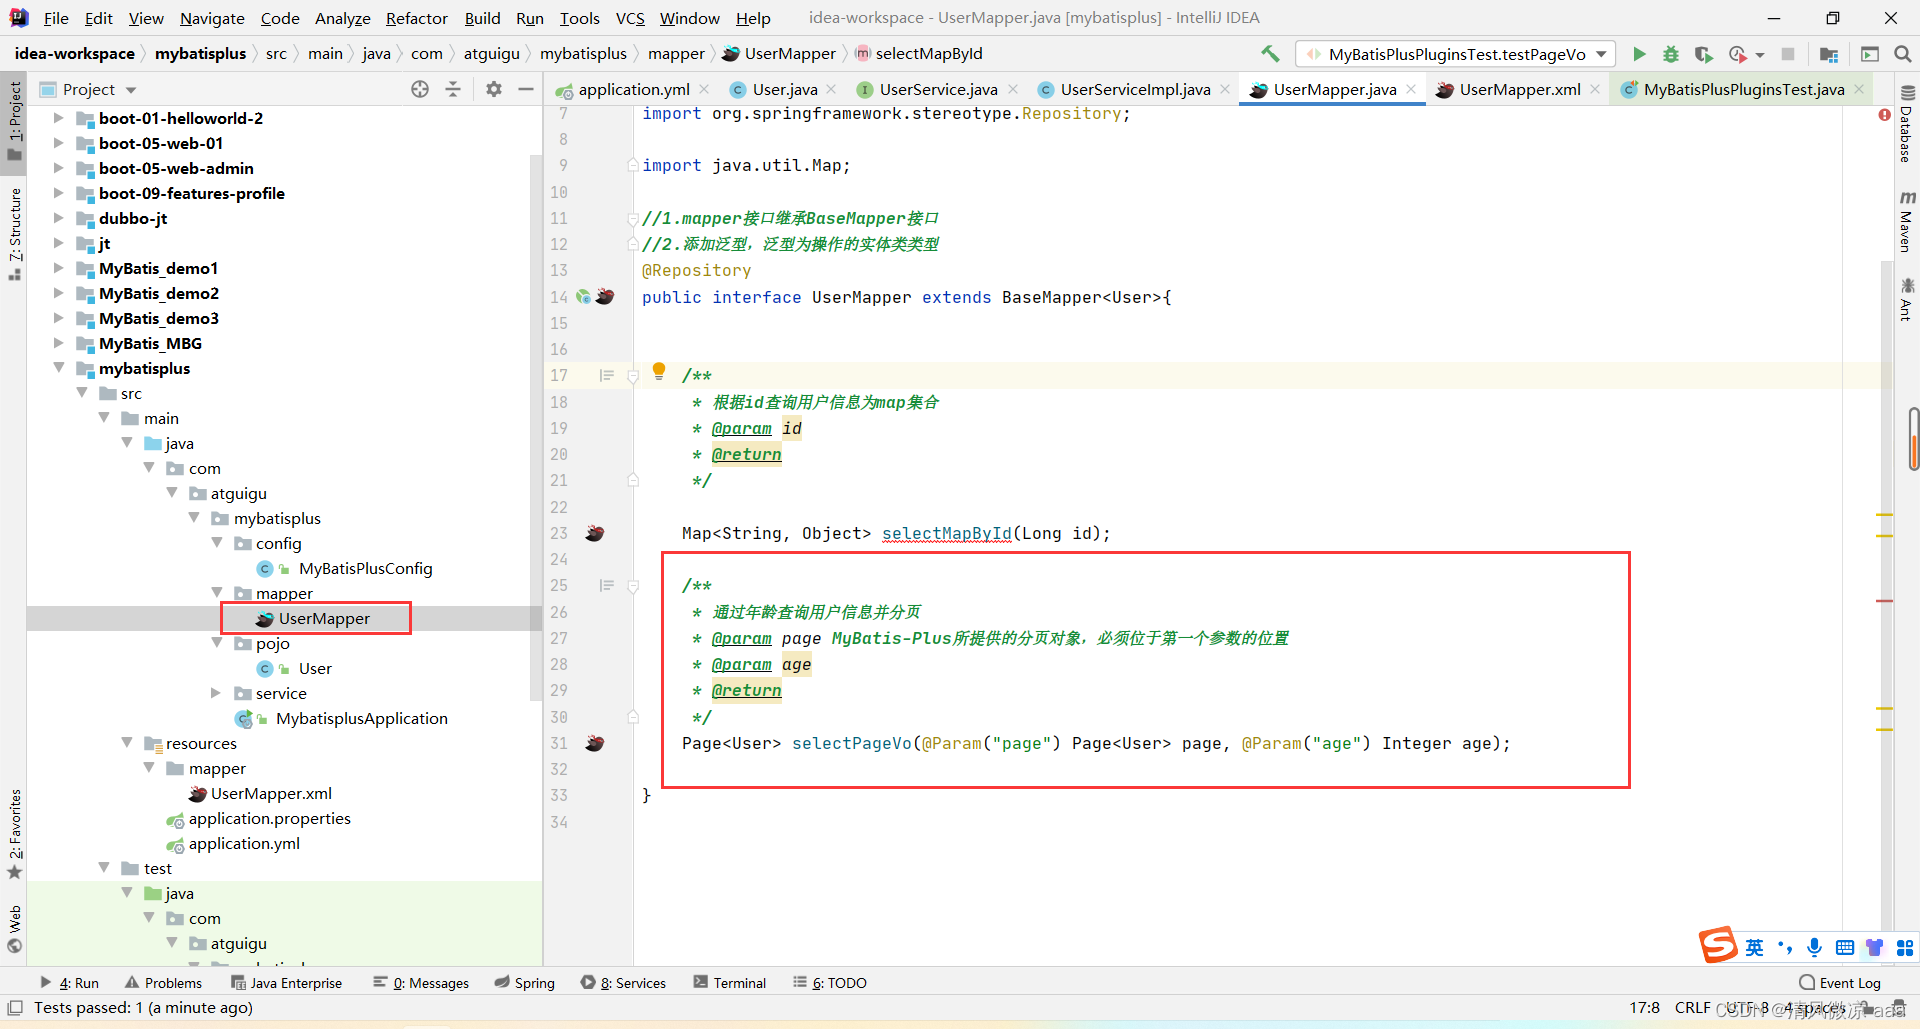
- 在 XML 中编写 SQL(无需写
LIMIT,插件会自动处理)。
<select id="selectPageVo" resultType="User">
    select * from t_user where age > #{age}
</select>
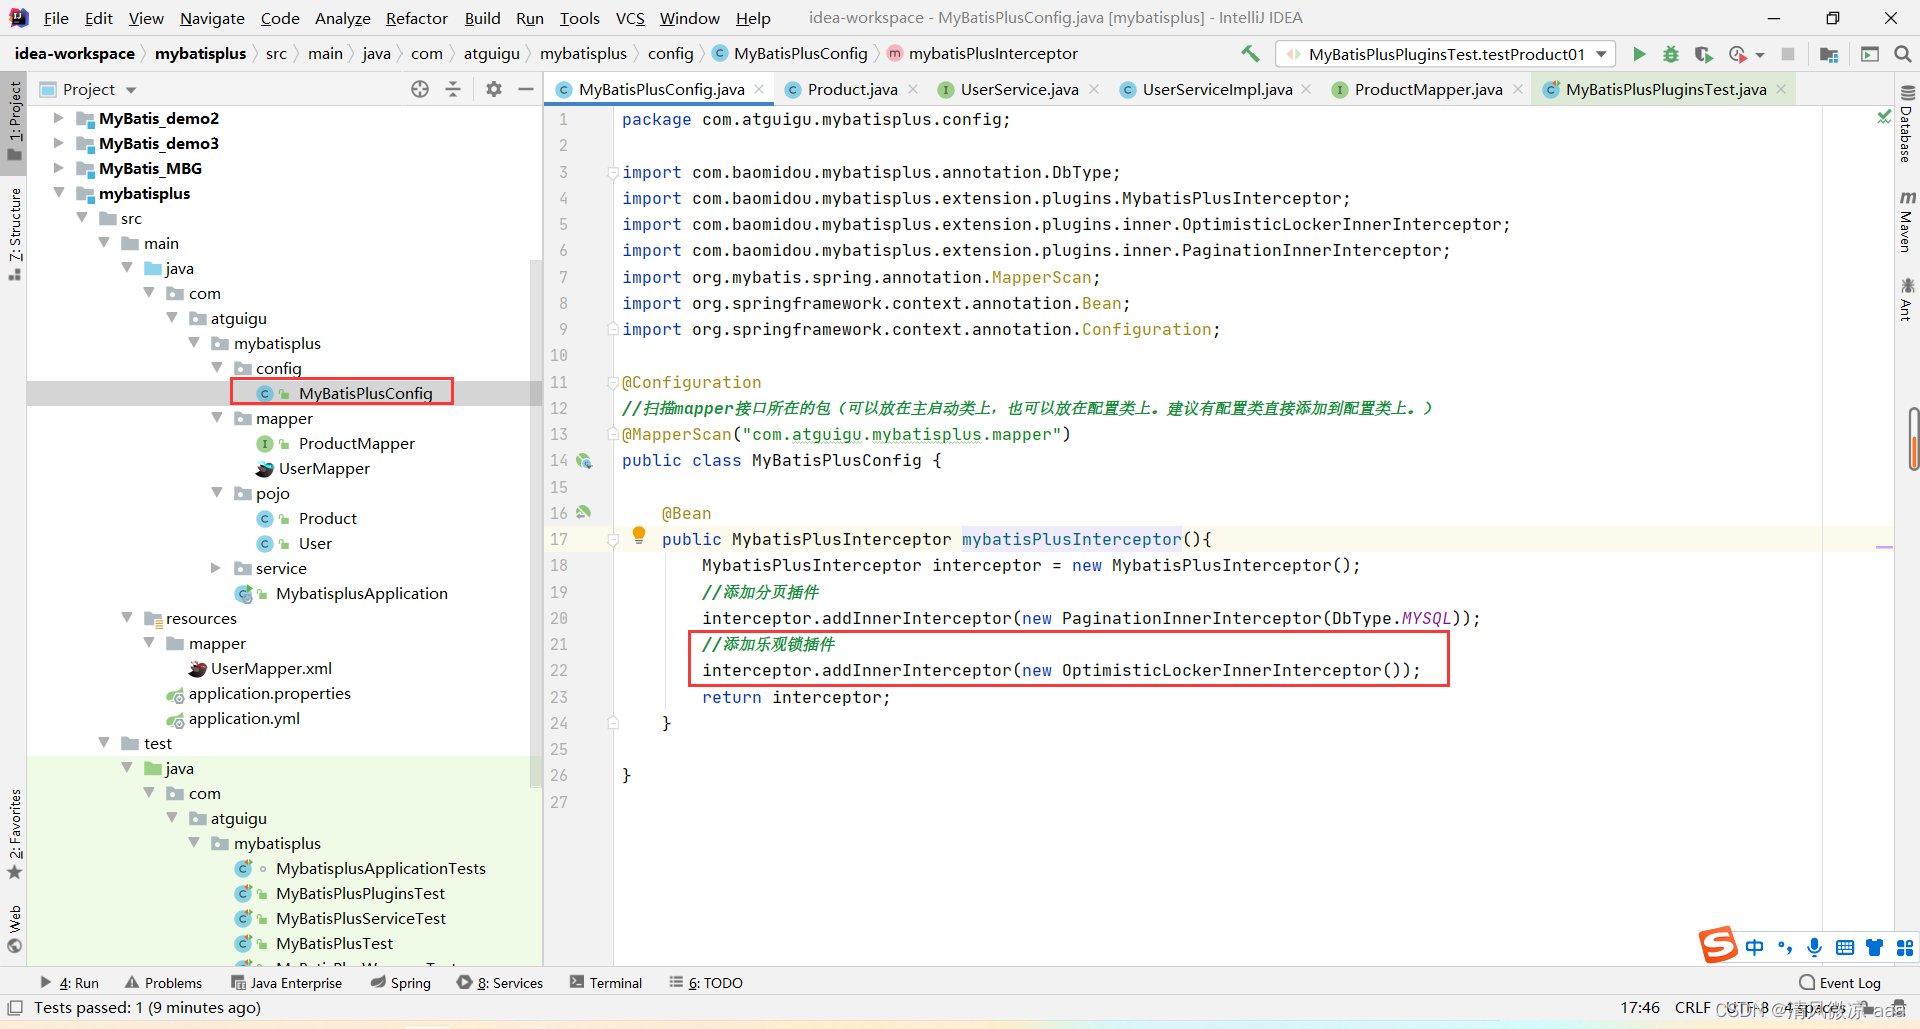
2. 乐观锁插件
解决并发更新时的数据覆盖问题。通过版本号机制实现:读取数据时获取版本号,更新时带上版本号作为条件,若版本号已变则更新失败。
配置乐观锁插件:
@Bean
public MybatisPlusInterceptor mybatisPlusInterceptor(){
    MybatisPlusInterceptor interceptor = new MybatisPlusInterceptor();
    interceptor.addInnerInterceptor(new OptimisticLockerInnerInterceptor()); // 添加乐观锁插件
    interceptor.addInnerInterceptor(new PaginationInnerInterceptor(DbType.MYSQL));
    return interceptor;
}
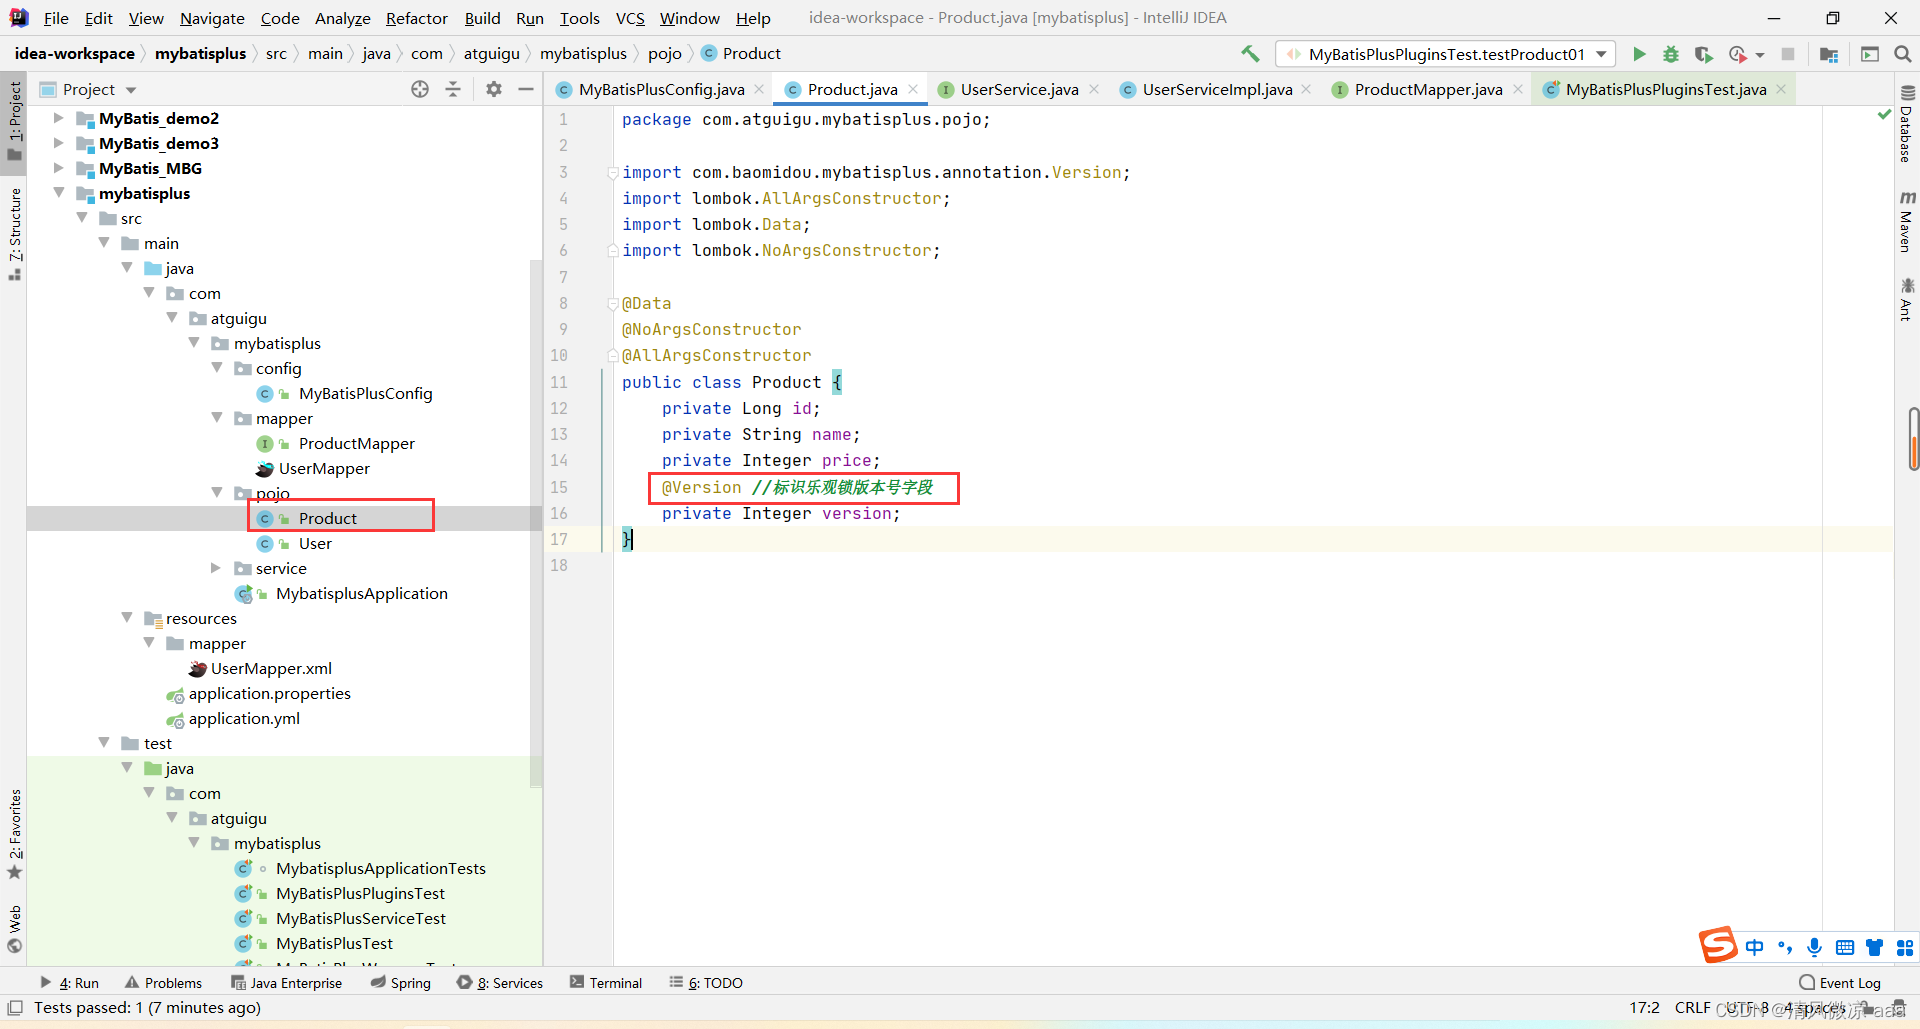
实体类添加 @Version 注解:
public class Product {
    private Long id;
    private String name;
    private Integer price;
    @Version
    private Integer version; // 乐观锁版本号字段
}
使用流程:
- 小明查询商品(version=1)。
- 小红查询商品(version=1)。
- 小明修改商品,版本号+1(执行成功,version=2)。
- 小红修改商品,WHERE 条件中 version=1,此时实际版本已是2,故修改失败。
- 小红可重新查询最新数据后重试更新。
七、通用枚举
将数据库中的数字字段与 Java 枚举类智能映射。
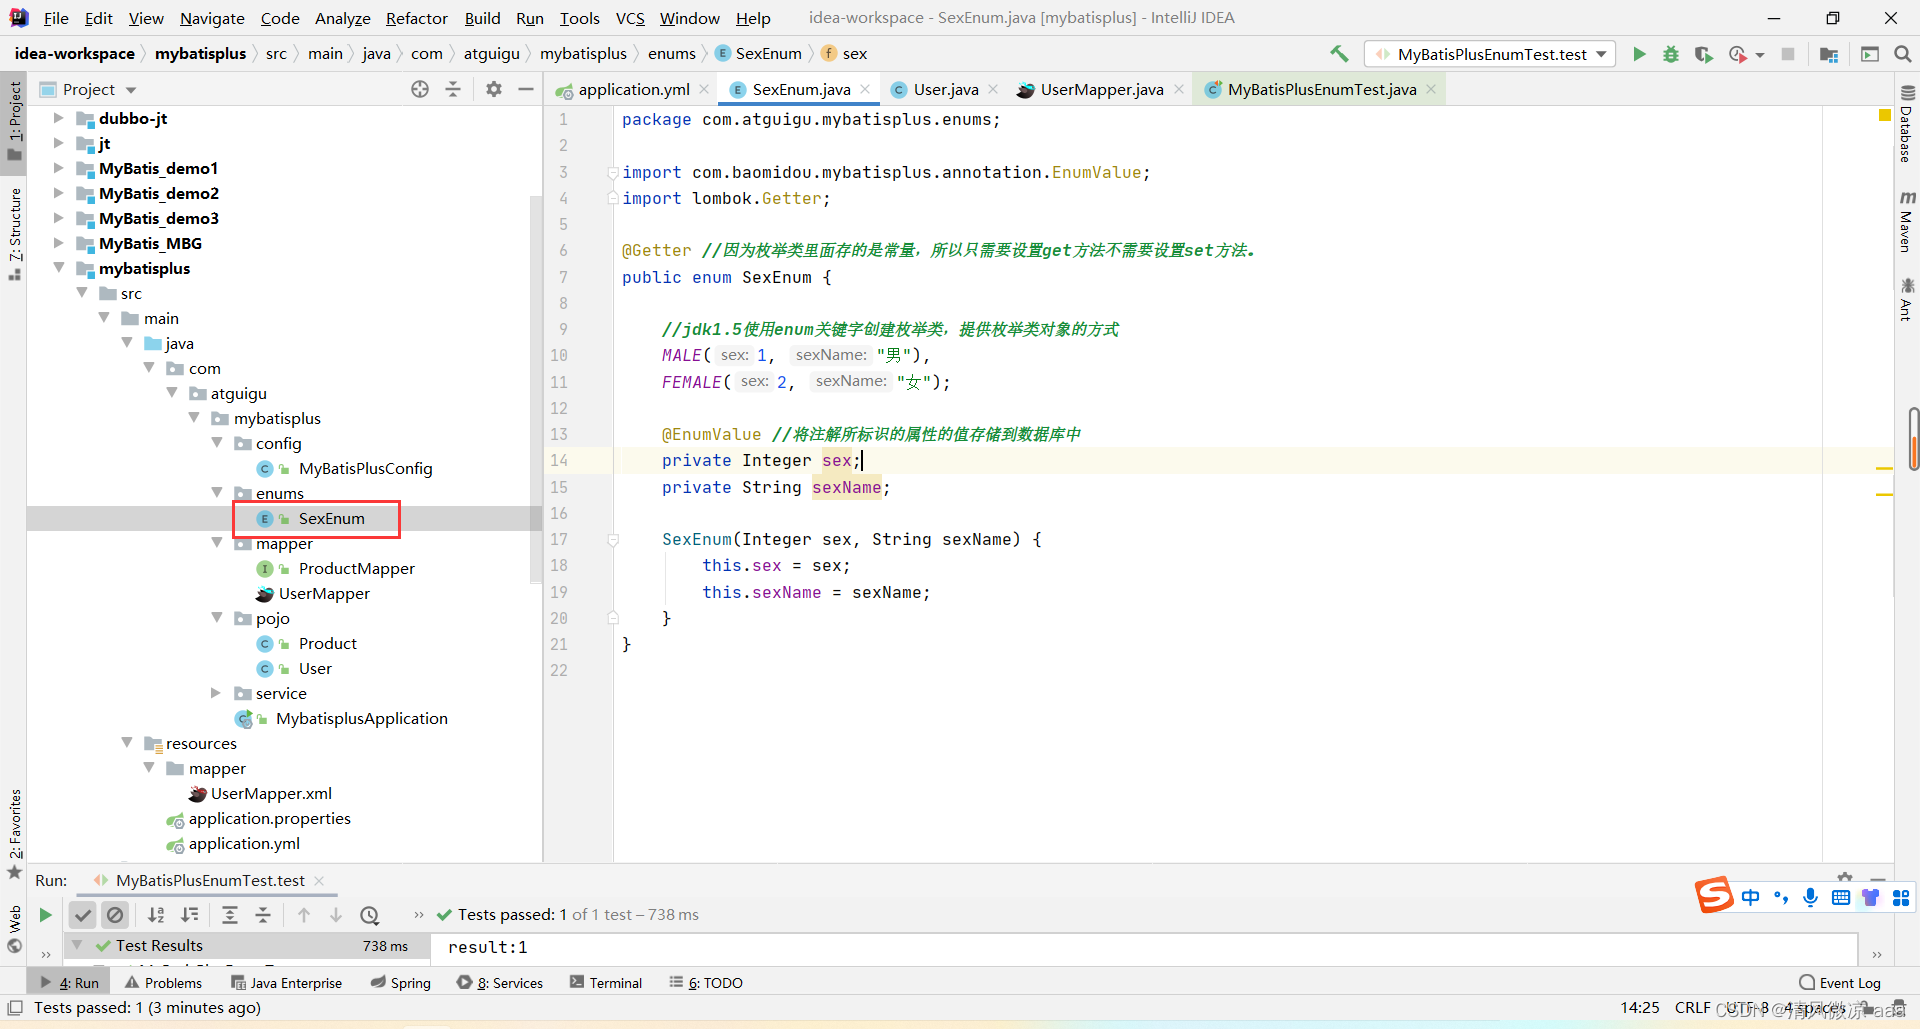
- 创建枚举类,使用
@EnumValue 注解标识存入数据库的值。
@Getter
public enum SexEnum {
    MALE(1, "男"),
    FEMALE(2, "女");
    @EnumValue // 标识此值存入数据库
    private Integer sex;
    private String sexName;
    SexEnum(Integer sex, String sexName) {
        this.sex = sex;
        this.sexName = sexName;
    }
}
- 实体类中使用该枚举类型。
private SexEnum sex;
- 配置文件中扫描枚举包。
mybatis-plus:
  type-enums-package: com.atguigu.mybatisplus.enums
- 插入数据时,直接设置枚举即可。
User user = new User();
user.setSex(SexEnum.MALE); // 数据库实际存入 1
userMapper.insert(user);
八、代码生成器
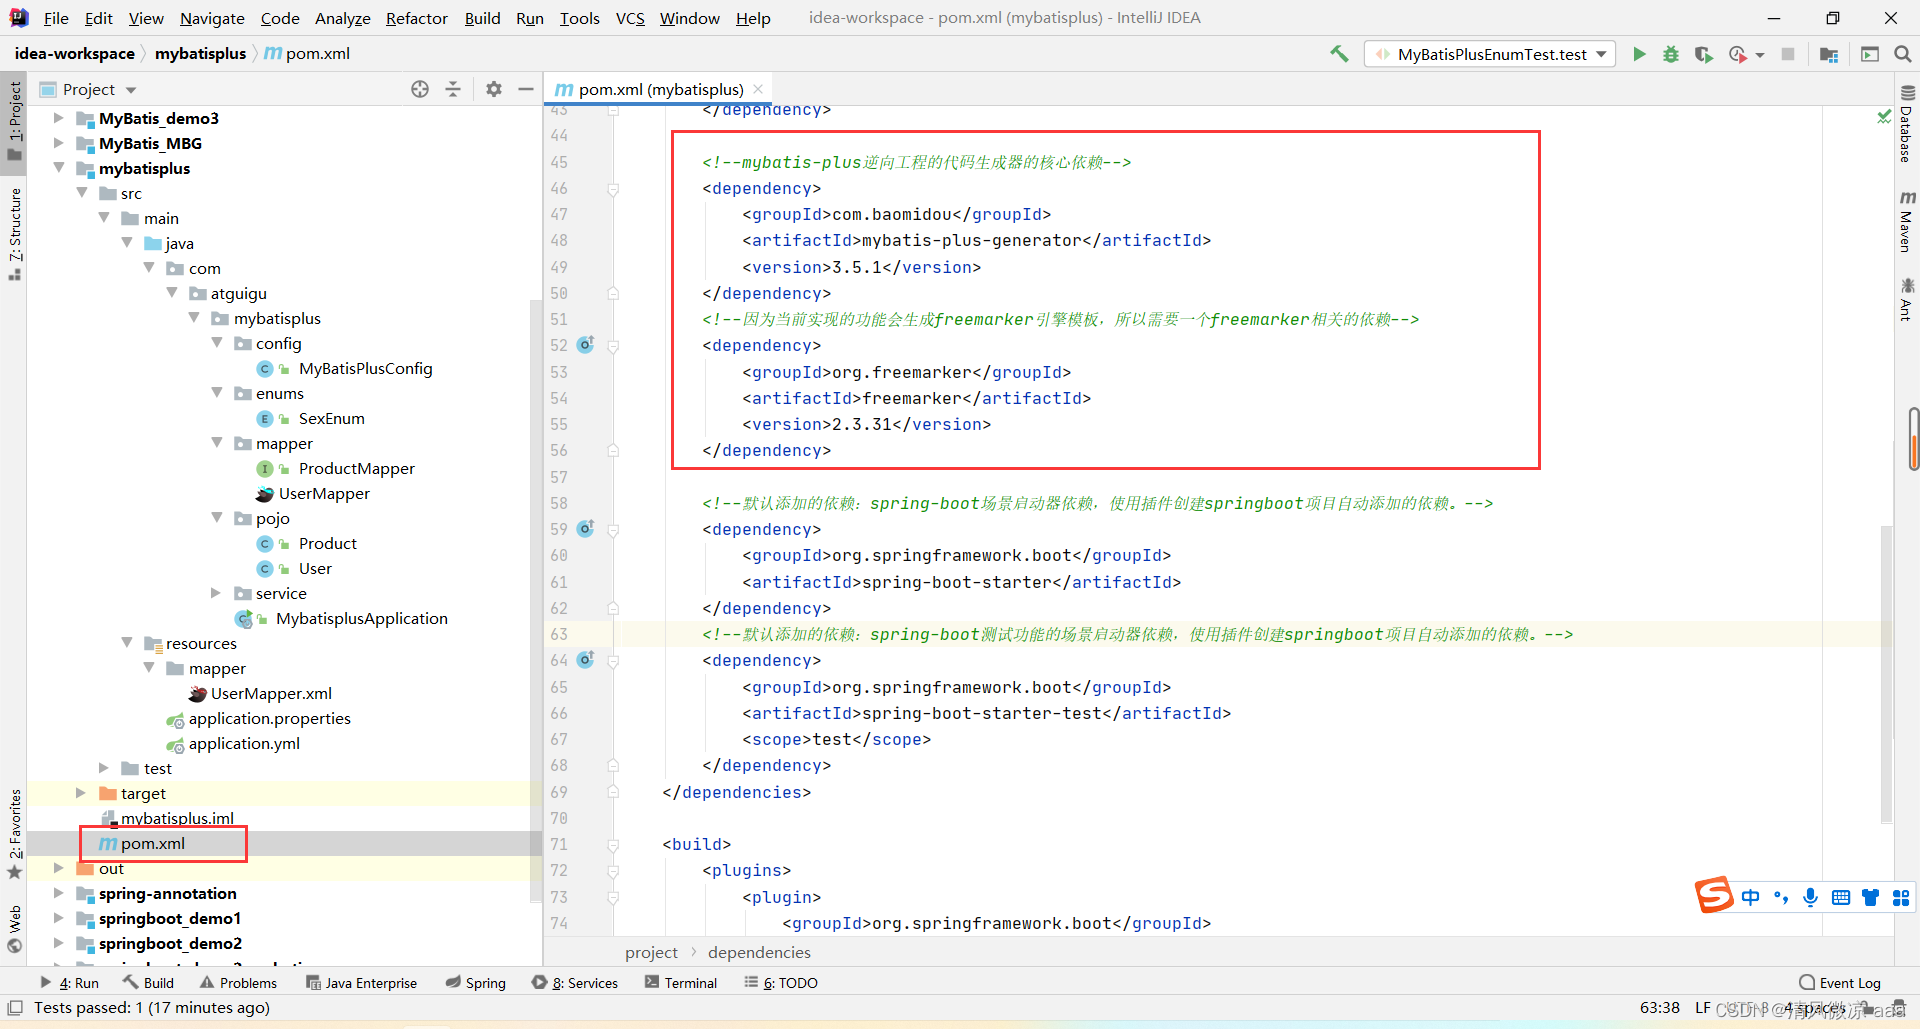
MyBatis-Plus 提供了强大的代码生成器,可一键生成 Entity、Mapper、Service、Controller 等全套代码。
-
引入生成器依赖:
<dependency>
    <groupId>com.baomidou</groupId>
    <artifactId>mybatis-plus-generator</artifactId>
    <version>3.5.1</version>
</dependency>
<dependency>
    <groupId>org.freemarker</groupId>
    <artifactId>freemarker</artifactId>
    <version>2.3.31</version>
</dependency>
-
编写生成代码(示例使用 FastAutoGenerator):
FastAutoGenerator.create("jdbc:mysql://localhost:3306/mybatis_plus", "root", "root")
        .globalConfig(builder -> builder.author("atguigu").outputDir("D://generator"))
        .packageConfig(builder -> builder.parent("com.atguigu"))
        .strategyConfig(builder -> builder.addInclude("t_user").addTablePrefix("t_"))
        .templateEngine(new FreemarkerTemplateEngine())
        .execute();
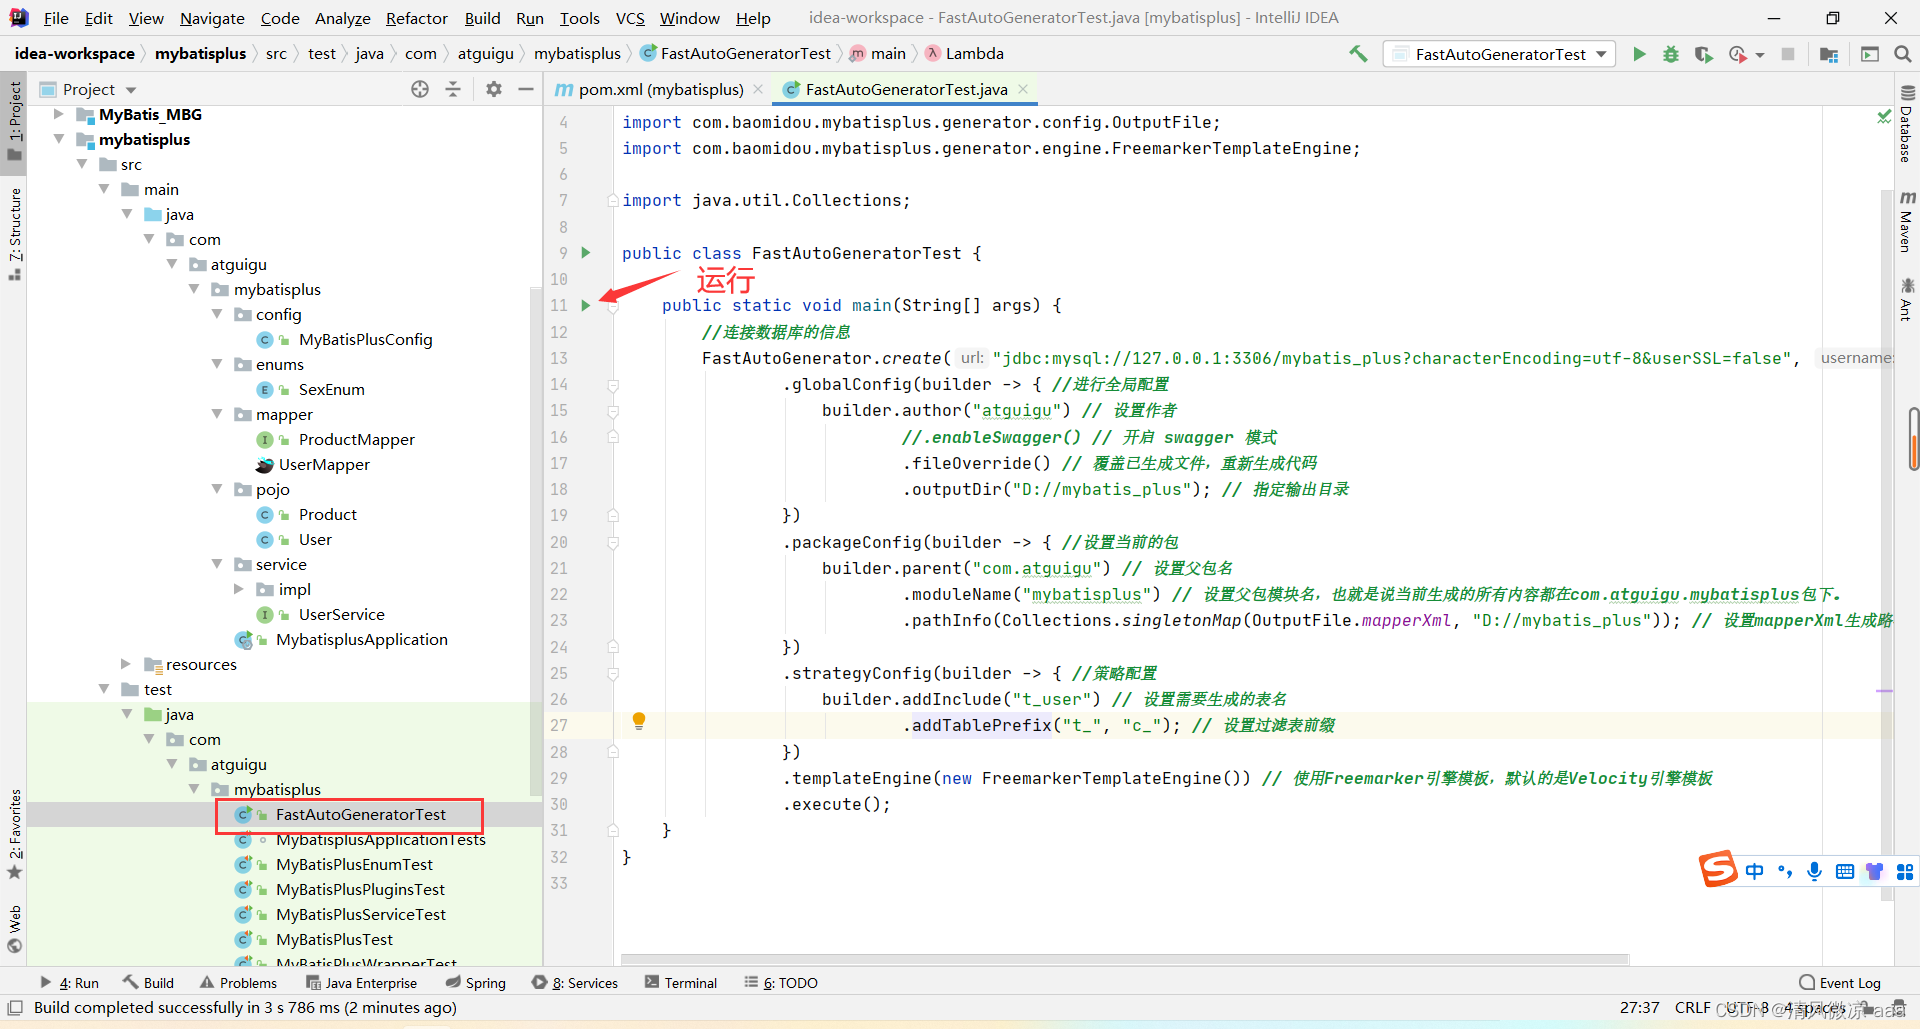
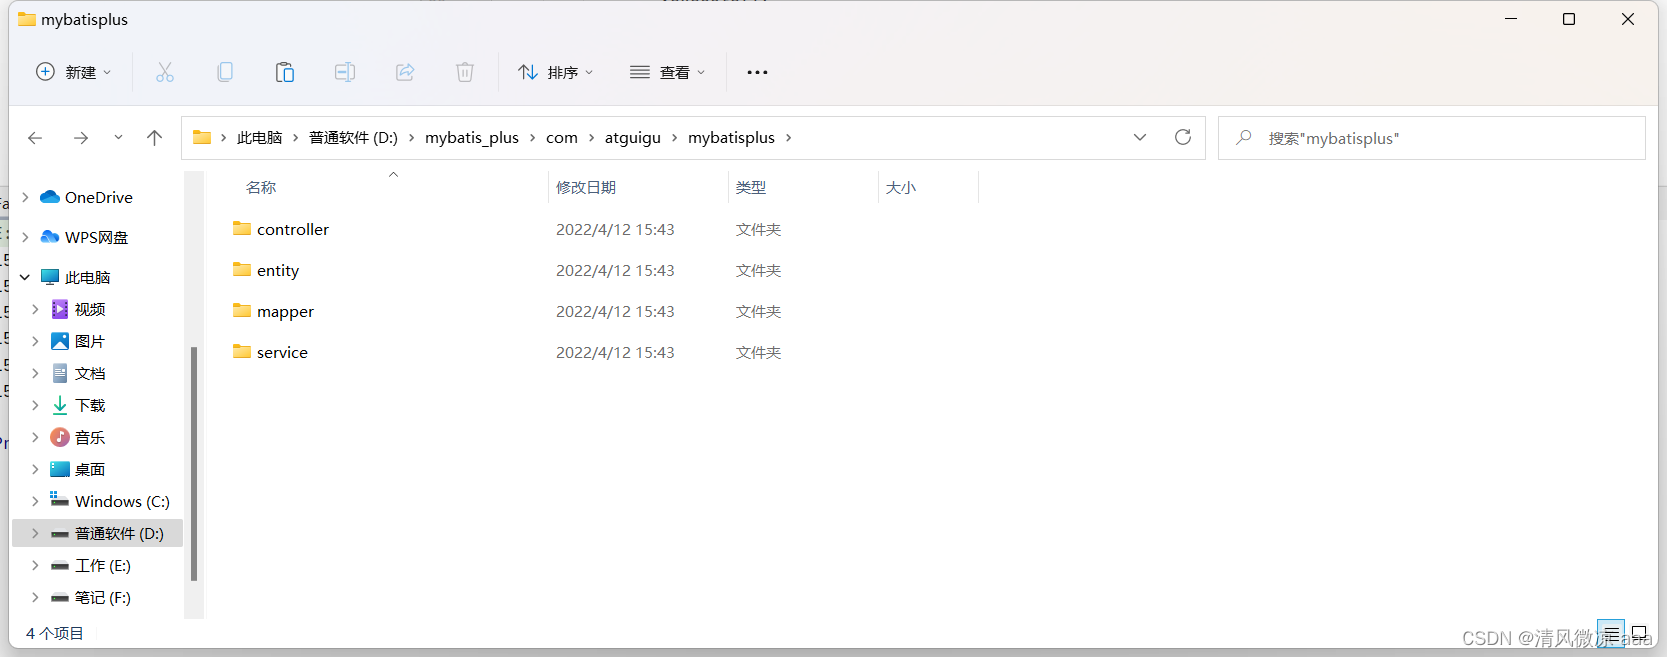
执行后,会在指定目录生成完整的项目结构代码。
九、多数据源配置
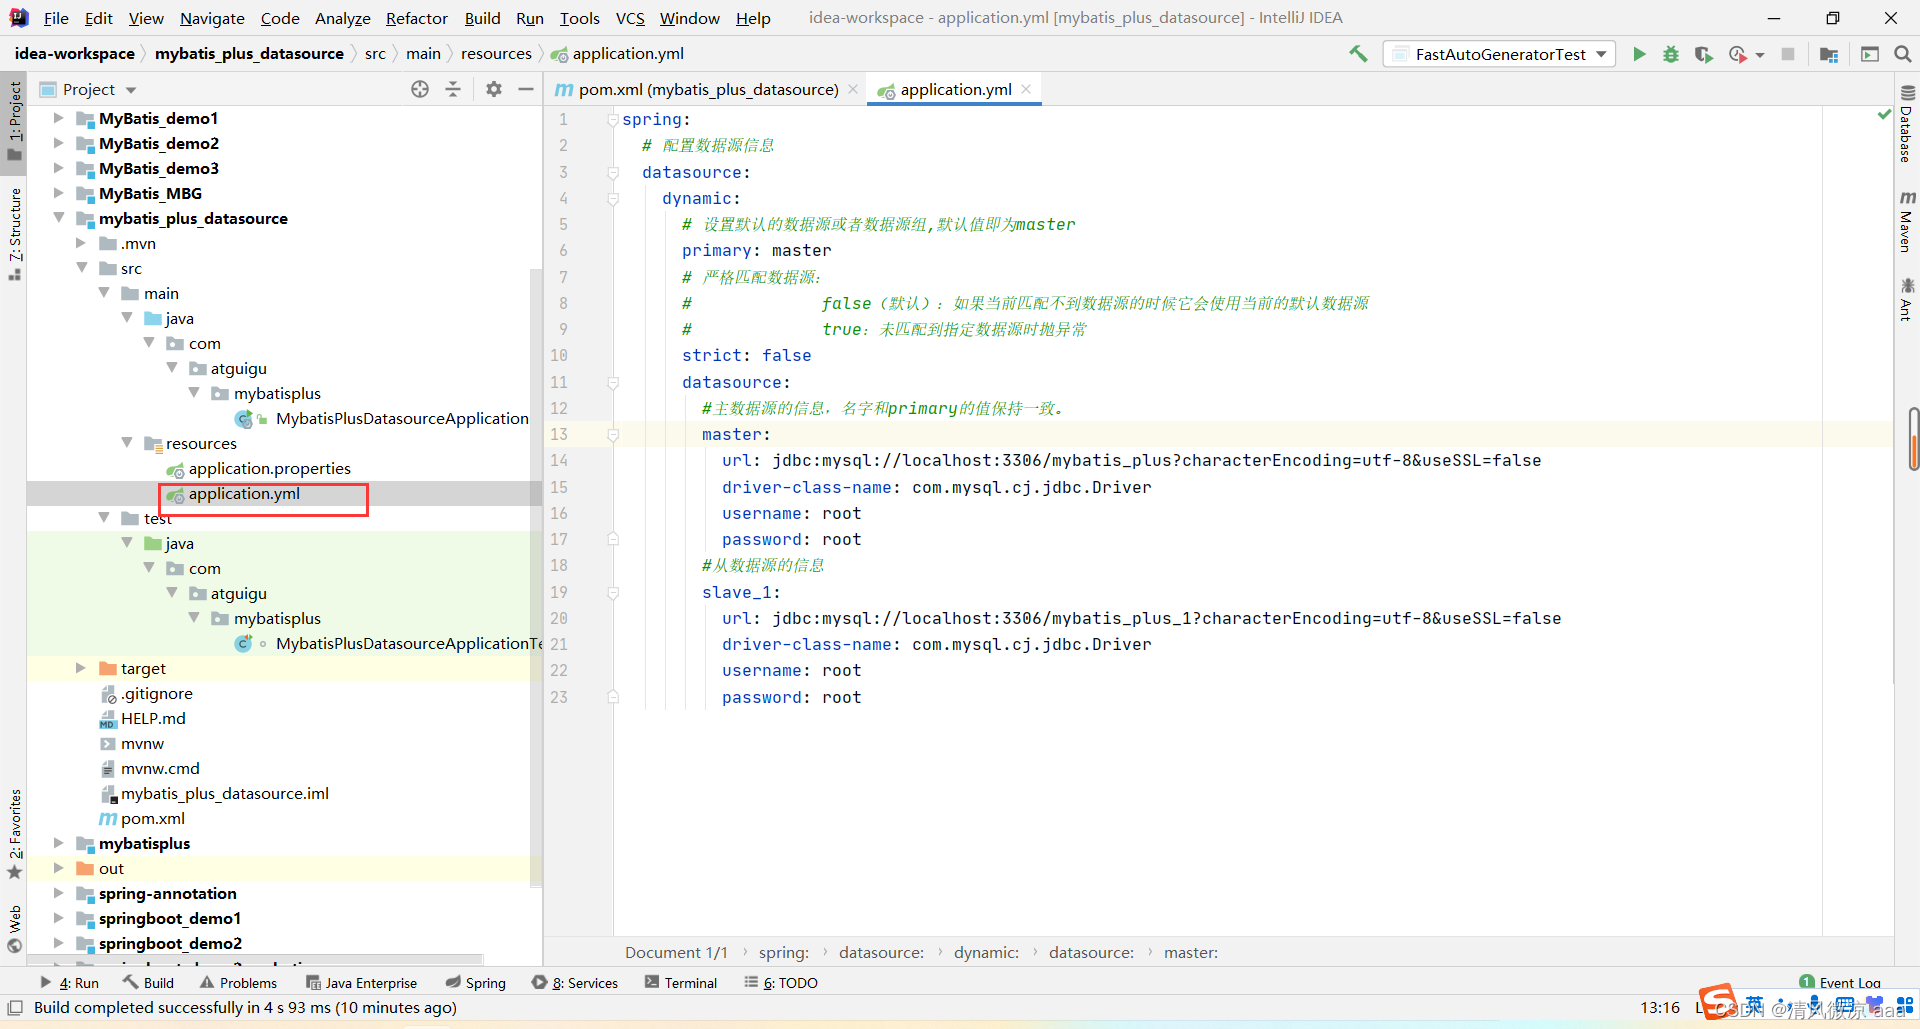
在实际业务中,一个应用可能需要连接多个数据库。MyBatis-Plus 结合 dynamic-datasource-spring-boot-starter 可以轻松实现多数据源配置,这对于复杂的后端架构场景非常有用。
-
引入依赖:
<dependency>
    <groupId>com.baomidou</groupId>
    <artifactId>dynamic-datasource-spring-boot-starter</artifactId>
    <version>3.5.0</version>
</dependency>
-
配置多个数据源(application.yml):
spring:
  datasource:
    dynamic:
      primary: master # 设置默认数据源
      datasource:
        master: # 数据源一
          url: jdbc:mysql://localhost:3306/mybatis_plus
          driver-class-name: com.mysql.cj.jdbc.Driver
          username: root
          password: root
        slave_1: # 数据源二
          url: jdbc:mysql://localhost:3306/mybatis_plus_1
          driver-class-name: com.mysql.cj.jdbc.Driver
          username: root
          password: root
-
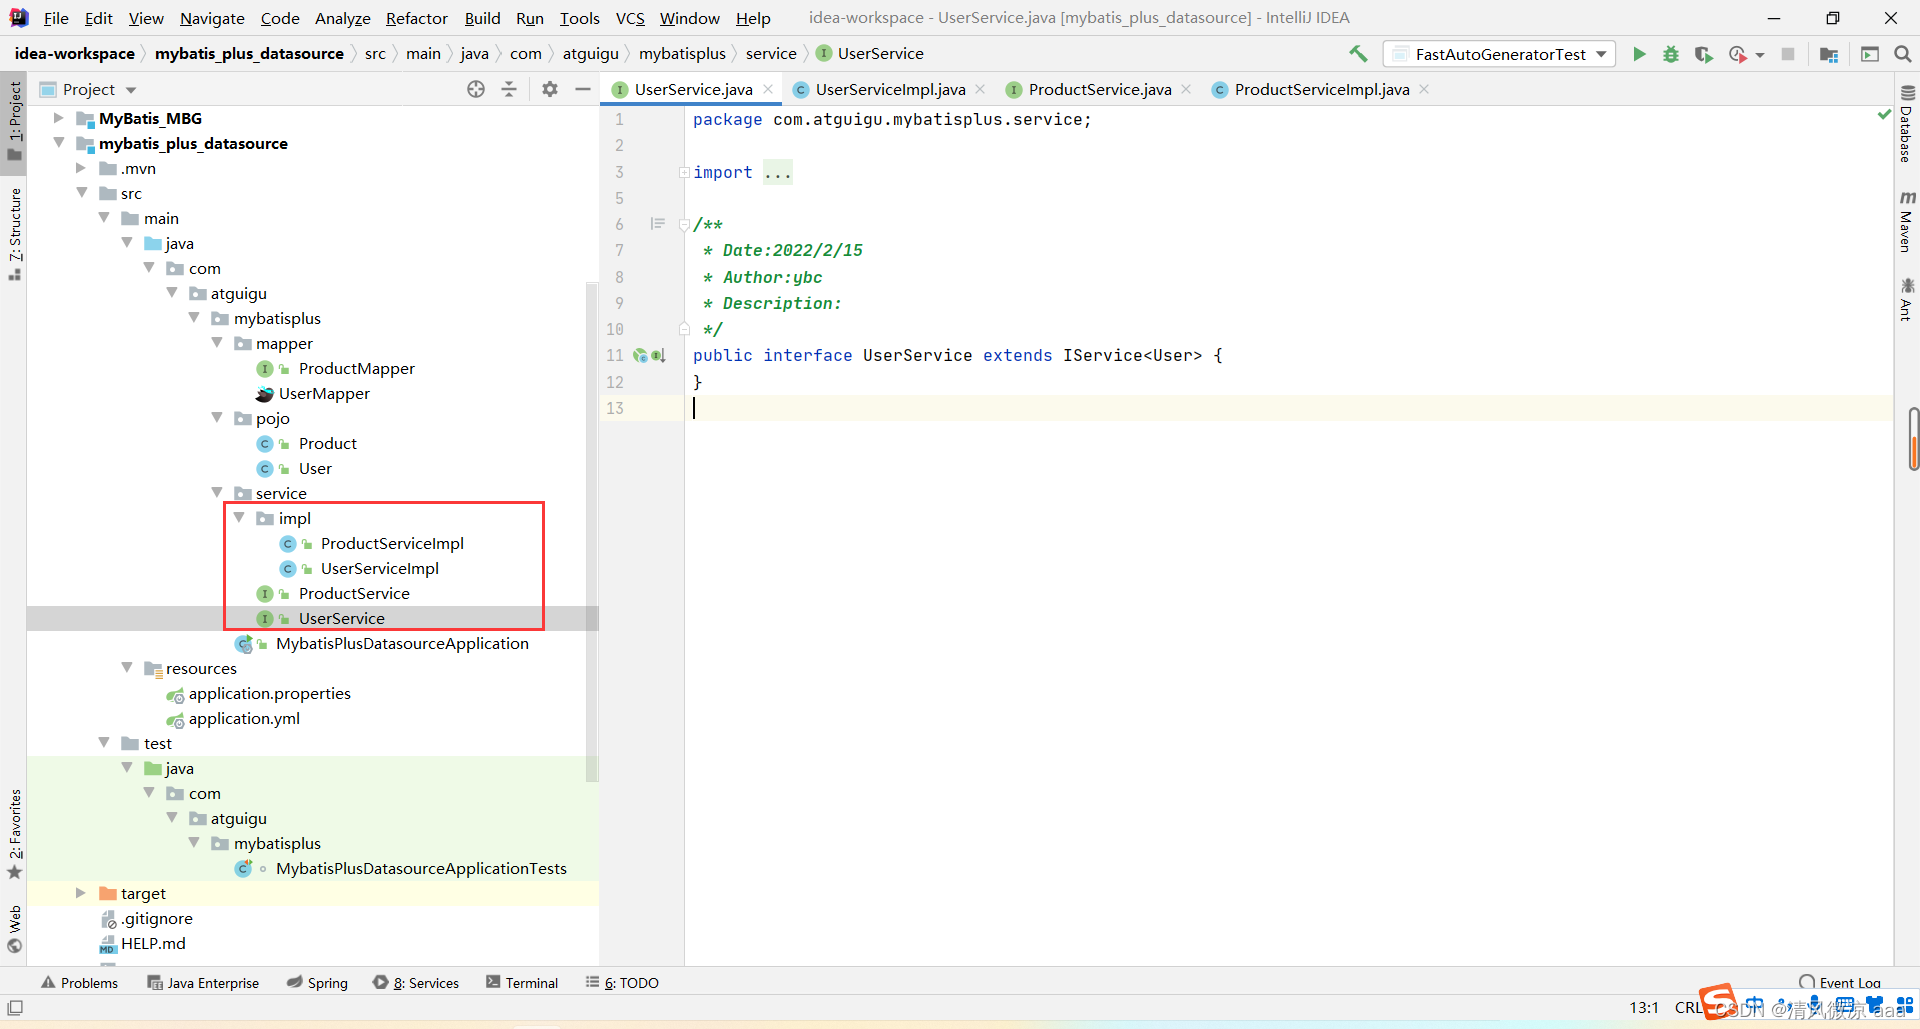
在 Service 实现类上使用 @DS 注解指定数据源:
@Service
@DS("master") // 操作 master 数据源
public class UserServiceImpl extends ServiceImpl<UserMapper, User> implements UserService {}

@Service
@DS("slave_1") // 操作 slave_1 数据源
public class ProductServiceImpl extends ServiceImpl<ProductMapper, Product> implements ProductService {}
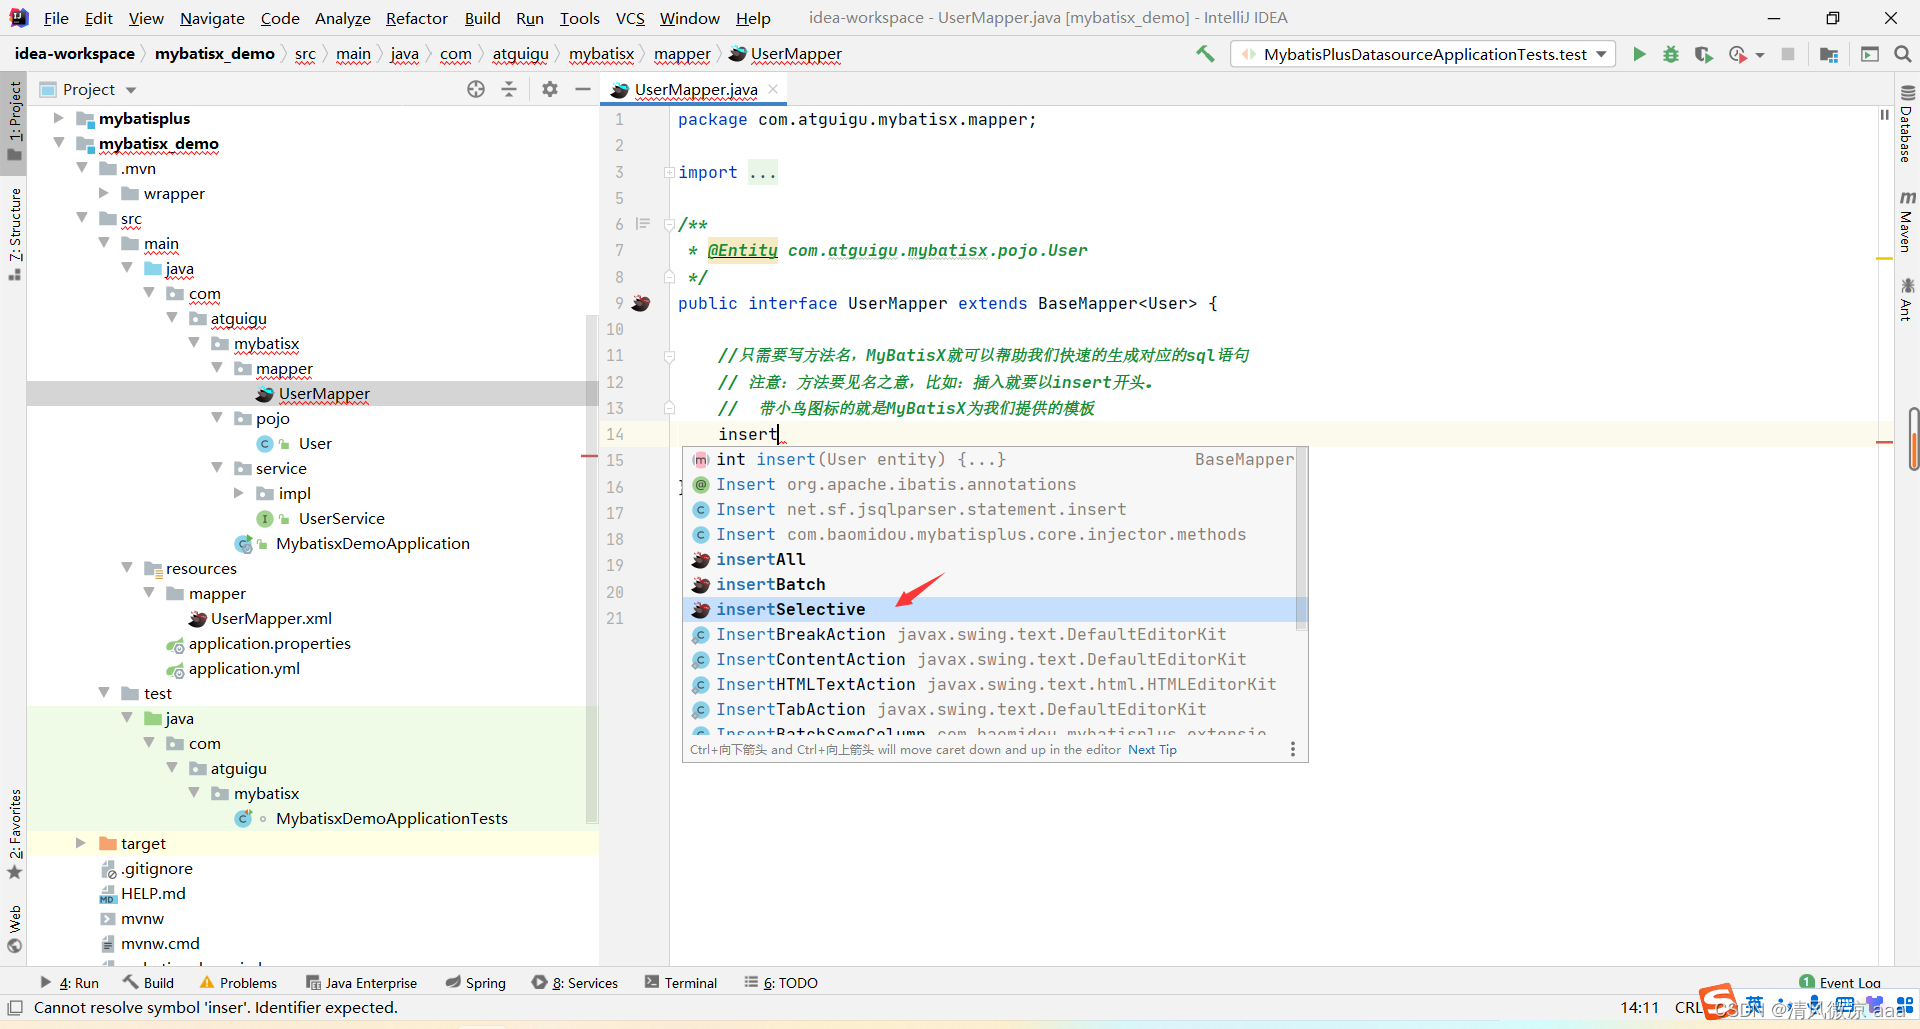
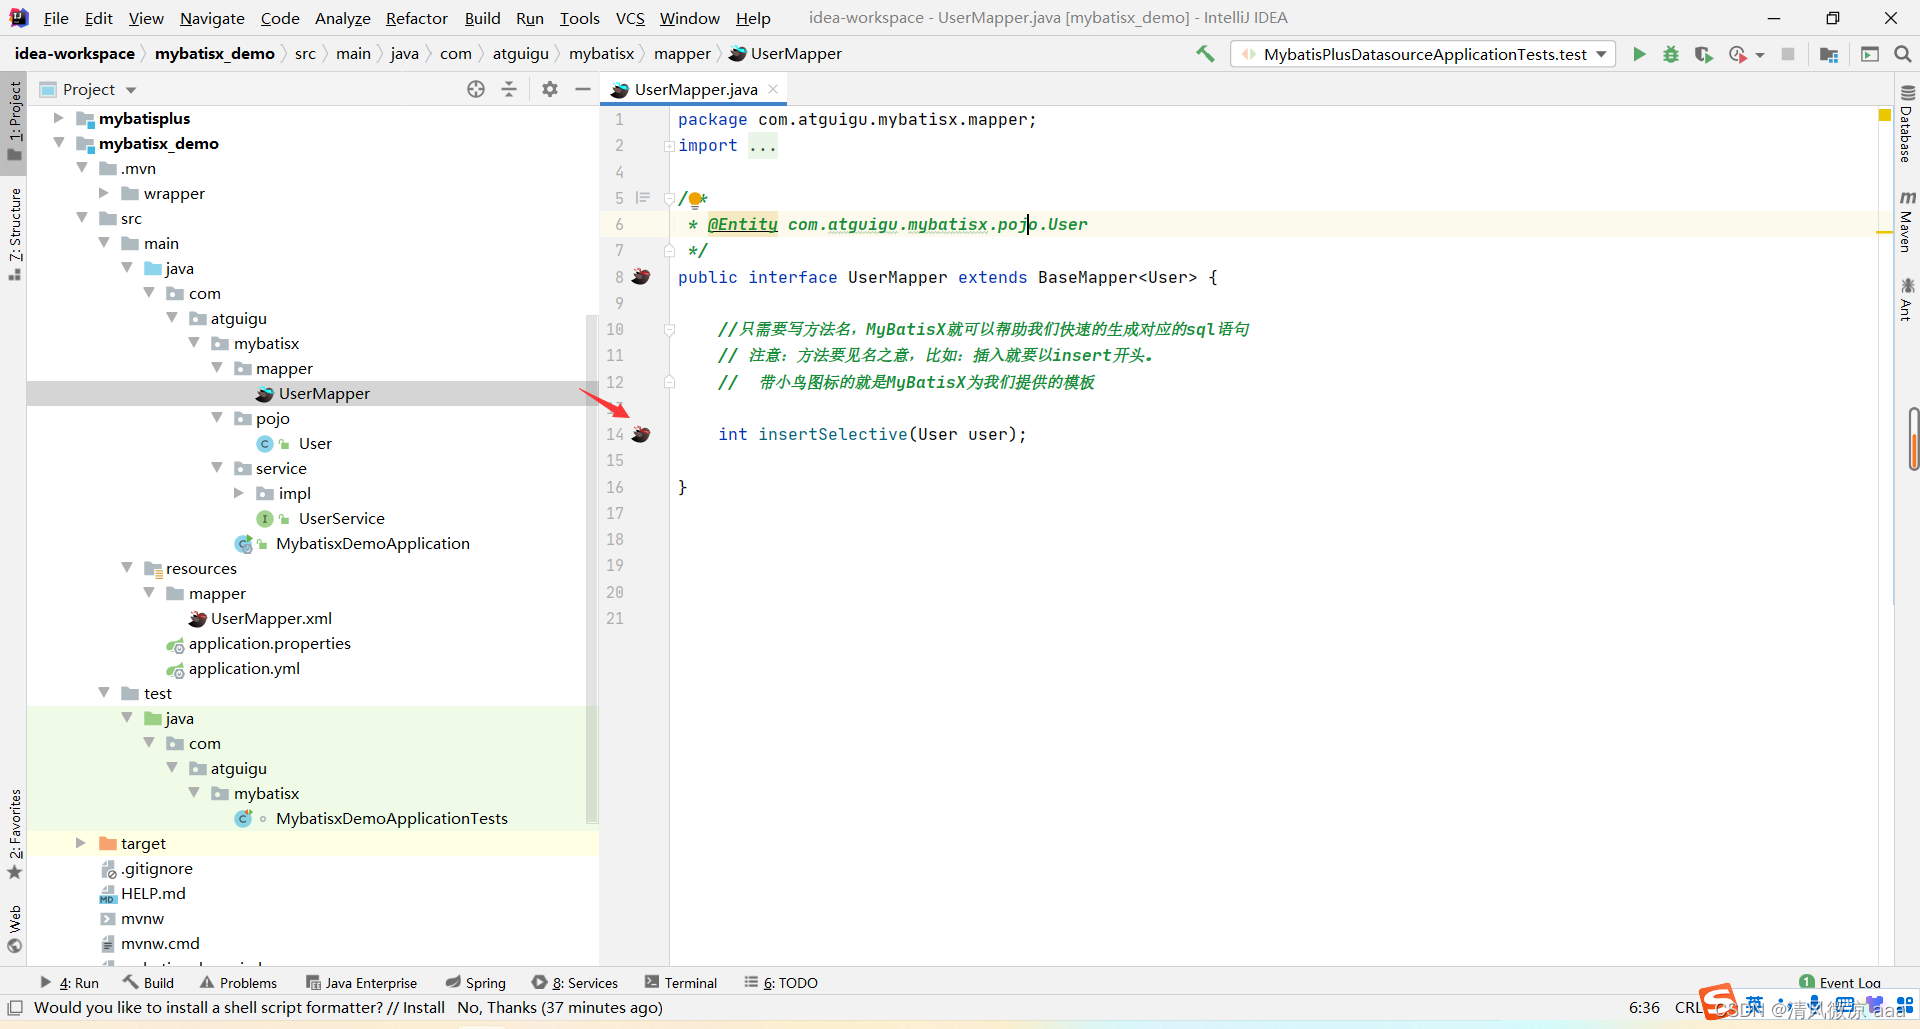
十、MyBatisX 插件(IDEA 高效开发利器)
MyBatisX 是一款 IDEA 插件,能极大提升基于 MyBatis/MyBatis-Plus 的开发效率。
-
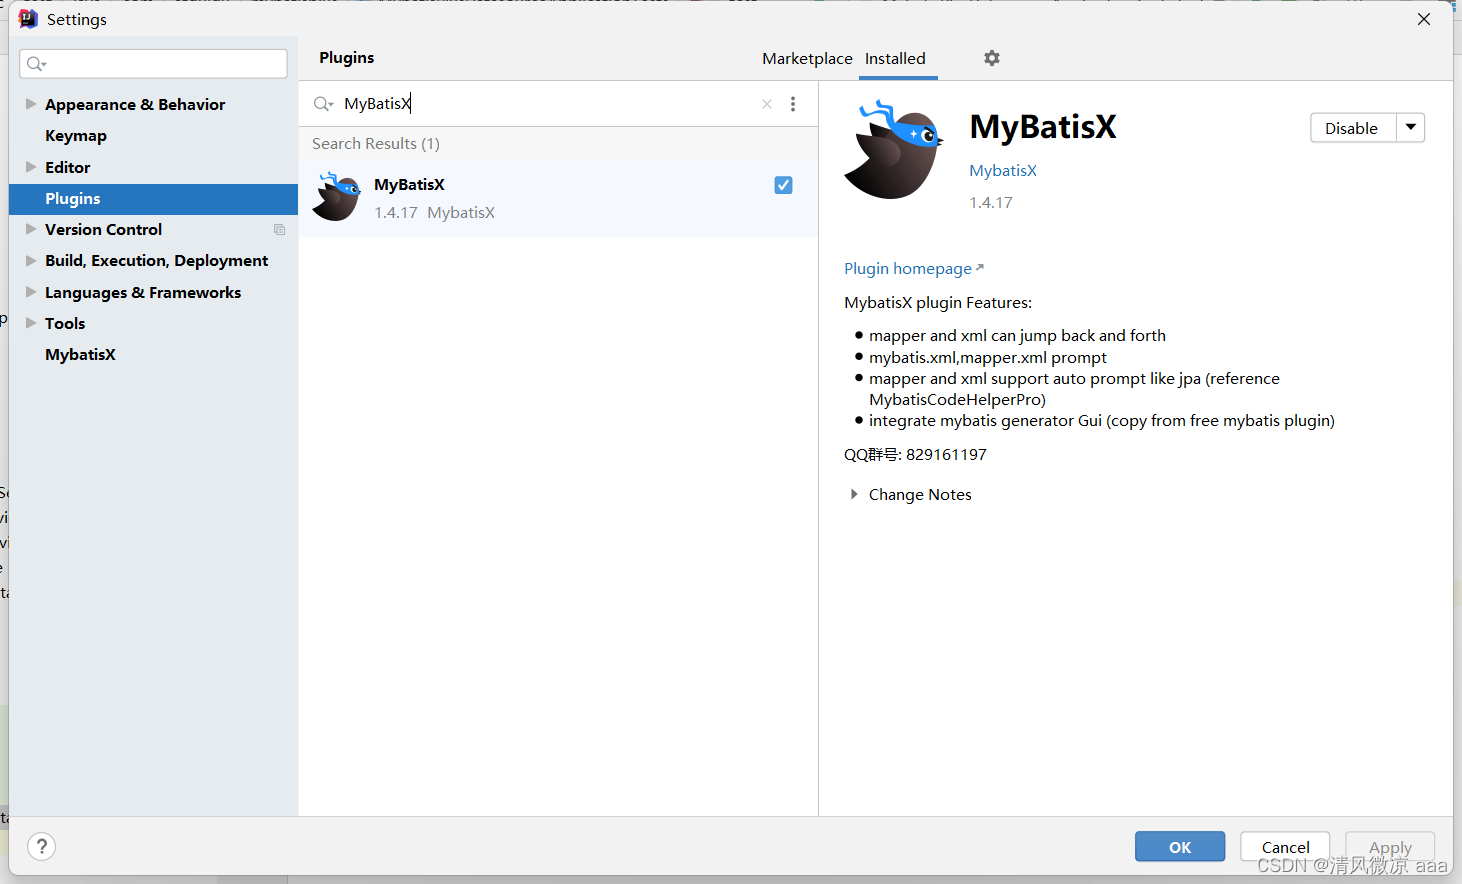
安装:在 IDEA 插件市场搜索 “MyBatisX” 并安装。
-
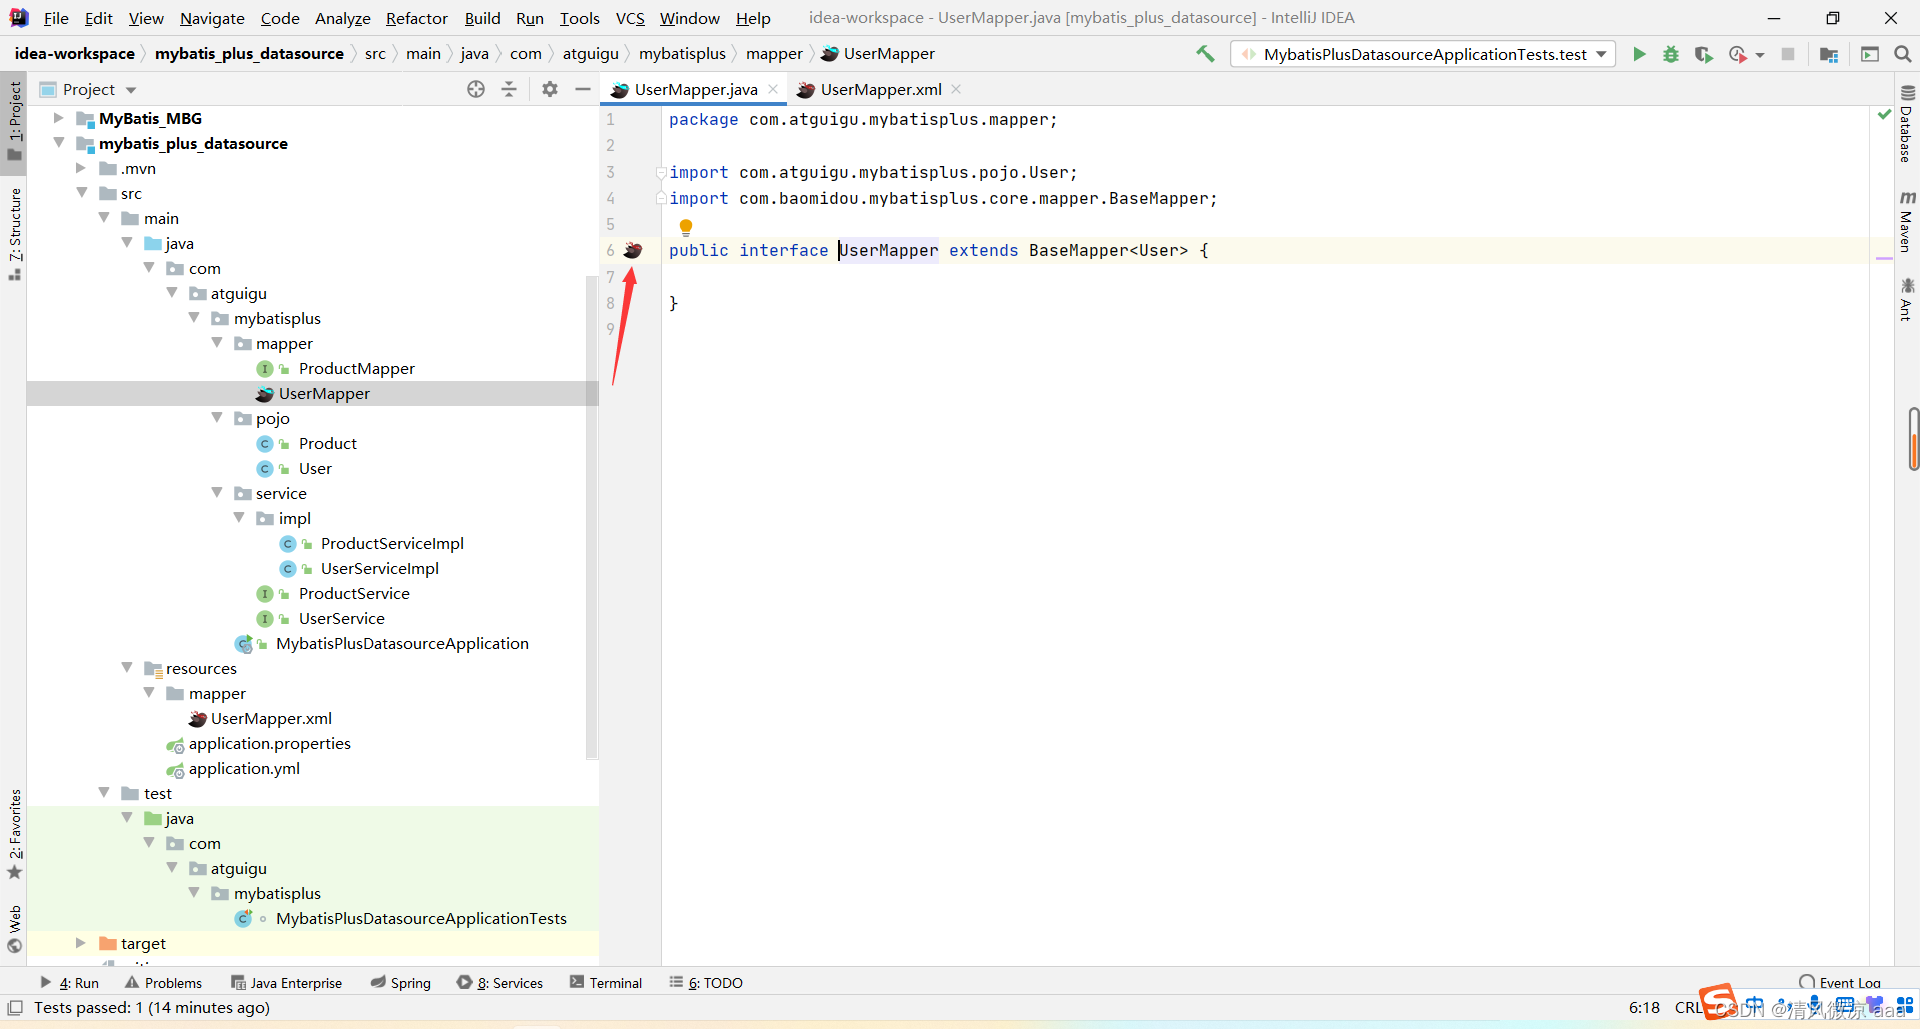
快速跳转:在 Mapper 接口方法和 XML 标签之间生成一只“小鸟”图标,点击即可快速跳转。
-
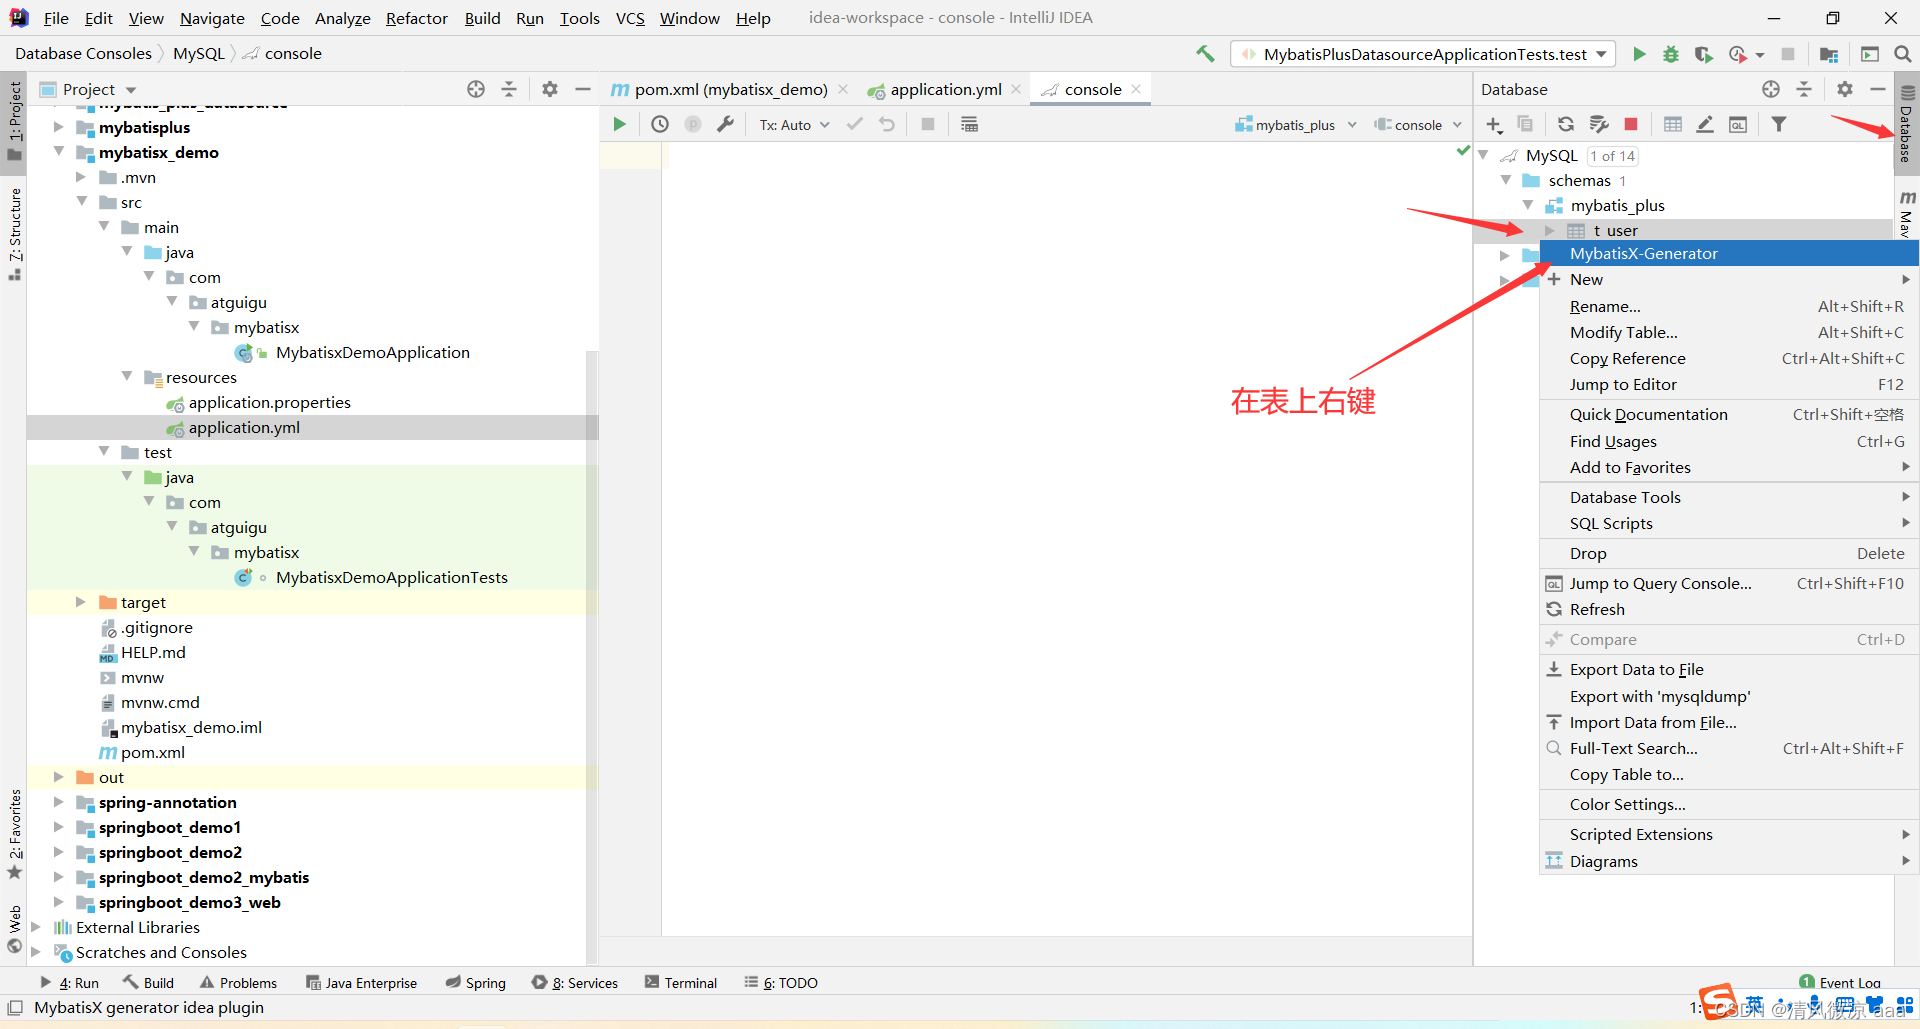
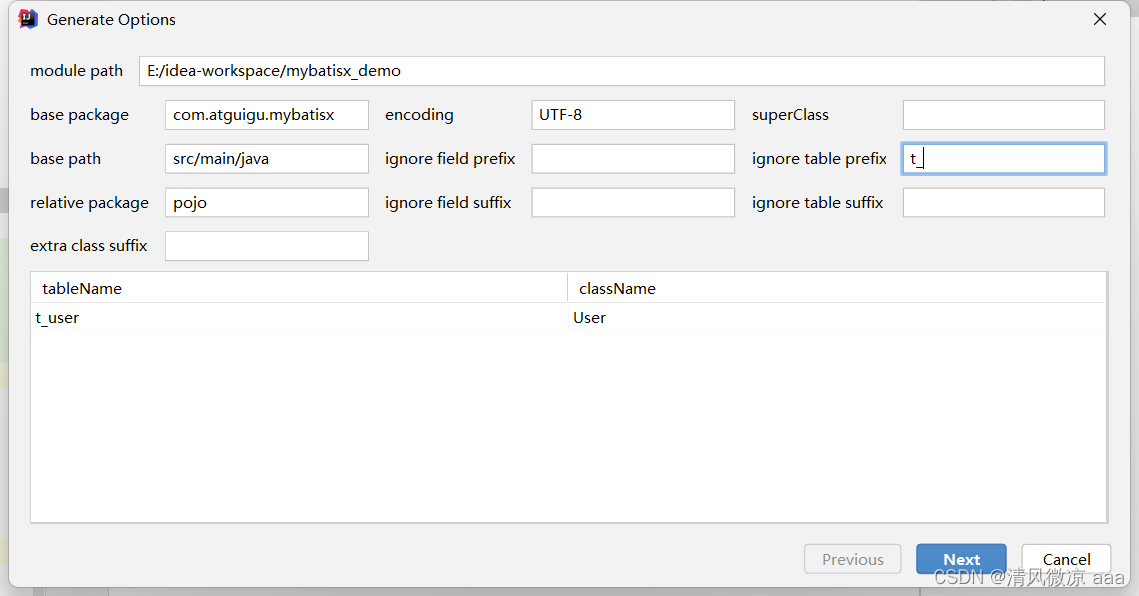
代码生成:连接数据库后,在表上右键选择 MybatisX-Generator,可快速生成实体类、Mapper、Service 等全套代码,比官方生成器更加图形化、便捷。
-
智能 CRUD 生成:在 Mapper 接口中,根据方法名自动生成对应的 SQL 代码(类似于 JPA)。
// 输入方法名后,Alt+Enter 可根据方法名快速生成SQL
int deleteByUidAndUserName(@Param("uid") Long uid, @Param("userName") String userName);
List<User> selectAllOrderByAgeDesc();
通过以上十个部分的系统学习,你可以全面掌握 MyBatis-Plus 在 Spring Boot 项目中的核心用法,从基础配置、CRUD 操作到高级特性如插件、多数据源管理,再到借助 MyBatisX 插件提升开发效率,构建出高效、健壮的数据库/中间件访问层。MyBatis-Plus 真正做到了简化开发而不失强大,是现代 Java 后端开发的优选持久层框架。
 发表于 2025-12-27 11:07:43
|
查看: 243|
回复: 0
发表于 2025-12-27 11:07:43
|
查看: 243|
回复: 0