哈喽各位JS学习者!前面我们吃透了DOM操作、BOM特性和事件机制三大核心,今天就用12个经典案例实战落地,把知识点串起来灵活运用。
所有案例均采用代码分步拆解,先讲思路再写实现,每步都标注清晰,方便你截图演示效果。案例覆盖基础交互、动画效果、业务场景,既能巩固知识点,又能直接复用在项目中~
一、基础交互类案例(巩固DOM事件核心)
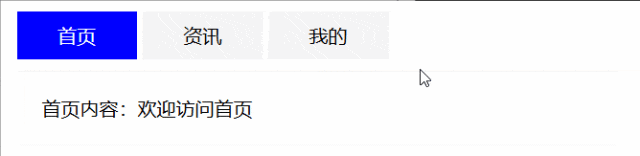
案例1:Tab切换(网页高频交互组件)
1. 思路分析
核心逻辑:通过“点击事件”切换Tab标题和对应内容的显示状态。
① 给所有Tab标题绑定点击事件;
② 点击时移除所有标题的“激活样式”,给当前点击标题添加;
③ 隐藏所有Tab内容,显示与当前标题对应的内容;
④ 利用索引关联标题和内容,确保一一对应。
2. 代码实现
<!DOCTYPE html>
<html lang="zh-CN">
<head>
<meta charset="UTF-8">
<title>Tab切换案例</title>
<style>
 * { margin: 0; padding: 0; list-style: none; }
 .tab-container { width: 500px; margin: 30px auto; }
 .tab-titles { overflow: hidden; }
 .tab-title { float: left; width: 100px; height: 40px; line-height: 40px; text-align: center; background: #f5f5f5; cursor: pointer; margin-right: 5px; }
 .tab-title.active { background: blue; color: white; }
 .tab-contents { margin-top: 10px; border: 1px solid #f5f5f5; padding: 20px; }
 .tab-content { display: none; }
 .tab-content.show { display: block; }
</style>
</head>
<body>
<div class="tab-container">
  <ul class="tab-titles" id="tabTitles">
    <li class="tab-title active">首页</li>
    <li class="tab-title">资讯</li>
    <li class="tab-title">我的</li>
  </ul>
  <div class="tab-contents" id="tabContents">
    <div class="tab-content show">首页内容:欢迎访问首页</div>
    <div class="tab-content">资讯内容:最新行业资讯更新啦</div>
    <div class="tab-content">我的内容:个人中心数据</div>
  </div>
</div>
<script>
  // 1. 获取元素
  var tabTitles = document.getElementById("tabTitles").getElementsByTagName("li");
  var tabContents = document.getElementById("tabContents").getElementsByClassName("tab-content");
  // 2. 遍历标题,绑定点击事件
  for (var i = 0; i < tabTitles.length; i++) {
    // 给每个标题存索引,用于关联内容
    tabTitles[i].index = i;
    tabTitles[i].onclick = function() {
      // 3. 重置所有标题样式和内容显示
      for (var j = 0; j < tabTitles.length; j++) {
        tabTitles[j].className = "tab-title";
        tabContents[j].className = "tab-content";
      }
      // 4. 给当前点击标题和对应内容添加激活状态
      this.className = "tab-title active";
      tabContents[this.index].className = "tab-content show";
    }
  }
</script>
</body>
</html>
3. 效果说明
点击不同Tab标题,标题背景色切换为蓝色,对应内容显示,其他内容隐藏,是网页导航、详情页常见组件,核心用到“事件绑定、DOM样式操作、索引关联”知识点。
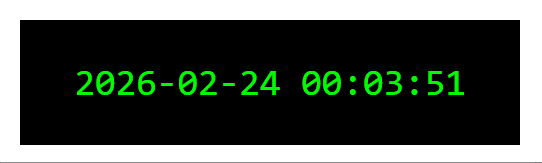
案例2:电子时钟(BOM时间+DOM实时更新)
1. 思路分析
核心逻辑:利用BOM的Date对象获取当前时间,通过定时器实时更新DOM内容。
① 定义函数,获取年、月、日、时、分、秒;
② 处理时间格式(不足两位数补0);
③ 把格式化后的时间插入DOM元素;
④ 用setInterval定时器每秒执行一次函数,实现实时刷新。
2. 代码实现
<!DOCTYPE html>
<html lang="zh-CN">
<head>
<meta charset="UTF-8">
<title>电子时钟案例</title>
<style>
  .clock { width: 400px; height: 100px; line-height: 100px; text-align: center; margin: 50px auto; background: #000; color: #0f0; font-size: 30px; font-family: "Consolas"; }
</style>
</head>
<body>
<div class="clock" id="clock"></div>
<script>
  var clock = document.getElementById("clock");
  // 格式化时间:不足两位数补0
  function formatNum(num) {
    return num < 10 ? "0" + num : num;
  }
  // 获取并更新时间
  function updateClock() {
    var date = new Date(); // 获取当前时间
    var year = date.getFullYear();
    var month = formatNum(date.getMonth() + 1); // 月份从0开始,需+1
    var day = formatNum(date.getDate());
    var hour = formatNum(date.getHours());
    var minute = formatNum(date.getMinutes());
    var second = formatNum(date.getSeconds());
    // 拼接时间字符串
    var timeStr = year + "-" + month + "-" + day + " " + hour + ":" + minute + ":" + second;
    clock.innerText = timeStr;
  }
  // 页面加载时立即执行一次,避免空白
  updateClock();
  // 每秒更新一次
  setInterval(updateClock, 1000);
</script>
</body>
</html>
3. 效果说明
黑色背景盒子中显示绿色数字时间,每秒自动刷新,时间格式规范(两位数),核心用到“Date对象、定时器、DOM文本操作”知识点,可拓展为日历组件。
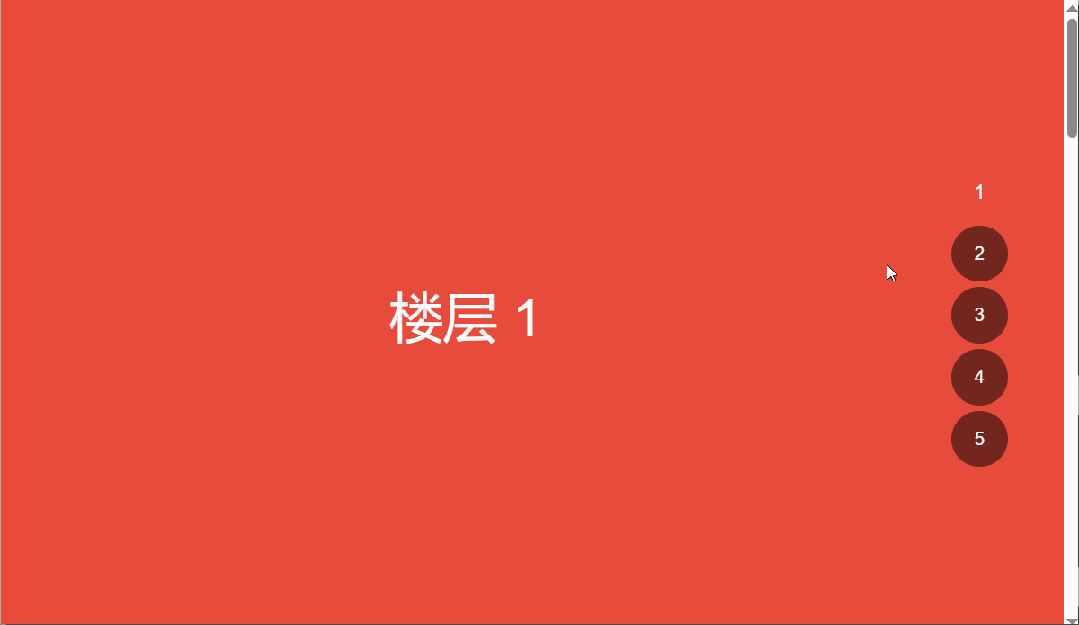
案例3:楼层跳转(BOM滚动+DOM事件)
1. 思路分析
核心逻辑:点击楼层导航,页面平滑滚动到对应楼层;滚动页面时,导航同步高亮。
① 给每个导航项绑定点击事件,获取对应楼层的偏移量;
② 用定时器实现平滑滚动(而非瞬间跳转);
③ 监听页面滚动事件,判断当前可视区域的楼层,同步更新导航激活状态。
2. 代码实现
<!DOCTYPE html>
<html lang="zh-CN">
<head>
  <meta charset="UTF-8">
  <meta name="viewport" content="width=device-width, initial-scale=1.0">
  <title>楼层跳转案例</title>
  <style>
    * {
      margin: 0;
      padding: 0;
      box-sizing: border-box;
    }
    body {
      font-family: Arial, sans-serif;
    }
    /* 楼层样式 */
    .floor {
      height: 100vh;
      display: flex;
      justify-content: center;
      align-items: center;
      font-size: 3rem;
      color: white;
    }
    #floor1 { background-color: #e74c3c; }
    #floor2 { background-color: #3498db; }
    #floor3 { background-color: #2ecc71; }
    #floor4 { background-color: #f39c12; }
    #floor5 { background-color: #9b59b6; }
    /* 侧边导航样式 */
    .floor-nav {
      position: fixed;
      right: 50px;
      top: 50%;
      transform: translateY(-50%);
      list-style: none;
      z-index: 999;
    }
    .floor-nav li {
      width: 50px;
      height: 50px;
      line-height: 50px;
      text-align: center;
      background-color: rgba(0, 0, 0, 0.5);
      color: white;
      margin: 5px 0;
      cursor: pointer;
      border-radius: 50%;
      transition: all 0.3s;
    }
    .floor-nav li:hover, .floor-nav li.active {
      background-color: #e74c3c;
      transform: scale(1.1);
    }
    /* 回到顶部按钮 */
    .back-top {
      position: fixed;
      right: 50px;
      bottom: 50px;
      width: 50px;
      height: 50px;
      line-height: 50px;
      text-align: center;
      background-color: rgba(0, 0, 0, 0.5);
      color: white;
      border-radius: 50%;
      cursor: pointer;
      display: none;
      transition: all 0.3s;
    }
    .back-top:hover {
      background-color: #e74c3c;
    }
  </style>
</head>
<body>
  <!-- 楼层区域 -->
  <div id="floor1" class="floor">楼层 1</div>
  <div id="floor2" class="floor">楼层 2</div>
  <div id="floor3" class="floor">楼层 3</div>
  <div id="floor4" class="floor">楼层 4</div>
  <div id="floor5" class="floor">楼层 5</div>
  <!-- 楼层导航 -->
  <ul class="floor-nav">
    <li data-floor="floor1" class="active">1</li>
    <li data-floor="floor2">2</li>
    <li data-floor="floor3">3</li>
    <li data-floor="floor4">4</li>
    <li data-floor="floor5">5</li>
  </ul>
  <!-- 回到顶部 -->
  <div class="back-top">↑</div>
  <script>
    // 1. 获取DOM元素
    const floorNav = document.querySelector('.floor-nav');
    const navItems = floorNav.querySelectorAll('li');
    const backTopBtn = document.querySelector('.back-top');
    const floors = document.querySelectorAll('.floor');
    // 2. 点击导航项跳转到对应楼层
    navItems.forEach(item => {
      item.addEventListener('click', function() {
        // 移除所有active类
        navItems.forEach(li => li.classList.remove('active'));
        // 给当前点击项添加active类
        this.classList.add('active');

        // 获取目标楼层ID
        const targetId = this.dataset.floor;
        const targetFloor = document.getElementById(targetId);

        // 平滑滚动到目标楼层
        targetFloor.scrollIntoView({
          behavior: 'smooth', // 平滑滚动
          block: 'start'      // 对齐到顶部
        });
      });
    });
    // 3. 监听滚动事件,更新导航高亮
    window.addEventListener('scroll', function() {
      // 获取当前滚动的距离
      const scrollTop = window.pageYOffset || document.documentElement.scrollTop;

      // 显示/隐藏回到顶部按钮
      backTopBtn.style.display = scrollTop > 300 ? 'block' : 'none';

      // 遍历所有楼层,判断当前可视区域的楼层
      floors.forEach((floor, index) => {
        // 获取楼层的顶部位置和高度
        const floorTop = floor.offsetTop;
        const floorHeight = floor.offsetHeight;
        // 当滚动距离超过当前楼层顶部,且未超过下一楼层顶部时,高亮对应导航
        if (scrollTop >= floorTop - 100 && scrollTop < floorTop + floorHeight - 100) {
          navItems.forEach(li => li.classList.remove('active'));
          navItems[index].classList.add('active');
        }
      });
    });
    // 4. 回到顶部功能
    backTopBtn.addEventListener('click', function() {
      // 平滑滚动到页面顶部
      window.scrollTo({
        top: 0,
        behavior: 'smooth'
      });
    });
  </script>
</body>
</html>
3. 效果说明
左侧固定导航,点击对应楼层可平滑滚动到目标位置,导航项高亮;滚动页面时,当前可视楼层对应的导航项自动高亮,核心用到“scroll事件、offsetTop、定时器平滑滚动”知识点,是电商网站常见功能。
二、动画效果类案例(强化事件与定时器)
案例4:轮播图(自动+手动切换,网页核心组件)
1. 思路分析
核心逻辑:结合定时器自动切换和点击事件手动切换,同步更新指示器。
① 准备轮播图片、左右箭头、指示器;
② 用定时器实现自动轮播(切换图片索引,更新显示);
③ 给左右箭头绑定点击事件,切换上一张/下一张;
④ 给指示器绑定点击事件,跳转到对应图片;
⑤ 处理边界(第一张前跳最后一张,最后一张后跳第一张)。
2. 代码实现
<!DOCTYPE html>
<html lang="zh-CN">
<head>
<meta charset="UTF-8">
<title>轮播图案例</title>
<style>
 * { margin: 0; padding: 0; list-style: none; }
 .carousel-container { width: 600px; height: 400px; margin: 50px auto; position: relative; overflow: hidden; }
 .carousel-list { width: 3000px; height: 400px; position: absolute; left: 0; top: 0; }
 .carousel-item { float: left; width: 600px; height: 400px; }
 .carousel-item img { width: 100%; height: 100%; }
 .arrow { position: absolute; top: 50%; transform: translateY(-50%); width: 40px; height: 40px; line-height: 40px; text-align: center; background: rgba(0,0,0,0.5); color: white; font-size: 20px; cursor: pointer; z-index: 10; }
 .arrow-left { left: 10px; }
 .arrow-right { right: 10px; }
 .indicator { position: absolute; bottom: 20px; left: 50%; transform: translateX(-50%); z-index: 10; }
 .indicator-item { float: left; width: 12px; height: 12px; border-radius: 50%; background: white; margin: 0 5px; cursor: pointer; }
 .indicator-item.active { background: #f00; }
</style>
</head>
<body>
<div class="carousel-container" id="carousel">
  <ul class="carousel-list" id="carouselList">
    <li class="carousel-item"><img src="https://picsum.photos/id/1/600/400" alt="轮播图1"></li>
    <li class="carousel-item"><img src="https://picsum.photos/id/24/600/400" alt="轮播图2"></li>
    <li class="carousel-item"><img src="https://picsum.photos/id/96/600/400" alt="轮播图3"></li>
    <li class="carousel-item"><img src="https://picsum.photos/id/160/600/400" alt="轮播图4"></li>
  </ul>
  <div class="arrow arrow-left" id="arrowLeft"><</div>
  <div class="arrow arrow-right" id="arrowRight">></div>
  <div class="indicator" id="indicator">
    <div class="indicator-item active"></div>
    <div class="indicator-item"></div>
    <div class="indicator-item"></div>
    <div class="indicator-item"></div>
  </div>
</div>
<script>
  var carouselList = document.getElementById("carouselList");
  var arrowLeft = document.getElementById("arrowLeft");
  var arrowRight = document.getElementById("arrowRight");
  var indicators = document.getElementById("indicator").getElementsByClassName("indicator-item");
  var itemWidth = 600; // 每张图片宽度
  var currentIndex = 0; // 当前轮播索引
  var timer = null;
  // 更新轮播图和指示器状态
  function updateCarousel() {
    // 移动图片列表
    carouselList.style.left = -currentIndex * itemWidth + "px";
    // 更新指示器
    for (var i = 0; i < indicators.length; i++) {
      indicators[i].className = "indicator-item";
    }
    indicators[currentIndex].className = "indicator-item active";
  }
  // 自动轮播
  function autoCarousel() {
    timer = setInterval(function() {
      currentIndex++;
      // 边界处理:最后一张后跳第一张
      if (currentIndex >= indicators.length) {
        currentIndex = 0;
      }
      updateCarousel();
    }, 3000);
  }
  // 左侧箭头:上一张
  arrowLeft.onclick = function() {
    currentIndex--;
    if (currentIndex < 0) {
      currentIndex = indicators.length - 1;
    }
    updateCarousel();
  }
  // 右侧箭头:下一张
  arrowRight.onclick = function() {
    currentIndex++;
    if (currentIndex >= indicators.length) {
      currentIndex = 0;
    }
    updateCarousel();
  }
  // 指示器点击:跳转到对应图片
  for (var i = 0; i < indicators.length; i++) {
    indicators[i].index = i;
    indicators[i].onclick = function() {
      currentIndex = this.index;
      updateCarousel();
    }
  }
  // 鼠标移入暂停,移出继续
  document.getElementById("carousel").onmouseover = function() {
    clearInterval(timer);
  }
  document.getElementById("carousel").onmouseout = function() {
    autoCarousel();
  }
  // 初始化自动轮播
  autoCarousel();
</script>
</body>
</html>
3. 效果说明
轮播图自动切换(3秒/张),鼠标移入暂停、移出继续;点击左右箭头切换上下张,点击指示器圆点跳转到对应图片,同步高亮指示器,核心用到“定时器、click事件、DOM样式操作、边界处理”知识点,是网页必掌握组件。
案例5:拖拽盒子(事件对象+鼠标事件综合)
1. 思路分析
核心逻辑:监听鼠标按下、移动、松开事件,计算盒子位置实现拖拽。
① 鼠标按下(mousedown):记录盒子初始位置和鼠标相对盒子的偏移量,标记拖拽状态;
② 鼠标移动(mousemove):若处于拖拽状态,计算盒子新位置(鼠标页面坐标 - 偏移量),更新盒子样式;
③ 鼠标松开(mouseup):取消拖拽状态,停止盒子移动。
2. 代码实现
<!DOCTYPE html>
<html lang="zh-CN">
<head>
<meta charset="UTF-8">
<title>拖拽盒子案例</title>
<style>
  .box { width: 100px; height: 100px; background: red; position: absolute; cursor: move; }
</style>
</head>
<body>
<div class="box" id="box"></div>
<script>
  var box = document.getElementById("box");
  var isDrag = false; // 拖拽状态标记
  var offsetX = 0; // 鼠标相对盒子左侧偏移量
  var offsetY = 0; // 鼠标相对盒子顶部偏移量
  // 鼠标按下:开启拖拽,记录偏移量
  box.onmousedown = function(e) {
    isDrag = true;
    // 偏移量 = 鼠标页面坐标 - 盒子偏移量
    offsetX = e.pageX - box.offsetLeft;
    offsetY = e.pageY - box.offsetTop;
    box.style.cursor = "grabbing";
  }
  // 鼠标移动:更新盒子位置
  document.onmousemove = function(e) {
    if (!isDrag) return; // 非拖拽状态不执行
    // 盒子新位置 = 鼠标页面坐标 - 偏移量
    var left = e.pageX - offsetX;
    var top = e.pageY - offsetY;
    // 限制盒子不出可视区域
    left = Math.max(0, Math.min(left, document.documentElement.clientWidth - box.offsetWidth));
    top = Math.max(0, Math.min(top, document.documentElement.clientHeight - box.offsetHeight));
    box.style.left = left + "px";
    box.style.top = top + "px";
  }
  // 鼠标松开:关闭拖拽
  document.onmouseup = function() {
    isDrag = false;
    box.style.cursor = "move";
  }
</script>
</body>
</html>
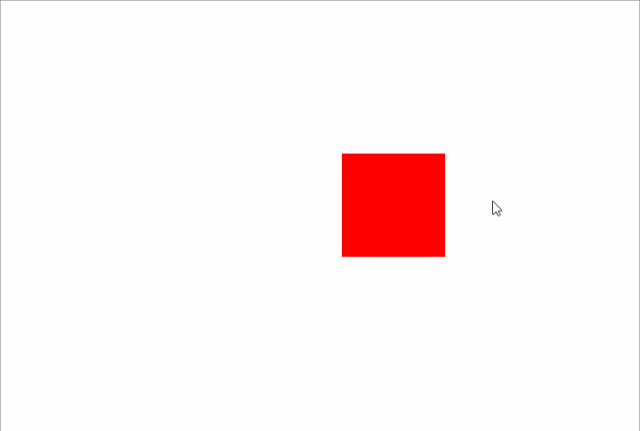
3. 效果说明
鼠标按住红色盒子可自由拖拽,松开鼠标停止移动,盒子被限制在浏览器可视区域内,不会超出边界,核心用到“事件对象(pageX/pageY)、鼠标事件、拖拽状态管理”知识点,可拓展为弹窗拖拽功能。
案例6:进度条动画(定时器+DOM样式)
1. 思路分析
核心逻辑:用定时器逐步增加进度条宽度,模拟加载效果。
① 准备进度条容器和进度条本体;
② 定义进度值(初始为0);
③ 用定时器每秒增加进度值,同步更新进度条宽度;
④ 进度达到100%时,清除定时器,显示加载完成提示。
2. 代码实现
<!DOCTYPE html>
<html lang="zh-CN">
<head>
<meta charset="UTF-8">
<title>进度条动画案例</title>
<style>
  .progress-container { width: 500px; height: 30px; border: 1px solid #ccc; margin: 50px auto; border-radius: 15px; overflow: hidden; }
  .progress-bar { width: 0%; height: 100%; background: blue; transition: width 0.3s ease; }
  .tips { text-align: center; font-size: 20px; margin-top: 20px; color: #666; }
</style>
</head>
<body>
<div class="progress-container">
  <div class="progress-bar" id="progressBar"></div>
</div>
<div class="tips" id="tips">加载中...0%</div>
<script>
  var progressBar = document.getElementById("progressBar");
  var tips = document.getElementById("tips");
  var progress = 0; // 初始进度
  var timer = setInterval(function() {
    progress += 1;
    // 更新进度条和提示
    progressBar.style.width = progress + "%";
    tips.innerText = "加载中..." + progress + "%";
    // 进度满了停止
    if (progress >= 100) {
      clearInterval(timer);
      tips.innerText = "加载完成!";
      progressBar.style.background = "green";
    }
  }, 50); // 每50毫秒更新一次,模拟快速加载
</script>
</body>
</html>
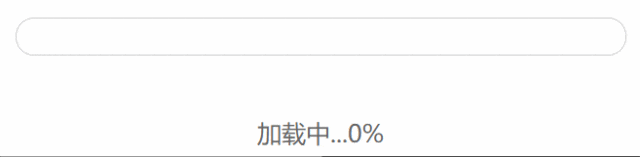
3. 效果说明
蓝色进度条从左到右逐步填充,同步显示加载百分比,进度达到100%后变为绿色,提示加载完成,核心用到“定时器、DOM样式操作、进度值管理”知识点,可用于页面加载、文件上传场景。
三、游戏类案例(综合运用BOM+DOM+事件)
案例7:贪吃蛇(经典游戏,全知识点覆盖)
1. 思路分析
核心逻辑:用DOM创建蛇身和食物,通过键盘事件控制方向,定时器移动蛇身,判断碰撞逻辑。
① 定义蛇身(数组存储每个节点)、方向、食物位置;
② 用定时器让蛇每秒移动一次(删除尾部节点,在头部添加新节点);
③ 键盘事件控制蛇的移动方向(上下左右);
④ 随机生成食物位置,蛇吃到食物后不删除尾部(实现增长);
⑤ 判断碰撞(撞墙、撞自身),游戏结束。
2. 代码实现
<!DOCTYPE html>
<html lang="zh-CN">
<head>
<meta charset="UTF-8">
<title>贪吃蛇案例</title>
<style>
  .game-container { width: 400px; height: 400px; border: 2px solid #000; margin: 50px auto; position: relative; background-color: #f5f5f5; /* 增加背景色,更清晰 */ }
  .snake-body { width: 20px; height: 20px; background: green; position: absolute; box-sizing: border-box; /* 防止边框影响尺寸 */ }
  .food { width: 20px; height: 20px; background: red; position: absolute; border-radius: 50%; /* 食物改为圆形,区分蛇身 */ box-sizing: border-box; }
  .score { text-align: center; font-size: 20px; margin-top: 20px; font-weight: bold; }
</style>
</head>
<body>
<div class="score">得分:<span id="score">0</span></div>
<div class="game-container" id="gameContainer"></div>
<script>
  var gameContainer = document.getElementById("gameContainer");
  var scoreEle = document.getElementById("score");
  var snake = []; // 蛇身数组,存储每个节点元素
  var direction = "right"; // 初始方向
  var score = 0;
  var cellSize = 20; // 每个格子大小
  var timer = null;
  // 游戏容器的实际可移动范围(避免边界误差)
  var maxX = (gameContainer.offsetWidth / cellSize) - 1;
  var maxY = (gameContainer.offsetHeight / cellSize) - 1;
  // 初始化蛇(3个节点)
  function initSnake() {
    // 先清空可能残留的蛇身(重置时用)
    snake.forEach(item => gameContainer.removeChild(item));
    snake = [];

    for (var i = 0; i < 3; i++) {
      var body = document.createElement("div");
      body.className = "snake-body";
      // 初始位置:从左到右排列,x轴递减(蛇头在最右侧)
      body.style.left = (2 - i) * cellSize + "px";
      body.style.top = 0 + "px";
      gameContainer.appendChild(body);
      snake.push(body);
    }
  }
  // 生成食物(修复:确保食物不重复生成、避免空指针)
  function createFood() {
    // 先移除已存在的食物
    var oldFood = document.querySelector(".food");
    if (oldFood) {
      gameContainer.removeChild(oldFood);
    }
    var x, y;
    var isOverlap; // 标记是否与蛇身重叠
    do {
      isOverlap = false;
      // 随机生成格子坐标(确保是cellSize的整数倍)
      x = Math.floor(Math.random() * (maxX + 1)) * cellSize;
      y = Math.floor(Math.random() * (maxY + 1)) * cellSize;

      // 检查是否与蛇身重叠
      for (var i = 0; i < snake.length; i++) {
        if (snake[i].offsetLeft === x && snake[i].offsetTop === y) {
          isOverlap = true;
          break;
        }
      }
    } while (isOverlap); // 重叠则重新生成
    // 创建新食物
    var food = document.createElement("div");
    food.className = "food";
    food.style.left = x + "px";
    food.style.top = y + "px";
    gameContainer.appendChild(food);
  }
  // 移动蛇(修复:边界判断、空指针问题)
  function moveSnake() {
    // 获取蛇头位置
    var headX = snake[0].offsetLeft;
    var headY = snake[0].offsetTop;
    // 根据方向计算新蛇头位置
    switch(direction) {
      case "right": headX += cellSize; break;
      case "left": headX -= cellSize; break;
      case "up": headY -= cellSize; break;
      case "down": headY += cellSize; break;
    }
    // 创建新蛇头
    var newHead = document.createElement("div");
    newHead.className = "snake-body";
    newHead.style.left = headX + "px";
    newHead.style.top = headY + "px";
    gameContainer.appendChild(newHead);
    snake.unshift(newHead);
    // 判断是否吃到食物(先检查食物是否存在)
    var food = document.querySelector(".food");
    if (food && headX === food.offsetLeft && headY === food.offsetTop) {
      // 吃到食物,加分且不删除尾部
      score += 10;
      scoreEle.innerText = score;
      createFood(); // 重新生成食物
    } else {
      // 没吃到食物,删除尾部节点
      var tail = snake.pop();
      gameContainer.removeChild(tail);
    }
    // 判断碰撞(撞墙):修复边界判断逻辑
    if (headX < 0 || headX > maxX * cellSize || headY < 0 || headY > maxY * cellSize) {
      gameOver();
      return; // 终止本次移动,避免后续判断
    }
    // 判断碰撞(撞自身)
    for (var i = 1; i < snake.length; i++) {
      if (headX === snake[i].offsetLeft && headY === snake[i].offsetTop) {
        gameOver();
        return;
      }
    }
  }
  // 键盘控制方向(修复:兼容key和keyCode,防止快速按键导致方向反转)
  document.addEventListener("keydown", function(e) {
    // 阻止默认行为(比如页面滚动)
    e.preventDefault();
    var newDir;
    switch(e.keyCode || e.key) {
      case 37: case "ArrowLeft": newDir = "left"; break;
      case 38: case "ArrowUp": newDir = "up"; break;
      case 39: case "ArrowRight": newDir = "right"; break;
      case 40: case "ArrowDown": newDir = "down"; break;
      default: return; // 非方向键不处理
    }
    // 阻止方向反转(如向右时不能直接向左)
    var opposite = {
      left: "right",
      right: "left",
      up: "down",
      down: "up"
    };
    if (newDir !== opposite[direction]) {
      direction = newDir;
    }
  });
  // 游戏结束(优化:重置更友好)
  function gameOver() {
    clearInterval(timer);
    if (confirm(`游戏结束!最终得分:${score}\n是否重新开始游戏?`)) {
      // 重置游戏
      score = 0;
      scoreEle.innerText = score;
      direction = "right";
      initSnake();
      createFood();
      timer = setInterval(moveSnake, 200);
    } else {
      // 不重新开始,停止游戏
      snake.forEach(item => item.style.backgroundColor = "gray");
    }
  }
  // 初始化游戏
  initSnake();
  createFood();
  timer = setInterval(moveSnake, 200); // 200毫秒移动一次
</script>
</body>
</html>
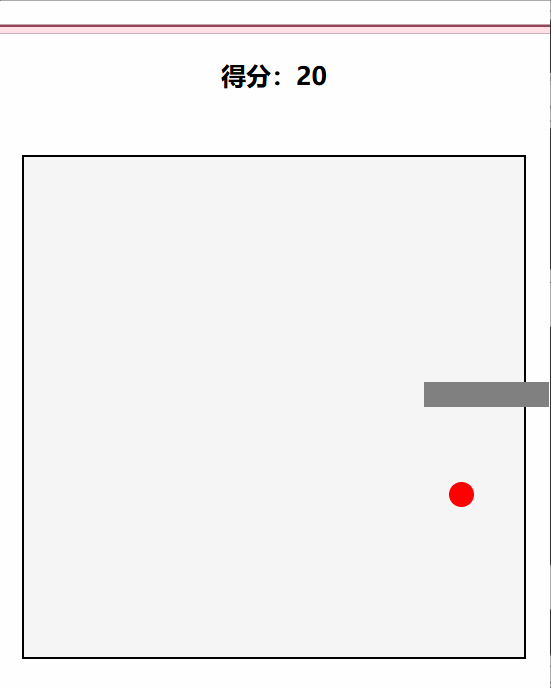
3. 效果说明
绿色蛇身在黑色容器内移动,红色食物随机生成,按方向键控制蛇的移动方向,蛇吃到食物后增长,得分增加;撞到容器边界或自身时游戏结束,弹出最终得分,核心覆盖“键盘事件、定时器、DOM增删、碰撞判断”所有知识点。
案例8:打砖块(鼠标/键盘控制,物理碰撞模拟)
1. 思路分析
核心逻辑: 控制挡板接球,撞击砖块消除,模拟物理碰撞。
① 创建对象:初始化游戏场景,创建挡板、小球、砖块矩阵等核心对象。
② 控制挡板:绑定鼠标移动事件(或键盘事件),实时监听鼠标位置,控制挡板在水平方向左右移动。
③ 小球运动与碰撞检测:使用定时器(如 requestAnimationFrame 或 setInterval)控制小球的连续移动。在每一帧中,判断小球是否发生碰撞:
• 撞挡板:检测小球底部是否与挡板顶部接触,接触则反弹。
• 撞边界:检测小球是否碰到画布的左、右、上三面墙壁,碰到则反弹。
• 撞砖块:遍历砖块矩阵,检测小球是否与砖块发生碰撞,碰撞后处理消除逻辑。
④ 消除与胜利:小球撞击砖块后,将对应砖块标记为不可见(消除),小球反弹。当所有砖块都被消除时,判定游戏胜利。
⑤ 失败判定:判断小球是否落到画布底部(即挡板下方),如果小球落地,则判定游戏失败。
2. 代码实现
<!DOCTYPE html>
<html lang="zh-CN">
<head>
  <meta charset="UTF-8">
  <meta name="viewport" content="width=device-width, initial-scale=1.0">
  <title>打砖块游戏</title>
  <style>
    body {
      margin: 0;
      padding: 20px;
      display: flex;
      justify-content: center;
      align-items: center;
      min-height: 100vh;
      background: linear-gradient(135deg, #1a1a2e, #16213e);
      font-family: Arial, sans-serif;
    }

    .game-container {
      text-align: center;
      background: rgba(0, 0, 0, 0.3);
      padding: 20px;
      border-radius: 10px;
      box-shadow: 0 0 20px rgba(0, 0, 0, 0.5);
    }

    h1 {
      color: #fff;
      margin-bottom: 10px;
    }

    .game-info {
      display: flex;
      justify-content: space-between;
      width: 600px;
      margin: 0 auto 20px;
      color: #fff;
      font-size: 18px;
    }

    #canvas {
      background: #000;
      border: 2px solid #fff;
      border-radius: 5px;
      display: block;
      margin: 0 auto;
    }

    .controls {
      margin-top: 20px;
      color: #fff;
    }

    button {
      background: #4CAF50;
      color: white;
      border: none;
      padding: 10px 20px;
      font-size: 16px;
      border-radius: 5px;
      cursor: pointer;
      margin: 0 10px;
      transition: background 0.3s;
    }

    button:hover {
      background: #45a049;
    }

    .game-over {
      position: absolute;
      top: 50%;
      left: 50%;
      transform: translate(-50%, -50%);
      background: rgba(0, 0, 0, 0.8);
      color: white;
      padding: 30px;
      border-radius: 10px;
      text-align: center;
      display: none;
    }
  </style>
</head>
<body>
  <div class="game-container">
    <h1>打砖块游戏</h1>
    <div class="game-info">
      <div>分数: <span id="score">0</span></div>
      <div>生命: <span id="lives">3</span></div>
      <div>关卡: <span id="level">1</span></div>
    </div>
    <canvas id="canvas" width="600" height="400"></canvas>
    <div class="controls">
      <button onclick="moveLeft()">← 左移</button>
      <button onclick="moveRight()">右移 →</button>
      <button onclick="startGame()">开始游戏</button>
      <button onclick="resetGame()">重新开始</button>
    </div>
  </div>
  <div id="gameOver" class="game-over">
    <h2 id="gameResult"></h2>
    <p>最终分数: <span id="finalScore">0</span></p>
    <button onclick="resetGame()">再玩一次</button>
  </div>
  <script>
    const canvas = document.getElementById('canvas');
    const ctx = canvas.getContext('2d');
    const scoreElement = document.getElementById('score');
    const livesElement = document.getElementById('lives');
    const levelElement = document.getElementById('level');
    const gameOverElement = document.getElementById('gameOver');
    const gameResultElement = document.getElementById('gameResult');
    const finalScoreElement = document.getElementById('finalScore');
    // 游戏变量
    let score = 0;
    let lives = 3;
    let level = 1;
    let gameRunning = false;
    let animationId;
    // 挡板属性
    const paddle = {
      width: 100,
      height: 15,
      x: canvas.width / 2 - 50,
      y: canvas.height - 30,
      speed: 8,
      dx: 0
    };
    // 球属性
    const ball = {
      x: canvas.width / 2,
      y: canvas.height - 50,
      radius: 8,
      speed: 4,
      dx: 4 * (Math.random() > 0.5 ? 1 : -1),
      dy: -4
    };
    // 砖块属性
    const brick = {
      row: 5,
      col: 10,
      width: 55,
      height: 20,
      padding: 5,
      offsetTop: 50,
      offsetLeft: 20,
      color: '#FF5252'
    };
    let bricks = [];
    // 初始化砖块
    function initBricks() {
      bricks = [];
      for (let r = 0; r < brick.row; r++) {
        bricks[r] = [];
        for (let c = 0; c < brick.col; c++) {
          bricks[r][c] = {
            x: c * (brick.width + brick.padding) + brick.offsetLeft,
            y: r * (brick.height + brick.padding) + brick.offsetTop,
            status: 1,
            // 不同行的颜色
            color: r === 0 ? '#FF5252' :
                   r === 1 ? '#FF9800' :
                   r === 2 ? '#FFEB3B' :
                   r === 3 ? '#8BC34A' : '#2196F3'
          };
        }
      }
    }
    // 绘制挡板
    function drawPaddle() {
      ctx.beginPath();
      ctx.rect(paddle.x, paddle.y, paddle.width, paddle.height);
      ctx.fillStyle = '#4CAF50';
      ctx.fill();
      ctx.closePath();
    }
    // 绘制球
    function drawBall() {
      ctx.beginPath();
      ctx.arc(ball.x, ball.y, ball.radius, 0, Math.PI * 2);
      ctx.fillStyle = '#fff';
      ctx.fill();
      ctx.closePath();
    }
    // 绘制砖块
    function drawBricks() {
      for (let r = 0; r < brick.row; r++) {
        for (let c = 0; c < brick.col; c++) {
          if (bricks[r][c].status === 1) {
            ctx.beginPath();
            ctx.rect(bricks[r][c].x, bricks[r][c].y, brick.width, brick.height);
            ctx.fillStyle = bricks[r][c].color;
            ctx.fill();
            ctx.closePath();
          }
        }
      }
    }
    // 碰撞检测
    function collisionDetection() {
      // 检测与砖块的碰撞
      for (let r = 0; r < brick.row; r++) {
        for (let c = 0; c < brick.col; c++) {
          const b = bricks[r][c];
          if (b.status === 1) {
            if (ball.x + ball.radius > b.x &&
                ball.x - ball.radius < b.x + brick.width &&
                ball.y + ball.radius > b.y &&
                ball.y - ball.radius < b.y + brick.height) {

              ball.dy = -ball.dy;
              b.status = 0;
              score += 10;
              scoreElement.textContent = score;

              // 检查是否所有砖块都被击碎
              if (score === brick.row * brick.col * 10) {
                levelUp();
              }
            }
          }
        }
      }
      // 检测与墙壁的碰撞
      if (ball.x + ball.radius > canvas.width || ball.x - ball.radius < 0) {
        ball.dx = -ball.dx;
      }

      if (ball.y - ball.radius < 0) {
        ball.dy = -ball.dy;
      }

      // 修正:检测与挡板的碰撞
      // 只有当球在挡板范围内且从上方接近挡板时才反弹
      if (ball.y + ball.radius > paddle.y &&
          ball.y - ball.radius < paddle.y + paddle.height &&
          ball.x > paddle.x &&
          ball.x < paddle.x + paddle.width) {

        // 确保球是从上方接近挡板的
        if (ball.dy > 0) {
          // 根据击中挡板的位置改变反弹角度
          const hitPos = (ball.x - paddle.x) / paddle.width;
          ball.dx = 8 * (hitPos - 0.5);
          ball.dy = -Math.abs(ball.dy); // 确保总是向上反弹
        }
      }

      // 球落到底部
      if (ball.y + ball.radius > canvas.height) {
        lives--;
        livesElement.textContent = lives;

        if (lives <= 0) {
          gameOver(false);
        } else {
          resetBall();
        }
      }
    }
    // 升级关卡
    function levelUp() {
      level++;
      levelElement.textContent = level;
      ball.speed += 0.5;
      resetBall();
      initBricks();
    }
    // 重置球的位置
    function resetBall() {
      ball.x = canvas.width / 2;
      ball.y = canvas.height - 50;
      ball.dx = ball.speed * (Math.random() > 0.5 ? 1 : -1);
      ball.dy = -ball.speed;
    }
    // 移动挡板
    function movePaddle() {
      paddle.x += paddle.dx;

      // 防止挡板移出画布
      if (paddle.x < 0) {
        paddle.x = 0;
      } else if (paddle.x + paddle.width > canvas.width) {
        paddle.x = canvas.width - paddle.width;
      }
    }
    // 移动球
    function moveBall() {
      ball.x += ball.dx;
      ball.y += ball.dy;
    }
    // 绘制所有元素
    function draw() {
      // 清空画布
      ctx.clearRect(0, 0, canvas.width, canvas.height);

      drawBricks();
      drawPaddle();
      drawBall();
    }
    // 游戏更新循环
    function update() {
      movePaddle();
      moveBall();
      collisionDetection();
      draw();

      if (gameRunning) {
        animationId = requestAnimationFrame(update);
      }
    }
    // 游戏结束
    function gameOver(isWin) {
      gameRunning = false;
      cancelAnimationFrame(animationId);

      gameResultElement.textContent = isWin ? '恭喜通关!' : '游戏结束!';
      finalScoreElement.textContent = score;
      gameOverElement.style.display = 'block';
    }
    // 开始游戏
    function startGame() {
      if (!gameRunning) {
        gameRunning = true;
        gameOverElement.style.display = 'none';
        update();
      }
    }
    // 重置游戏
    function resetGame() {
      score = 0;
      lives = 3;
      level = 1;

      scoreElement.textContent = score;
      livesElement.textContent = lives;
      levelElement.textContent = level;

      ball.speed = 4;
      resetBall();
      initBricks();
      gameOverElement.style.display = 'none';

      if (animationId) {
        cancelAnimationFrame(animationId);
      }

      gameRunning = false;
    }
    // 键盘控制
    document.addEventListener('keydown', (e) => {
      if (e.key === 'ArrowLeft') {
        paddle.dx = -paddle.speed;
      } else if (e.key === 'ArrowRight') {
        paddle.dx = paddle.speed;
      }
    });
    document.addEventListener('keyup', (e) => {
      if (e.key === 'ArrowLeft' || e.key === 'ArrowRight') {
        paddle.dx = 0;
      }
    });
    // 按钮控制
    function moveLeft() {
      paddle.dx = -paddle.speed;
      setTimeout(() => { paddle.dx = 0; }, 100);
    }
    function moveRight() {
      paddle.dx = paddle.speed;
      setTimeout(() => { paddle.dx = 0; }, 100);
    }
    // 触摸控制(移动端支持)
    let touchStartX = 0;

    canvas.addEventListener('touchstart', (e) => {
      touchStartX = e.touches[0].clientX;
      e.preventDefault();
    });
    canvas.addEventListener('touchmove', (e) => {
      const touchX = e.touches[0].clientX;
      const deltaX = touchX - touchStartX;

      paddle.x += deltaX * 2;

      // 防止挡板移出画布
      if (paddle.x < 0) {
        paddle.x = 0;
      } else if (paddle.x + paddle.width > canvas.width) {
        paddle.x = canvas.width - paddle.width;
      }

      touchStartX = touchX;
      e.preventDefault();
    });
    // 初始化游戏
    initBricks();
    draw();
  </script>
</body>
</html>
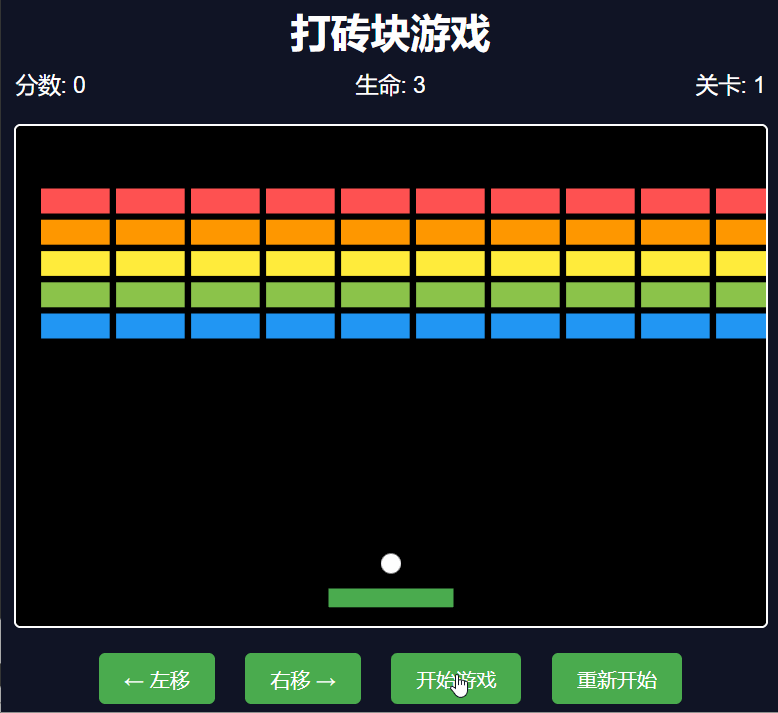
3. 效果说明
- 鼠标控制: 鼠标移动控制蓝色挡板在画布底部左右移动,跟随鼠标位置实时响应。
- 小球运动: 红色小球在画布内自动反弹运动,模拟重力和碰撞物理效果。
- 砖块消除: 小球撞击绿色砖块后,砖块消失(消除),同时小球反弹,且反弹角度会根据撞击位置发生细微变化。
- 胜利条件: 当画布内所有砖块都被消除时,游戏判定为通关成功。
- 失败与重置: 如果小球落到画布底部(未被挡板接住),游戏判定失败。失败后等待 2 秒自动重置游戏状态,重新开始。
- 核心知识点: 本案例主要应用了“鼠标事件”(控制挡板)、“碰撞检测”(判断小球与物体接触)以及“定时器动画”(控制小球连续运动)等 JavaScript 核心知识点。
四、业务拓展类案例(贴合实际开发场景)
案例9:表单验证(DOM事件+表单操作)
1. 思路分析
核心逻辑:监听表单输入和提交事件,验证输入合法性,给出反馈。
① 给表单输入框绑定失去焦点事件,实时验证(用户名、密码、手机号);
② 定义验证规则(用户名长度、密码强度、手机号格式);
③ 提交表单时,全量验证所有字段,验证通过则提交,失败则阻止默认行为,提示错误。
2. 代码实现
<!DOCTYPE html>
<html lang="zh-CN">
<head>
<meta charset="UTF-8">
<title>表单验证案例</title>
<style>
  .form-container { width: 400px; margin: 50px auto; }
  .form-item { margin: 20px 0; }
  label { display: block; margin-bottom: 5px; font-weight: bold; }
  input { width: 100%; height: 30px; padding: 0 5px; box-sizing: border-box; }
  .error { color: red; font-size: 12px; margin-top: 5px; display: none; }
  button { width: 100%; height: 40px; background: blue; color: white; border: none; cursor: pointer; font-size: 16px; }
  button:disabled { background: #ccc; cursor: not-allowed; }
</style>
</head>
<body>
<div class="form-container">
  <form id="userForm">
    <div class="form-item">
      <label for="username">用户名</label>
      <input type="text" id="username" placeholder="3-10位字符">
      <div class="error" id="usernameError">用户名需为3-10位字符</div>
    </div>
    <div class="form-item">
      <label for="password">密码</label>
      <input type="password" id="password" placeholder="6-16位,含字母和数字">
      <div class="error" id="passwordError">密码需为6-16位,含字母和数字</div>
    </div>
    <div class="form-item">
      <label for="phone">手机号</label>
      <input type="text" id="phone" placeholder="11位手机号">
      <div class="error" id="phoneError">请输入正确的手机号</div>
    </div>
    <button type="submit" id="submitBtn">提交</button>
  </form>
</div>
<script>
  var form = document.getElementById("userForm");
  var username = document.getElementById("username");
  var password = document.getElementById("password");
  var phone = document.getElementById("phone");
  var usernameError = document.getElementById("usernameError");
  var passwordError = document.getElementById("passwordError");
  var phoneError = document.getElementById("phoneError");
  // 用户名验证
  function checkUsername() {
    var val = username.value.trim();
    if (val.length < 3 || val.length > 10) {
      usernameError.style.display = "block";
      return false;
    } else {
      usernameError.style.display = "none";
      return true;
    }
  }
  // 密码验证
  function checkPassword() {
    var val = password.value.trim();
    var reg = /^(?=.*[a-zA-Z])(?=.*\d).{6,16}$/; // 含字母和数字
    if (!reg.test(val)) {
      passwordError.style.display = "block";
      return false;
    } else {
      passwordError.style.display = "none";
      return true;
    }
  }
  // 手机号验证
  function checkPhone() {
    var val = phone.value.trim();
    var reg = /^1[3-9]\d{9}$/; // 手机号正则
    if (!reg.test(val)) {
      phoneError.style.display = "block";
      return false;
    } else {
      phoneError.style.display = "none";
      return true;
    }
  }
  // 绑定失去焦点事件,实时验证
  username.onblur = checkUsername;
  password.onblur = checkPassword;
  phone.onblur = checkPhone;
  // 表单提交验证
  form.onsubmit = function() {
    var isUsernameOk = checkUsername();
    var isPasswordOk = checkPassword();
    var isPhoneOk = checkPhone();
    // 所有验证通过才提交
    if (isUsernameOk && isPasswordOk && isPhoneOk) {
      alert("表单验证通过,准备提交!");
      return true;
    } else {
      return false; // 阻止表单提交
    }
  }
</script>
</body>
</html>
3. 效果说明
输入框失去焦点时实时验证,不符合规则则显示红色错误提示;点击提交按钮时全量验证,所有字段验证通过则提示提交,失败则阻止提交并显示错误,核心用到“表单事件、正则表达式、DOM样式控制”知识点,是登录/注册页面必备功能。

案例10:模态框(弹窗,DOM事件+遮罩层)
1. 思路分析
核心逻辑:点击按钮显示模态框,点击关闭/遮罩层隐藏模态框,控制显示隐藏状态。
① 准备按钮、模态框、遮罩层;
② 点击按钮:显示模态框和遮罩层,禁止页面滚动;
③ 点击关闭按钮/遮罩层:隐藏模态框和遮罩层,恢复页面滚动;
④ 阻止模态框内部点击事件冒泡,避免触发遮罩层关闭。
2. 代码实现
<!DOCTYPE html>
<html lang="zh-CN">
<head>
<meta charset="UTF-8">
<title>模态框案例</title>
<style>
.open-btn { padding: 10px 20px; font-size: 16px; margin: 50px; cursor: pointer; }
.mask { position: fixed; top: 0; left: 0; width: 100%; height: 100%; background: rgba(0,0,0,0.5); display: none; z-index: 999; }
.modal { position: fixed; top: 50%; left: 50%; transform: translate(-50%, -50%); width: 400px; height: 300px; background: white; border-radius: 8px; padding: 20px; display: none; z-index: 1000; }
.modal-header { text-align: center; font-size: 20px; margin-bottom: 20px; }
.modal-body { line-height: 2; }
.close-btn { position: absolute; top: 10px; right: 10px; width: 30px; height: 30px; line-height: 30px; text-align: center; background: #f5f5f5; border: none; cursor: pointer; font-size: 20px; }
</style>
</head>
<body>
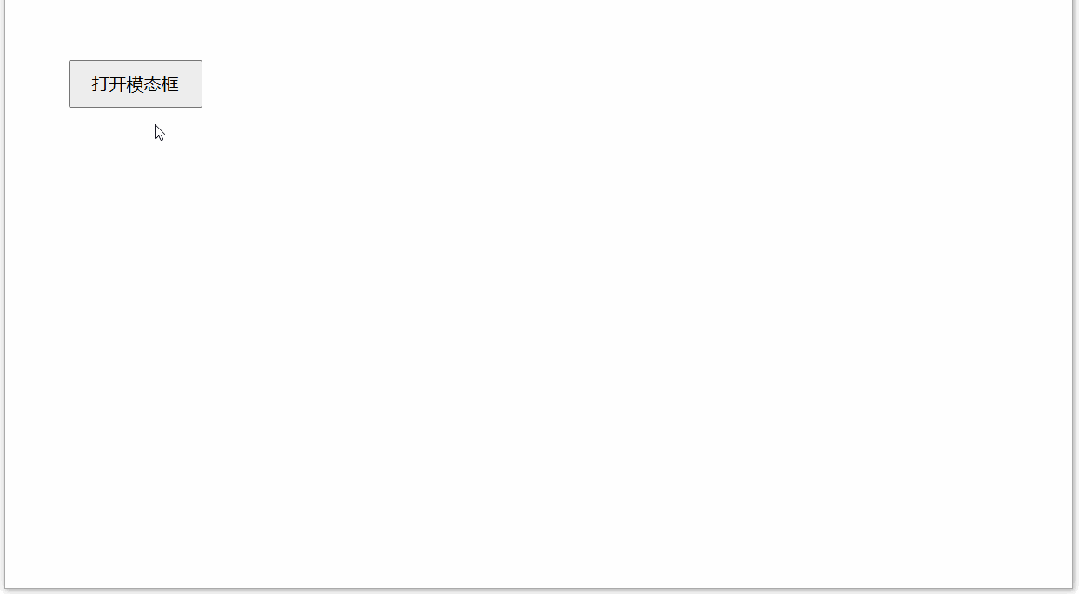
<button class="open-btn" id="openBtn">打开模态框</button>
<div class="mask" id="mask"></div>
<div class="modal" id="modal">
<button class="close-btn" id="closeBtn">×</button>
<div class="modal-header">模态框标题</div>
<div class="modal-body">
这是模态框内容,点击关闭按钮或遮罩层可关闭弹窗。<br>
模态框内部点击不会关闭哦!
</div>
</div>
<script>
var openBtn = document.getElementById("openBtn");
var closeBtn = document.getElementById("closeBtn");
var mask = document.getElementById("mask");
var modal = document.getElementById("modal");
// 打开模态框
openBtn.onclick = function() {
mask.style.display = "block";
modal.style.display = "block";
// 禁止页面滚动
document.body.style.overflow = "hidden";
}
// 关闭模态框
function closeModal() {
mask.style.display = "none";
modal.style.display = "none";
// 恢复页面滚动
document.body.style.overflow = "auto";
}
closeBtn.onclick = closeModal;
mask.onclick = closeModal;
// 阻止模态框内部点击冒泡,避免触发遮罩层关闭
modal.onclick = function(e) {
e.stopPropagation();
}
</script>
</body>
</html>
3. 效果说明
点击“打开模态框”按钮,遮罩层和白色模态框弹出,页面滚动被禁止;点击右上角关闭按钮或遮罩层,弹窗隐藏,恢复页面滚动;点击模态框内部区域不会触发关闭,核心用到“事件冒泡阻止、DOM显示控制、页面滚动限制”知识点,是弹窗提示、登录窗口常用组件。
案例11:电商详情页放大镜效果(DOM定位+鼠标事件)
1. 思路分析
核心逻辑:通过鼠标移动控制放大镜视窗和预览图,实现局部放大。
① 准备小图容器、放大镜遮罩(小视窗)、大图容器;
② 鼠标移入小图容器,显示遮罩和大图容器,移出则隐藏;
③ 鼠标移动时,计算遮罩位置(限制在小图内),同步按比例移动大图;
④ 按小图与大图的尺寸比例,确保遮罩区域与大图显示区域对应。
2. 代码实现
<!DOCTYPE html>
<html lang="zh-CN">
<head>
<meta charset="UTF-8">
<title>放大镜效果(精准对应版)</title>
<style>
 * { margin: 0; padding: 0; box-sizing: border-box; }
 .magnifier-container { width: 400px; margin: 50px; position: relative; }
 .small-img { width: 400px; height: 400px; border: 1px solid #ccc; position: relative; overflow: hidden; cursor: crosshair; }
 .small-img img { width: 100%; height: 100%; object-fit: cover; }
 .mask { width: 100px; height: 100px; background: rgba(255,255,0,0.3); position: absolute; top: 0; left: 0; display: none; pointer-events: none; border: 1px solid #fff; }
 .big-img { width: 400px; height: 400px; border: 1px solid #ccc; position: absolute; left: 410px; top: 0; overflow: hidden; display: none; z-index: 10; }
 .big-img img { position: absolute; top: 0; left: 0; object-fit: cover; }
</style>
</head>
<body>
<div class="magnifier-container">
  <div class="small-img" id="smallImg">
    <img src="https://picsum.photos/id/96/400/400" alt="商品小图" id="smallImgSrc">
    <div class="mask" id="mask"></div>
  </div>
  <div class="big-img" id="bigImg">
    <img src="https://picsum.photos/id/96/1600/1600" alt="商品大图" id="bigImgSrc">
  </div>
</div>
<script>
  var smallImg = document.getElementById("smallImg");
  var mask = document.getElementById("mask");
  var bigImg = document.getElementById("bigImg");
  var bigImgSrc = document.getElementById("bigImgSrc");
  // 固定尺寸(和你截图一致)
  var smallWidth = 400;    // 小图容器宽
  var smallHeight = 400;   // 小图容器高
  var maskWidth = 150;     // 遮罩宽
  var maskHeight = 150;    // 遮罩高
  var bigImgWidth = 1600; // 大图原始宽
  var bigImgHeight = 1600; // 大图原始高
  var bigContainerWidth = 500;  // 大图容器宽
  var bigContainerHeight = 500; // 大图容器高
  // 核心:计算大图需要移动的比例
  // 大图容器在大图上的裁剪比例 = 遮罩在小图上的覆盖比例
  var scaleX = bigImgWidth / bigContainerWidth;  // 大图容器是大图的 1/3.2
  var scaleY = bigImgHeight / bigContainerHeight;
  // 鼠标移动
  smallImg.addEventListener('mousemove', function(e) {
    var smallRect = smallImg.getBoundingClientRect();
    var mouseX = e.clientX - smallRect.left;
    var mouseY = e.clientY - smallRect.top;
    // 遮罩位置(限制在小图内)
    var maskX = mouseX - maskWidth / 2;
    var maskY = mouseY - maskHeight / 2;
    maskX = Math.max(0, Math.min(maskX, smallWidth - maskWidth));
    maskY = Math.max(0, Math.min(maskY, smallHeight - maskHeight));
    mask.style.left = maskX + "px";
    mask.style.top = maskY + "px";
    // 大图移动距离 = 遮罩在小图上的比例 × 大图尺寸
    // 这样遮罩覆盖的区域,正好是大图容器显示的区域
    var bigImgLeft = -(maskX / smallWidth) * bigImgWidth;
    var bigImgTop = -(maskY / smallHeight) * bigImgHeight;
    bigImgSrc.style.left = bigImgLeft + "px";
    bigImgSrc.style.top = bigImgTop + "px";
  });
  // 显示/隐藏
  smallImg.addEventListener('mouseenter', function() {
    mask.style.display = "block";
    bigImg.style.display = "block";
  });
  smallImg.addEventListener('mouseleave', function() {
    mask.style.display = "none";
    bigImg.style.display = "none";
  });
  // 初始化大图尺寸
  bigImgSrc.style.width = bigImgWidth + "px";
  bigImgSrc.style.height = bigImgHeight + "px";
</script>
</body>
</html>
3. 效果说明
鼠标移入商品小图,出现黄色半透明遮罩和右侧大图容器;移动鼠标时,遮罩跟随移动,大图同步显示遮罩对应的局部放大区域,完美模拟电商详情页放大镜功能,核心用到“鼠标事件、DOM定位、比例计算”知识点。

案例12:自定义右键菜单(阻止默认事件+鼠标定位)
1. 思路分析
核心逻辑:屏蔽浏览器默认右键菜单,显示自定义菜单,点击空白处隐藏。
① 监听文档右键点击事件,阻止默认菜单弹出;
② 计算鼠标位置,让自定义菜单显示在鼠标下方;
③ 点击菜单项执行对应操作,点击文档空白处隐藏菜单;
④ 监听鼠标左键点击,隐藏菜单以恢复默认交互。
2. 代码实现
<!DOCTYPE html>
<html lang="zh-CN">
<head>
<meta charset="UTF-8">
<title>自定义右键菜单案例</title>
<style>
 * { margin: 0; padding: 0; list-style: none; }
 body { height: 800px; background: #f5f5f5; }
 .custom-menu { width: 150px; background: white; border: 1px solid #ccc; border-radius: 4px; position: absolute; display: none; z-index: 9999; box-shadow: 0 2px 8px rgba(0,0,0,0.1); }
 .menu-item { padding: 8px 12px; cursor: pointer; font-size: 14px; }
 .menu-item:hover { background: #f0f0f0; }
</style>
</head>
<body>
<ul class="custom-menu" id="customMenu">
  <li class="menu-item" id="copy">复制</li>
  <li class="menu-item" id="paste">粘贴</li>
  <li class="menu-item" id="refresh">刷新页面</li>
</ul>
<script>
  var customMenu = document.getElementById("customMenu");
  var copyItem = document.getElementById("copy");
  var pasteItem = document.getElementById("paste");
  var refreshItem = document.getElementById("refresh");
  // 阻止浏览器默认右键菜单
  document.oncontextmenu = function() {
    return false;
  }
  // 鼠标右键点击,显示自定义菜单
  document.onmousedown = function(e) {
    // 右键点击(e.button=2)
    if (e.button === 2) {
      // 菜单位置 = 鼠标坐标 - 页面滚动偏移
      var scrollTop = document.documentElement.scrollTop || document.body.scrollTop;
      var scrollLeft = document.documentElement.scrollLeft || document.body.scrollLeft;
      var menuLeft = e.clientX + scrollLeft;
      var menuTop = e.clientY + scrollTop;
      // 限制菜单不出可视区域
      if (menuLeft + customMenu.offsetWidth > document.documentElement.clientWidth + scrollLeft) {
        menuLeft = e.clientX + scrollLeft - customMenu.offsetWidth;
      }
      if (menuTop + customMenu.offsetHeight > document.documentElement.clientHeight + scrollTop) {
        menuTop = e.clientY + scrollTop - customMenu.offsetHeight;
      }
      customMenu.style.left = menuLeft + "px";
      customMenu.style.top = menuTop + "px";
      customMenu.style.display = "block";
    } else {
      // 左键点击,隐藏菜单
      customMenu.style.display = "none";
    }
  }
  // 菜单项点击事件
  copyItem.onclick = function() {
    alert("执行复制操作");
    customMenu.style.display = "none";
  }
  pasteItem.onclick = function() {
    alert("执行粘贴操作");
    customMenu.style.display = "none";
  }
  refreshItem.onclick = function() {
    location.reload(); // 刷新页面
  }
</script>
</body>
</html>
3. 效果说明
在页面空白处右键点击,不会弹出浏览器默认菜单,而是显示自定义白色菜单;菜单跟随鼠标位置显示,点击菜单项执行对应操作(复制/粘贴提示、刷新页面),点击左键或空白处隐藏菜单,核心用到“阻止默认事件、鼠标坐标计算、页面滚动偏移”知识点。
以上12个案例完整覆盖BOM、DOM和事件核心知识点,从基础交互到游戏、业务场景,难度循序渐进。所有代码可直接复制运行截图,每个案例的思路和代码都标注清晰,方便理解和复用。建议结合知识点逐一实操,加深对JS交互逻辑的掌握~
 发表于 2026-2-25 08:29:32
|
查看: 172|
回复: 0
发表于 2026-2-25 08:29:32
|
查看: 172|
回复: 0
