CoPaw作为国产版OpenClaw,安装流程更适配国内环境(无需翻墙),且支持本地模型部署,下面给你一份分平台、带排错、可直接落地的详细安装攻略,新手也能一步步搞定。
环境前置要求
先确认基础环境,避免安装失败:
| 系统 |
核心依赖 |
可选依赖(本地模型用) |
| Windows 10+ |
Python 3.10~3.13 |
Ollama/llama.cpp |
| macOS 12+ |
Python 3.10~3.13 |
Ollama |
| Linux |
Python 3.10~3.13 + pip |
Ollama |
关键:Python 版本必须在 3.10~3.13 之间,过高 / 过低会导致依赖安装失败。
快速安装
1. 第一步:安装验证Python环境
Windows/macOS/Linux 通用检查:
打开终端(Windows 用 PowerShell,macOS/Linux 用终端),执行:
python --version
# 或 python3 --version
pip --version
# 或 pip3 --version
- 如果显示
Python 3.10.x~3.13.x,直接跳过下一步;
- 如果没有Python/版本不符,先安装:
- Windows/macOS:下载Python 3.12官方安装包(安装时勾选 Add Python to PATH);
- Linux(Ubuntu/Debian):
sudo apt update && sudo apt install python3.12 python3.12-pip -y
sudo update-alternatives --set python3 /usr/bin/python3.12  # 切换默认 Python 版本
✅ 实测截图(Windows):
Microsoft Windows [版本 10.0.19045.6456]
(c) Microsoft Corporation。保留所有权利。

C:\Users\Administrator>python
Python 3.12.10 (tags/v3.12.10:0cc8128, Apr  8 2025, 12:21:36) [MSC v.1943 64 bit (AMD64)] on win32
Type "help", "copyright", "credits" or "license" for more information.
>>> exit()

C:\Users\Administrator>python --version
Python 3.12.10
2. 第二步:安装CoPaw核心包
方式 1:PyPI 官方安装
# Windows
pip install copaw --upgrade

# macOS/Linux(避免权限问题)
pip3 install copaw --upgrade --user
✅ 实际安装日志节选(含大量依赖):
Collecting copaw
  Downloading copaw-0.0.5-py3-none-any.whl.metadata (25 kB)
Collecting agentscope==1.0.16.dev0 (from copaw)
  Using cached agentscope-1.0.16.dev0-py3-none-any.whl.metadata (23 kB)
Collecting agentscope-runtime==1.1.0 (from copaw)
  Downloading agentscope_runtime-1.1.0-py3-none-any.whl.metadata (50 kB)
...
Installing collected packages: sqlite-vec, pywin32, pypika, ..., copaw
Successfully installed ... copaw-0.0.5
方式 2:国内镜像加速
# 切换到清华镜像,快速安装
pip install copaw --upgrade -i https://pypi.tuna.tsinghua.edu.cn/simple
3. 第三步:验证安装成功
终端执行:
copaw --version # 或 copaw -v
显示版本号(如 v0.1.2)即安装成功。
初始化配置(核心步骤)
安装完成后,必须初始化配置(绑定模型 / 设置端口),才能正常使用。
1. 执行初始化向导
copaw init
✅ 实际交互日志(精简关键路径):
C:\Users\Administrator>copaw init
Working dir: C:\Users\Administrator\.copaw
╭───────────────────────────────────────── 🐾 Security warning — please read ──────────────────────────────────────────╮
│ Security warning — please read.                                                                                   │
│ CoPaw is a personal assistant that runs in your own environment. It can connect to                                │
│ channels (DingTalk, Feishu, QQ, Discord, iMessage, etc.) and run skills that read                                 │
│ files, run commands, and call external APIs. By default it is a single-operator                                   │
│ boundary: one trusted user. A malicious or confused prompt can lead the agent to                                   │
│ do unsafe things if tools are enabled.                                                                              │
│ If multiple people can message the same CoPaw instance with tools enabled, they                                    │
│ share the same delegated authority (files, commands, secrets the agent can use).                                    │
│ If you are not comfortable with access control and hardening, do not run CoPaw with                               │
│ tools or expose it to untrusted users. Get help from someone experienced before                                     │
│ enabling powerful skills or exposing the bot to the internet.                                                        │
│ Recommended baseline:                                                                                               │
│ - Restrict which channels and users can trigger the agent; use allowlists where possible.                          │
│ - Multi-user or shared inbox: use separate config/credentials and ideally separate OS users or hosts per trust boundary. │
│ - Run skills with least privilege; sandbox where you can.                                                           │
│ - Keep secrets out of the agent's working directory and skill-accessible paths.                                     │
│ - Use a capable model when the agent has tools or handles untrusted input.                                            │
│ Review your config and skills regularly; limit tool scope to what you need.                                          │
╰──────────────────────────────────────────────────────────────────────────────────────────────────────────────────────╯
? Have you read and accepted the security notice above? (yes to continue, no to abort) Yes

=== Heartbeat Configuration ===
Heartbeat interval (e.g. 30m, 1h) [6h]: 1h
? Heartbeat target: main
? Set active hours for heartbeat? (skip = run 24h) Yes
Active start (HH:MM) [08:00]:
Active end (HH:MM) [22:00]:
? Show tool call/result details in channel messages? Yes
? Select language for MD files: zh
? Configure channels? (iMessage/Discord/DingTalk/Feishu/QQ/Console) Yes

=== Channel Configuration ===

? Select a channel to configure: Feishu [✗]

=== Configure Feishu Channel ===
? Enable Feishu channel? Yes
Bot prefix (e.g., @bot) [[BOT]]: @dy
Feishu App ID []: cli_a926130d7678dcd6
Feishu App Secret []:

? Select a channel to configure: Save and exit

✓ Enabled channels: Feishu, Console

✓ Configuration saved to C:\Users\Administrator\.copaw\config.json

=== LLM Provider Configuration (required) ===

--- Provider Configuration ---
? Select provider to configure API key: Aliyun Coding Plan (aliyun-codingplan) [✓]
API key (prefix: sk-sp) [not set]:
✓ Aliyun Coding Plan — API Key: (not set)

Current models for Aliyun Coding Plan:
  - Qwen3.5 Plus (qwen3.5-plus)
  - GLM-5 (glm-5)
  - GLM-4.7 (glm-4.7)
  - MiniMax M2.5 (MiniMax-M2.5)
  - Kimi K2.5 (kimi-k2.5)
  - Qwen3 Max 2026-01-23 (qwen3-max-2026-01-23)
  - Qwen3 Coder Next (qwen3-coder-next)
  - Qwen3 Coder Plus (qwen3-coder-plus)
Add a model? [y/N]: n
Configure another provider? [y/N]: n

--- Activate LLM Model ---
? Select provider for LLM: Aliyun Coding Plan (aliyun-codingplan)
? Select LLM model: Qwen3.5 Plus
✓ LLM: Aliyun Coding Plan / qwen3.5-plus
? Configure skills: all
Enabling all skills...
✓ Skills synced: 10, skipped: 0
? Configure environment variables? Yes
  Variable name: copaw38
  Value for copaw38: copaw38
  ✓ copaw38 = copaw38
? Add another variable? No
Environment variable configuration complete.

Checking MD files [language: zh]...
✓ Copied 6 md file(s): AGENTS.md, BOOTSTRAP.md, HEARTBEAT.md, MEMORY.md, PROFILE.md, SOUL.md
? C:\Users\Administrator\.copaw\HEARTBEAT.md exists. Overwrite? No
Skipped HEARTBEAT.md.

✓ Initialization complete!
按提示一步步配置:
- 选择「快速配置」或「自定义配置」;
- 选择 AI 模型类型:
- 云端模型:通义千问 / 文心一言 / 讯飞星火 / OpenAI/Claude(需输入 API Key);
- 本地模型:Ollama(推荐,无需 API Key,需先安装 Ollama);
- 设置 Web 服务端口(默认
8000,若被占用可改 8001/8080);
- 选择是否开启「开机自启」。
2. (可选)安装 Ollama 对接本地模型
如果想离线使用(无需 API Key),先安装 Ollama:
curl -fsSL https://ollama.com/install.sh | sh
安装后启动 Ollama,拉取一个轻量模型(如 qwen2:0.5b):
ollama pull qwen2:0.5b # 超轻量,适合本地运行
再重新执行 copaw init,选择「本地模型 → Ollama → qwen2:0.5b」即可。
启动与访问 CoPaw
1. 启动 CoPaw 服务
# 前台启动(调试用,关闭终端即停止)
copaw app

# 后台启动(推荐,常驻运行)
copaw app --daemon  # Windows/macOS/Linux 通用
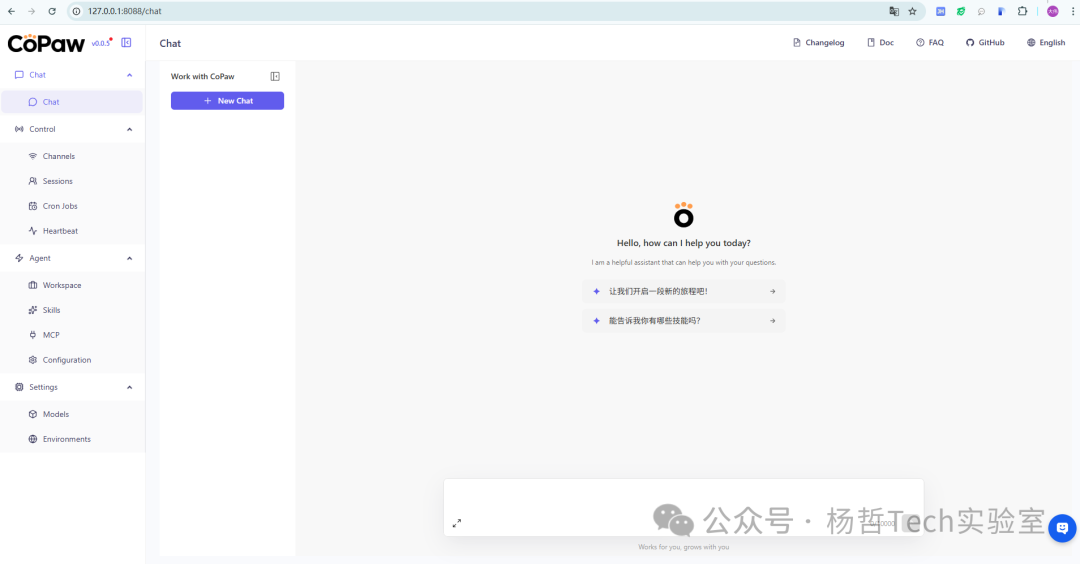
2. 访问 Web 管理界面
浏览器打开:http://127.0.0.1:8088(端口以初始化时设置的为准)
✅ 首次访问无需登录,直接进入控制台;
可配置:聊天渠道(钉钉 / 飞书 / QQ)、定时任务、自定义技能等。
核心管理命令
这些命令是您最常会用到的基础操作。
| 命令 |
功能说明 |
copaw init --defaults |
初始化工作目录和配置文件 |
copaw app |
启动 CoPaw 核心服务 |
copaw clean --yes |
清空工作目录下的所有内容 |
配置与设置命令
通过这些命令,您可以对模型、聊天频道和技能进行精细化配置。
| 命令 |
功能说明 |
copaw models config |
配置大语言模型(LLM)提供商和 API Key |
copaw channels config |
配置聊天频道(如钉钉、飞书等) |
copaw skills config |
管理技能的启用与禁用 |
信息查看命令
当您需要了解当前配置或状态时,可以使用以下命令来获取信息。
| 命令 |
功能说明 |
copaw models list |
查看已配置的模型列表 |
copaw channels list |
查看当前配置的聊天频道 |
copaw skills list |
查看所有可用的技能及其状态 |
copaw cron list |
查看已设置的定时任务(需服务运行中) |
copaw chats list |
查看聊天会话记录(需服务运行中) |
常见问题排查
-
报错「No module named copaw」:
- 原因:Python 环境混乱,pip 安装的包不在系统 PATH 里;
- 解决:用
python -m pip install copaw 替代 pip install,强制绑定当前 Python。
-
Web 界面打不开(localhost:8000 无法访问):
- 检查端口是否被占用:
netstat -ano | findstr 8000(Windows)/ lsof -i:8000(macOS/Linux);
- 重新初始化改端口:
copaw configure → 修改「Web 服务端口」为 8080 再启动。
-
本地模型 Ollama 对接失败:
- 确保 Ollama 已启动(终端执行
ollama ps 能看到模型);
- CoPaw 初始化时「Ollama 地址」填
http://localhost:11434(默认地址,不要改)。
-
安装时提示「权限不足」(Linux/macOS):
- 执行
sudo pip3 install copaw --upgrade,或加 --user 参数(如前面的命令)。
进阶:从源码安装(开发者用)
如果想体验最新功能,可从 GitHub 源码安装:
# 克隆仓库
git clone https://github.com/agentscope-ai/CoPaw.git
cd CoPaw

# 安装依赖并链接
pip install -e .
💡 提示:CoPaw 核心依赖是 Python 3.10~3.13,版本不符会导致安装失败,需先验证;安装优先用 pip install copaw,国内用户可加清华镜像加速;初始化时可选择云端模型(填 API Key)或本地 Ollama 模型(离线),启动后访问 localhost:8000 即可使用。

 发表于 2026-3-9 03:46:39
|
查看: 3329|
回复: 0
发表于 2026-3-9 03:46:39
|
查看: 3329|
回复: 0
