上篇在STM32C0上实现更流畅的动态GUI(上)介绍了图像的L8格式以及L8压缩方式,讲解了如何将图像经过RLE压缩后部署至STM32C0的TouchGFX应用层。本期文章(中篇),将带领大家解决上篇中发现的bug,使用设计好的L8图像重构以前设计的旋转菜单,让GUI变得更流畅。
01 工程手动配置
这是本篇中最为关键的一部分。由于该套件产生了一些版本更替问题,如果想要正确使用L8图像并正确烧录,涉及到编译器、bootloader等更改问题。
1.1 TouchGFX Designer中的更改
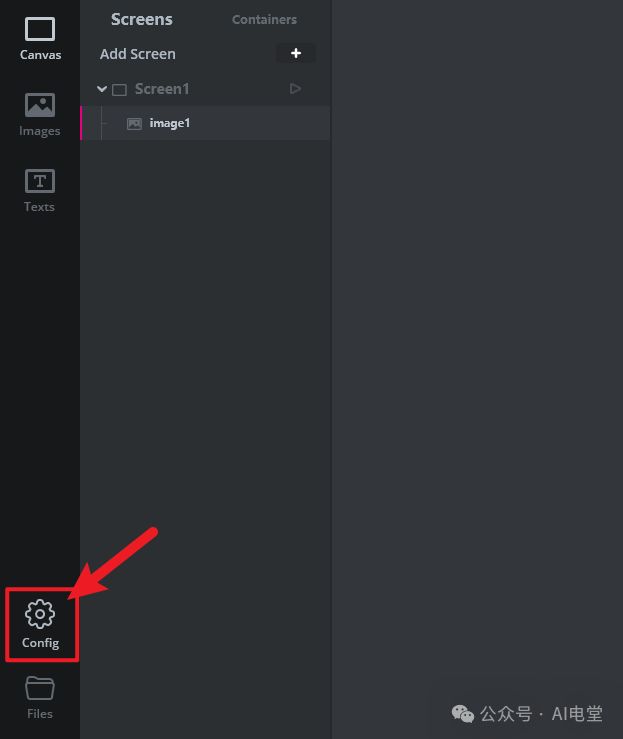
我们打开上次新建的工程,找到界面左下角的config。
进入Default Image Configuration,可以看到系统默认的配置。
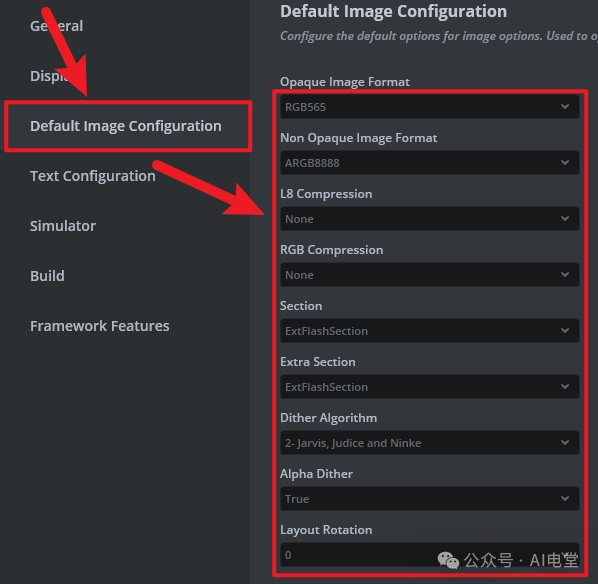
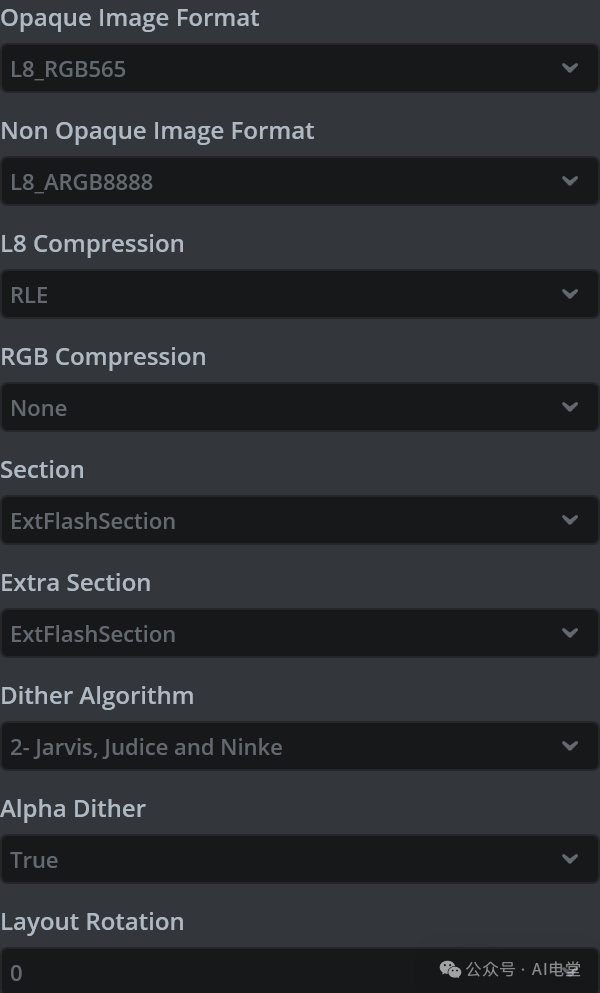
将图像默认格式全部改为L8,L8压缩方式改为RLE,其他请勿修改。
进入Build栏,更改编译命令Generate Assets Command、Flash Target Command和Flash Target Internal Command为:
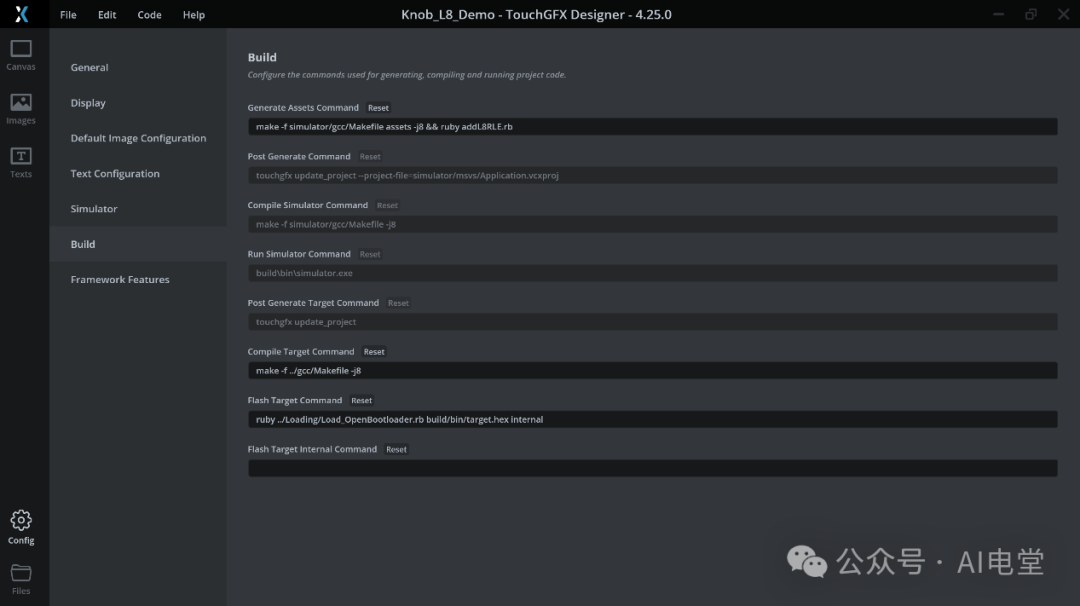
make -f simulator/gcc/Makefile assets -j8 && ruby addL8RLE.rb
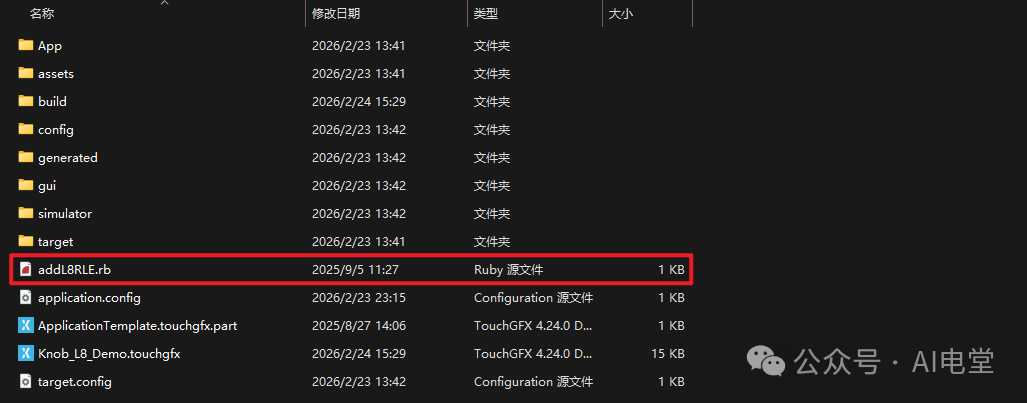
可以看到多了一个 ruby addL8RLE.rb,这是为了设置全部L8压缩格式为RLE。该脚本由原厂提供。等一会我们会将其复制到工程文件夹中。
1.2 工程文件夹中添加ruby脚本和更改gcc中的.ld文件
在TouchGFX Designer界面的左下角点击Files,进入TouchGFX目录。创建一个空文件,名为 addL8RLE.rb。用任意编辑器打开编辑。
target_line = '"IsEnabled": false'

replacement_block = <<~JSON.chomp
        "Features": [
          {
            "Id": "L8Compression",
            "Features": [
              {
                "Id": "RLE",
                "IsEnabled": true
              }
            ]
          }
        ]
JSON

updated_files = []

Dir.glob('*.touchgfx').each do |file_path|
  lines = File.readlines(file_path)
  if lines.any? { |line| line.strip == target_line }
    updated_lines = lines.map do |line|
      if line.strip == target_line
        indent = line[/^\s*/]
        replacement_block.lines.map { |l| indent + l }.join
      else
        line
      end
    end
    File.open(file_path, 'w') { |f| f.write(updated_lines.join) }
    updated_files << file_path
    puts "Updated: #{file_path}"
  end
end

if updated_files.empty?
  puts "No .touchgfx files with the target line were found in the current directory."
else
  puts "\nSummary: #{updated_files.size} file(s) updated."
end
保存。
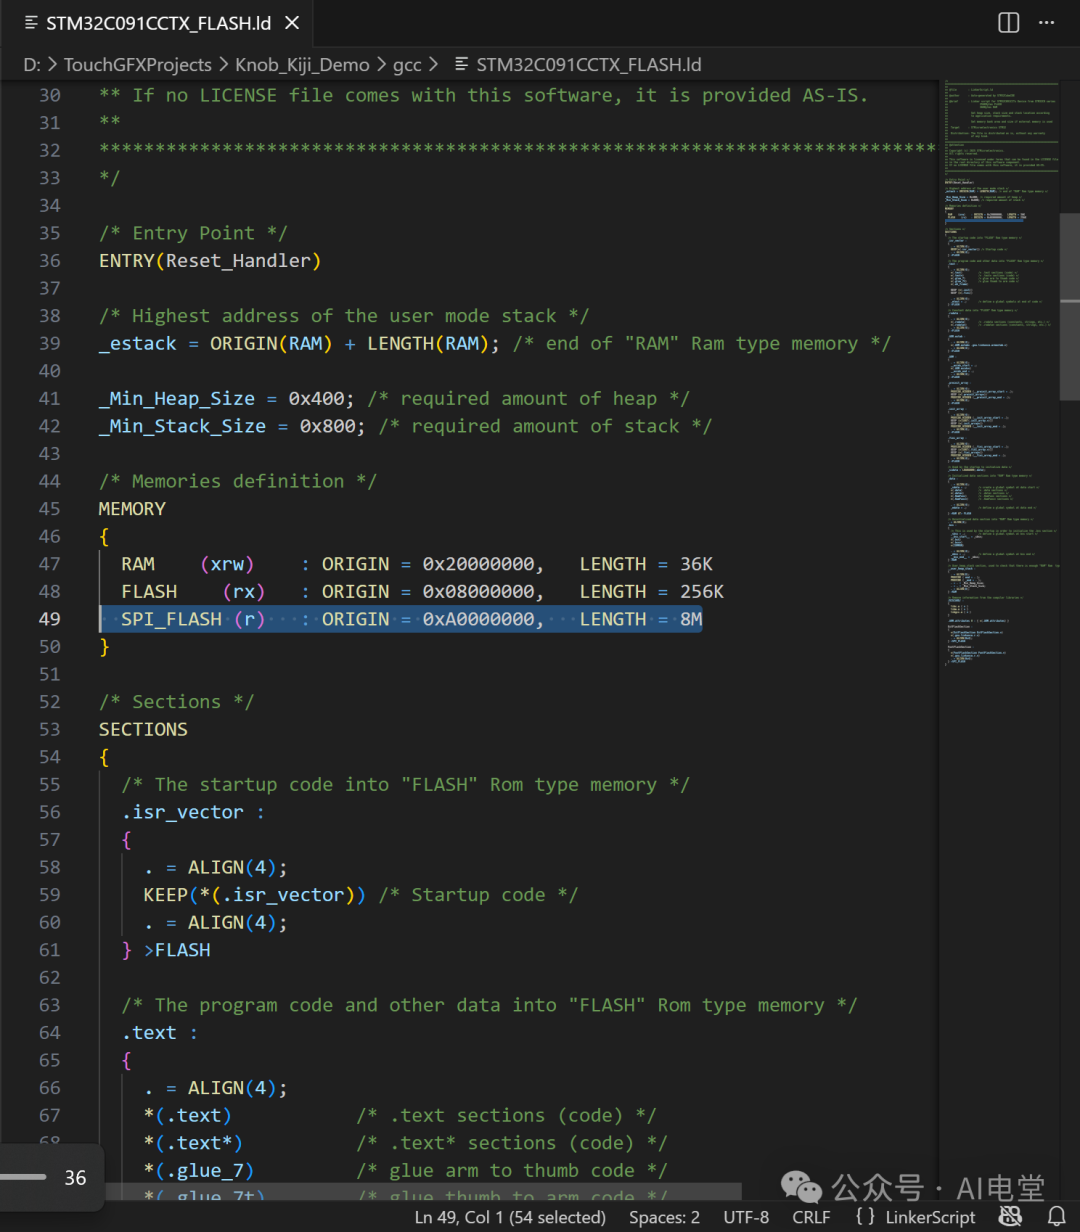
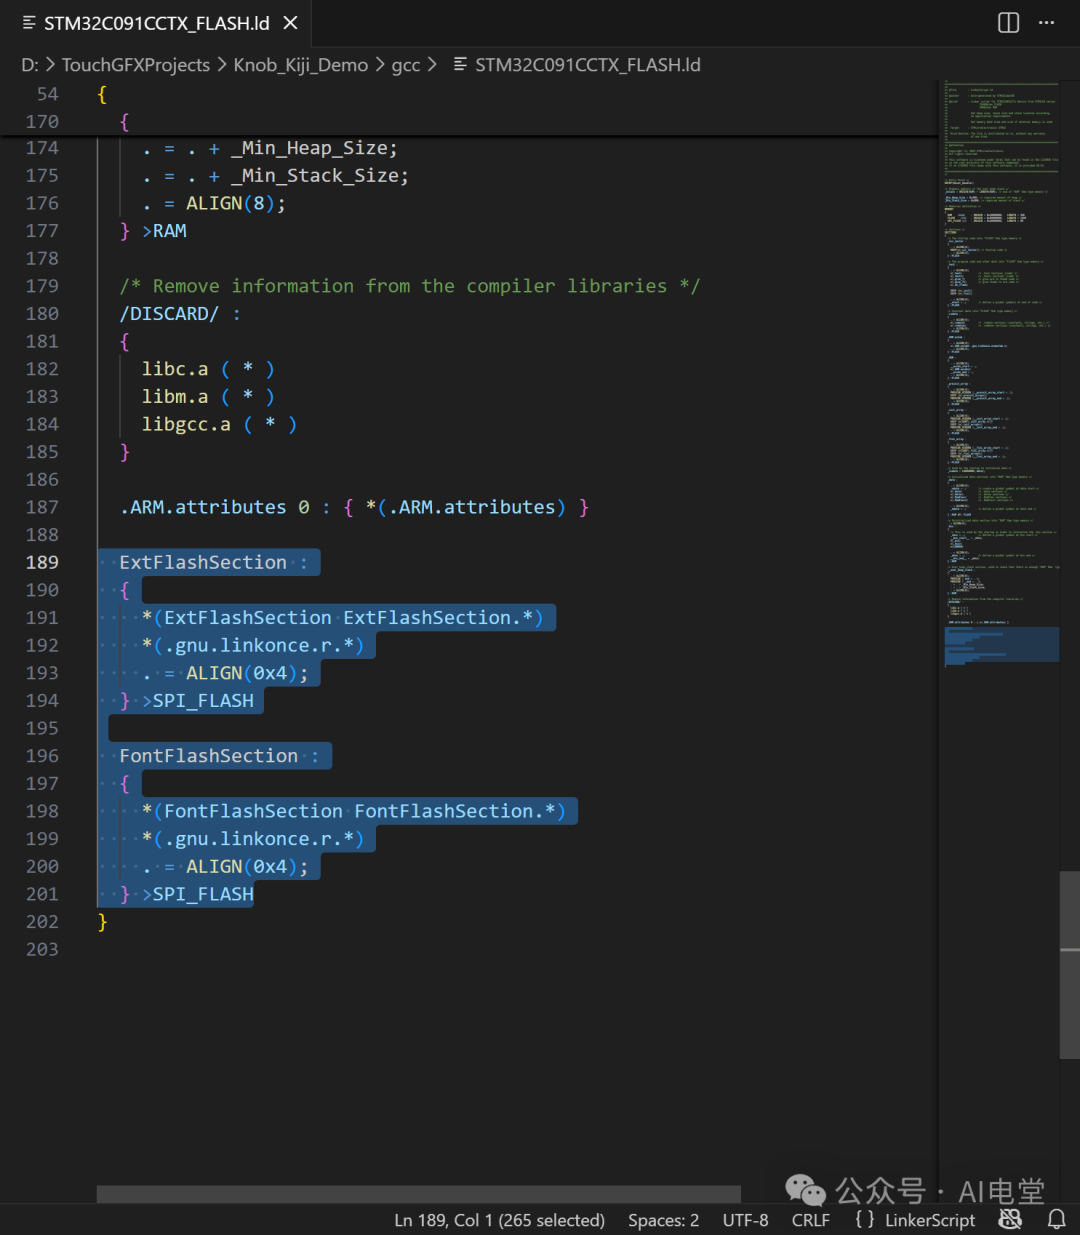
接着到上一级目录,找到gcc文件夹进入,找到 STM32C091CCTX_FLASH.ld 文件,进入编辑,删除有关SPI_FLASH的内容。
保存,回到TouchGFX Designer,reload project。将所有L8图像的设置全部改为默认。

至此修改完毕。
02 编写GUI
正片开始,首先确保已准备好自己的图标图片,并按照上述步骤导入并修改配置。老样子,创建一个用于作为主菜单最小单元的CustomContainer。我用的图标图像大小为100×100,因为考虑到滚动空间的问题所以Container的宽为170,高和图标的高一致。

创建一个scrollWheel,再在主屏幕右边加一个textArea控件用来作为文本指示,设置一个初始的文本用来撑起textArea的最大大小,确认后关闭Auto-size,选择文本居中,并为其勾选FadeAnimator。
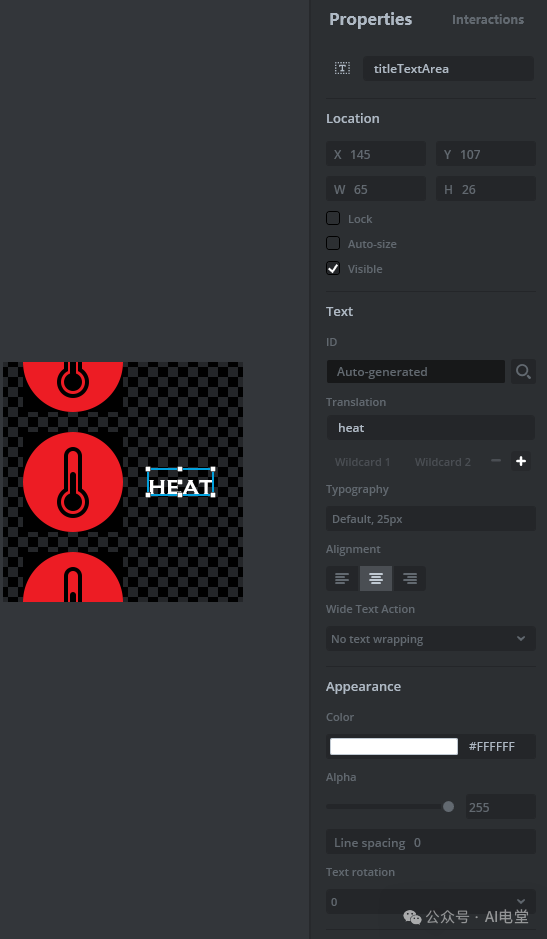
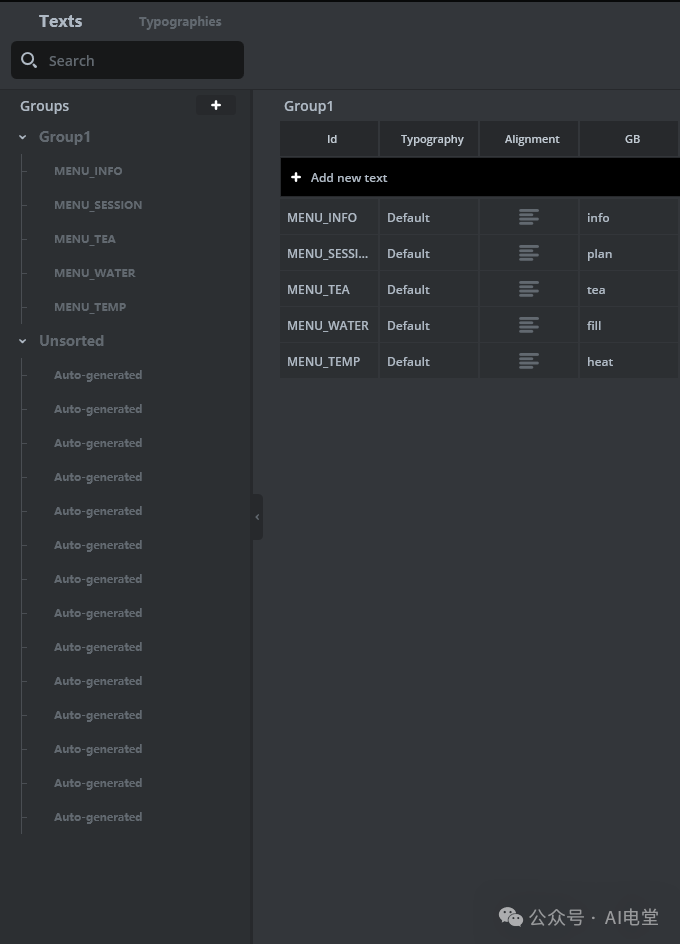
为你的图标设计相应的文本说明,在左侧栏的Texts中添加Texts。
为你的Menu元素写一个结构体放在一个.hpp中,这样可以直接调用。我在 TouchGFX\gui\include\gui\common 路径下新建了一个叫MenuItems的.hpp用来存储预定义的结构体。

#ifndef MENUITEMS_HPP
#define MENUITEMS_HPP

#include<images/BitmapDatabase.hpp>
#include<touchgfx/Color.hpp>
#include<texts/TextKeysAndLanguages.hpp>

struct MenuItem
{
    uint16_t iconId;
    uint32_t color;
    uint16_t titleId;
};

static const MenuItem menuItems[] =
{
    {
        BITMAP_TEMP_ID,
        touchgfx::Color::getColorFromRGB(34, 177, 76),
        T_MENU_TEMP
    },
    {
        BITMAP_WATER_ID,
        touchgfx::Color::getColorFromRGB(0, 162, 232),
        T_MENU_WATER
    },
    {
        BITMAP_TEA_ID,
        touchgfx::Color::getColorFromRGB(237, 28, 36),
        T_MENU_TEA
    },
    {
        BITMAP_SESSION_ID,
        touchgfx::Color::getColorFromRGB(255, 201, 14),
        T_MENU_SESSION
    },
    {
        BITMAP_INFO_ID,
        touchgfx::Color::getColorFromRGB(34, 177, 76),
        T_MENU_INFO
    }
};

#endif
以上是我的五组菜单元素,包含图标、主题颜色和文本说明,全部整合至此。接下来进入Container的.cpp编辑菜单元素的运动行为。这是一个老生常谈的模型了,想必大家已经可以熟练运用。
#include<gui/containers/menuIconCustomContainer.hpp>
#include<gui_generated/containers/MenuIconCustomContainerBase.hpp>
#include<gui/common/MenuItems.hpp>
#include<math.h>

MenuIconCustomContainer::MenuIconCustomContainer()
{

}

void MenuIconCustomContainer::initialize()
{
    MenuIconCustomContainerBase::initialize();
}

void MenuIconCustomContainer::offset(int16_t x)
{
    iconImage.setX(x);
}

//The new declaration and implementation of the setY() function
void MenuIconCustomContainer::setY(int16_t y)
{
    //set Y as normal
    MenuIconCustomContainerBase::setY(y);

    const int circleRadius = 250;

    //center around middle of background
    y = y + getHeight() / 2 - 240 /2;

    //calculate x
    float x_f = circleRadius - sqrtf((float)((circleRadius * circleRadius) - (y * y)));
    int16_t x = (int16_t)(x_f + 0.5f);
    offset(x);
}

void MenuIconCustomContainer::setIndex(int16_t index)
{
    // Set the icon bitmap according to the position in the list
    iconImage.setBitmap(menuItems[index].iconId);
    iconImage.invalidate();
}
这里就能够利用上刚才的结构体。如果我们只在这里使用的话,也可以不需要这个结构体,在这里可以换成switch结构。考虑到我们设计进入每个功能后旋钮屏下的氛围灯会相应地改变颜色,为了代码的简洁性和模块的可复用性选择构建这个结构体。编辑完成后记得到.hpp里声明函数。
为了让文本图标跟随menuItem,我们需要在屏幕的View.cpp中写handleTickEvent函数。
void MenuScreenView::handleTickEvent()
{
    MenuScreenViewBase::handleTickEvent();

    // Detect when menu wheel stops animating to an icon
    if(!menuScrollWheel.isAnimating() && !titleTextArea.isVisible())
    {
        MenuItem activeItem = menuItems[menuScrollWheel.getSelectedItem()];

        // Start title text animation
        titleTextArea.setTypedText(touchgfx::TypedText(activeItem.titleId));
        titleTextArea.setAlpha(0);
        titleTextArea.startFadeAnimation(255, 10, EasingEquations::quadEaseIn);
        titleTextArea.setVisible(true);
    }
}
由于没有触屏功能,我们需要自己写一个scrollWheel的 animateToItem,每次触发编码器旋转时根据需要向上或向下旋转菜单。
void MenuScreenView::rollMenu(int16_t change)
{
    // Animate the menu wheel to a new position, if it is valid
    int newIndex = menuScrollWheel.getSelectedItem() + change;
    if (newIndex >= 0 && newIndex < menuScrollWheel.getNumberOfItems())
    {
        menuScrollWheel.animateToItem(newIndex, 20);

        // Hide the title and color gradient during the menu animation
        titleTextArea.setVisible(false);
        titleTextArea.invalidate();
    }
}
保留两个自定义的函数,编码器产生触发时用于向上或向下旋转菜单。
void MenuScreenView::scrollDown()
{
    rollMenu(1);
}

void MenuScreenView::scrollUp()
{
    rollMenu(-1);
}
以上就是我们的动画效果主干。在setupScreen中进行屏幕初始化即可。
void MenuScreenView::setupScreen()
{
    MenuScreenViewBase::setupScreen();

    // Hide the widgets that will animate in when the wheel stops
    titleTextArea.setVisible(false);

    // Disable touch control for the menu wheel, since the demo is designed for button/turn input
    menuScrollWheel.setTouchable(false);
}
现在我们就将基本的动画编写好了。编译烧录验证,按照第一章中手动修改过后应当可以正常烧录,且L8图片均可正常渲染出来。
下一篇我们将介绍在TouchGFX中设计两种流畅的遮罩效果,为大家带来一些新的思考和启发。
待续
 发表于 2026-2-27 03:18:37
|
查看: 212|
回复: 0
发表于 2026-2-27 03:18:37
|
查看: 212|
回复: 0
