在C#企业级开发或自动化脚本编写中,开发者常会遇到一个共同痛点:如何高效、可靠地自动化操作那些没有提供开放API接口的传统或封闭式Windows桌面应用?例如,批量处理大量记事本文件、自动填写老旧的客户端软件表单,或是对一些专用工业软件进行重复性功能测试。传统的解决方案往往依赖不稳定的图像识别,或是低效的人工模拟操作,不仅维护成本高,而且难以保证稳定性。
实际上,微软早已在操作系统中内置了一套强大且稳定的自动化框架——UI Automation。它允许你的C#程序像真实用户一样,精准识别应用程序窗口、定位界面按钮、在文本框中输入内容并执行保存等操作,真正实现了对图形用户界面的程序化控制。
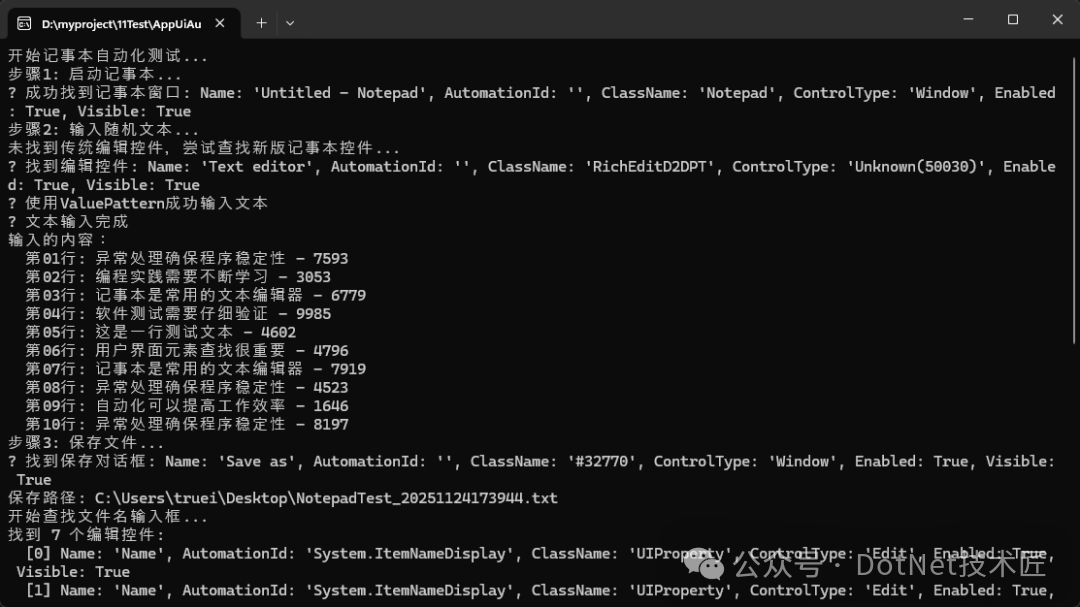
本文将从一个完整的“自动化操作Windows记事本”的案例出发,深入讲解如何利用C#和UI Automation框架,从零开始构建一个健壮的桌面自动化程序。
UI Automation最初是微软为辅助功能(如屏幕阅读器)设计的一套可访问性技术规范,但由于其直接与Windows底层UI框架交互,具备极高的通用性和稳定性,因此逐渐成为了桌面应用自动化的首选方案。
该技术的核心优势在于,它不依赖于目标应用程序是否开放了编程接口。只要其界面元素能够被Windows系统识别(绝大多数基于Win32、WPF、UWP等技术构建的标准桌面应用都支持),我们的程序就能对其进行查找和操控。
核心实现原理
UI Automation将应用程序界面中的每一个元素(如窗口、按钮、文本框、列表框等)都抽象为一个AutomationElement对象。每个对象都包含一系列属性(如控件类型、名称、自动化ID)和支持的操作模式(如点击、选择、输入文本)。
自动化的基本流程分为两步:
- 查找元素:通过创建条件(如控件类型、名称、自动化ID等),在UI树中定位到目标控件。
- 执行操作:获取目标控件支持的操作模式(如
InvokePattern用于点击按钮,ValuePattern用于设置文本框值),并调用相应的方法。
这种方法完全基于程序逻辑,无需依赖图像识别,因此执行速度快,可靠性高,且不受屏幕分辨率、主题变化的影响。
项目环境配置
要使用UI Automation,首先需要在C#项目中添加对相应COM组件的引用。以下是一个针对.NET 8的控制台应用程序的项目文件(.csproj)配置示例:
<Project Sdk="Microsoft.NET.Sdk">
  <PropertyGroup>
    <OutputType>Exe</OutputType>
    <TargetFramework>net8.0</TargetFramework>
    <UseWindowsForms>true</UseWindowsForms>
  </PropertyGroup>
  <ItemGroup>
    <COMReference Include="UIAutomationClient">
      <WrapperTool>tlbimp</WrapperTool>
      <Guid>944de083-8fb8-45cf-bcb7-c477acb2f897</Guid>
    </COMReference>
  </ItemGroup>
</Project>
关键点在于通过<COMReference>引用了UIAutomationClient库,并设置<UseWindowsForms>true</UseWindowsForms>以确保应用具有UI消息循环。
核心工具类封装
一套健壮的自动化程序离不开对基础操作的封装,例如带重试机制的控件查找和可靠的键盘输入模拟。
1. 元素查找器 (ElementFinder)
桌面应用的界面加载可能存在延迟,直接查找控件容易失败。因此,封装一个带超时和重试逻辑的查找工具类至关重要。
public static class ElementFinder
{
    private static readonly IUIAutomation _automation = new CUIAutomation();

    public static IUIAutomationElement GetDesktop()
    {
        return _automation.GetRootElement();
    }

    public static IUIAutomationElement? FindElementSafely(
        IUIAutomationElement parent,
        IUIAutomationCondition condition,
        TreeScope scope,
        int timeoutMs = 5000)
    {
        var endTime = DateTime.Now.AddMilliseconds(timeoutMs);

        while (DateTime.Now < endTime)
        {
            try
            {
                var element = parent.FindFirst(scope, condition);
                if (element != null) return element;
            }
            catch (COMException)
            {
                // UI可能正在变化,忽略异常并继续重试
            }
            Thread.Sleep(100);
        }
        return null;
    }

    public static IUIAutomationElement? FindFirstByControlType(
        IUIAutomationElement parent,
        int controlTypeId,
        int timeoutMs = 3000)
    {
        var condition = _automation.CreatePropertyCondition(
            UIA_PropertyIds.UIA_ControlTypePropertyId, controlTypeId);
        return FindElementSafely(parent, condition, TreeScope.TreeScope_Subtree, timeoutMs);
    }
}
2. 键盘操作助手 (KeyboardHelper)
对于文本输入,尤其是在Windows 11新版记事本等应用中,传统的SendKeys.Send()方法可能失效。采用更底层的keybd_event Windows API可以确保所有键盘操作(包括中英文输入、大小写、快捷键)都能被准确模拟。
public static class KeyboardHelper
{
    [DllImport("user32.dll")]
    private static extern void keybd_event(byte bVk, byte bScan, uint dwFlags, UIntPtr dwExtraInfo);
    [DllImport("user32.dll")]
    private static extern short VkKeyScan(char ch);

    private const uint KEYEVENTF_KEYUP = 0x0002;
    private const byte VK_CONTROL = 0x11;

    public static void SendText(string text)
    {
        foreach (char c in text)
        {
            if (c == '\r') continue;
            SendChar(c);
        }
    }

    public static void SendChar(char character)
    {
        short vkKey = VkKeyScan(character);
        byte virtualKey = (byte)(vkKey & 0xFF);
        bool needShift = (vkKey & 0x0100) != 0;

        if (needShift)
            keybd_event(0x10, 0, 0, UIntPtr.Zero); // Shift down

        keybd_event(virtualKey, 0, 0, UIntPtr.Zero); // Key down
        keybd_event(virtualKey, 0, KEYEVENTF_KEYUP, UIntPtr.Zero); // Key up

        if (needShift)
            keybd_event(0x10, 0, KEYEVENTF_KEYUP, UIntPtr.Zero); // Shift up

        Thread.Sleep(10);
    }

    public static void SendCtrlS()
    {
        keybd_event(VK_CONTROL, 0, 0, UIntPtr.Zero);
        SendChar('s');
        keybd_event(VK_CONTROL, 0, KEYEVENTF_KEYUP, UIntPtr.Zero);
    }
}
主业务流程:记事本自动化
下面的NotepadAutomation类整合了打开记事本、输入文本、保存文件、关闭应用的完整流程。它特别处理了不同Windows版本(如Win11新版记事本使用RichEditD2DPT类名)的兼容性问题,并展示了如何与“另存为”对话框交互。
public class NotepadAutomation
{
    private Process? _notepadProcess;
    private IUIAutomationElement? _notepadWindow;

    public bool RunTest()
    {
        try
        {
            if (!OpenNotepad()) return false;
            if (!InputRandomText()) return false;
            if (!SaveFile()) return false;
            if (!CloseNotepad()) return false;
            Console.WriteLine("✅ 自动化任务完成!");
            return true;
        }
        catch (Exception ex)
        {
            Console.WriteLine($"❌ 执行失败: {ex.Message}");
            return false;
        }
        finally
        {
            CleanUp();
        }
    }

    private bool InputRandomText()
    {
        if (_notepadWindow == null) return false;
        // 策略1:优先按控件类型查找编辑框
        var editControl = ElementFinder.FindFirstByControlType(
            _notepadWindow, UIA_ControlTypeIds.UIA_EditControlTypeId, 2000);
        // 策略2:针对新版记事本,按类名查找
        if (editControl == null)
        {
            editControl = ElementFinder.FindByClassName(_notepadWindow, "RichEditD2DPT", 3000);
        }
        // 策略3:降级方案,直接向窗口发送键盘输入
        if (editControl == null)
        {
            Console.WriteLine("⚠️ 未找到编辑控件,使用直接输入模式");
            return InputTextDirectlyToWindow();
        }
        editControl.SetFocus();
        Thread.Sleep(500);
        var textLines = GenerateRandomTextLines(10);
        var fullText = string.Join(Environment.NewLine, textLines);
        return TryInputText(editControl, fullText);
    }

    private bool SaveFile()
    {
        _notepadWindow?.SetFocus();
        KeyboardHelper.SendCtrlS(); // 发送Ctrl+S快捷键
        Thread.Sleep(3000); // 等待保存对话框弹出

        var desktop = ElementFinder.GetDesktop();
        var saveDialog = FindSaveDialog(desktop);
        if (saveDialog == null)
        {
            Console.WriteLine("❌ 未找到保存对话框");
            return false;
        }
        var fileName = $"AutoTest_{DateTime.Now:yyyyMMddHHmmss}.txt";
        // 查找并填充文件名文本框
        var fileNameEdit = FindFileNameEditBox(saveDialog);
        if (fileNameEdit != null && !IsSearchBox(fileNameEdit))
        {
            fileNameEdit.SetFocus();
            Thread.Sleep(300);
            KeyboardHelper.SendCtrlA(); // 全选现有文本
            KeyboardHelper.SendText(fileName);
        }
        // 查找并点击“保存”按钮
        var saveButton = ElementFinder.FindButton(saveDialog, "Save", 2000) ??
                         ElementFinder.FindByAutomationId(saveDialog, "1", 2000);
        if (saveButton != null)
        {
            ClickElement(saveButton);
            Thread.Sleep(2000);
            var desktopPath = Environment.GetFolderPath(Environment.SpecialFolder.Desktop);
            return File.Exists(Path.Combine(desktopPath, fileName));
        }
        return false;
    }

    private bool IsSearchBox(IUIAutomationElement element)
    {
        var name = element.CurrentName ?? "";
        var automationId = element.CurrentAutomationId ?? "";
        return name.Contains("Search") || automationId.Contains("Search");
    }
}
应用场景扩展
基于UI Automation的自动化方案具有极强的通用性,远不止于操作记事本,可广泛应用于以下场景:
- 办公自动化:批量处理Excel报表、Word文档的格式调整与数据填写。
- 软件自动化测试:对没有API或测试框架支持的遗留桌面软件进行功能回归测试。
- 数据采集与迁移:从封闭的工控系统、医疗软件等客户端界面中定时提取运行数据或日志。
- 运维脚本:自动执行软件安装、配置备份、定期报告生成等重复性桌面操作任务。
开发注意事项与最佳实践
- 健壮性设计:务必为控件查找操作设置合理的超时时间,并实现重试机制,以应对界面加载延迟。
- 性能优化:对需要频繁访问的控件,可缓存其
AutomationElement引用,避免重复遍历UI树。
- 兼容性处理:针对不同版本的应用程序,准备多套查找策略(如按控件类型、按名称、按自动化ID、按类名),并在主策略失败时优雅降级。
- 异常处理与降级:当标准的UI模式调用(如
InvokePattern.Invoke())失败时,应备有降级方案,例如模拟键盘快捷键或鼠标点击。
总结
C# UI Automation是一套强大且官方的桌面自动化解决方案,它能有效解决在缺乏API的封闭环境中实现程序化操作的难题。本文提供的代码框架经过实践检验,注重健壮性和可扩展性,可直接应用于工业软件自动化、测试工具开发或个人效率提升脚本。
掌握此项技术,意味着你能够以编程方式与几乎任何Windows桌面应用进行交互,这在追求效率与自动化的今天,无疑是一项极具价值的技术能力。
 发表于 2025-12-15 13:58:00
|
查看: 322|
回复: 0
发表于 2025-12-15 13:58:00
|
查看: 322|
回复: 0
