本文将带你一步步实现一个完整的实时人脸检测应用,打通从数据采集、模型训练、量化转换,到在资源受限的单片机上集成部署的每一个环节。我们已为你准备好了数据集、训练代码、转换工具链与RT-Thread工程。跟随本教程,你就能亲手体验在1 GHz主频的Arm® Cortex®-M85 MCU上部署并运行AI模型。
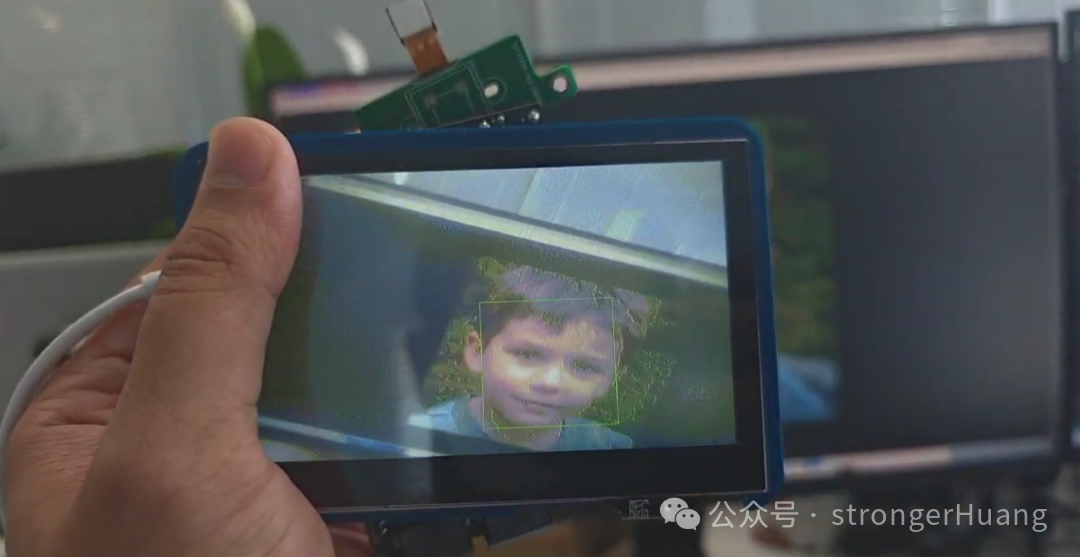
应用效果预览
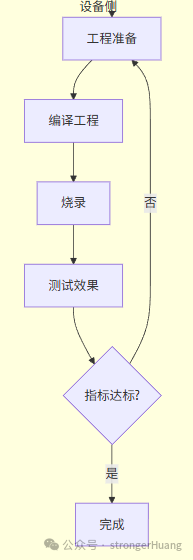
流程图
👆提示:可以上下滑动

环境准备
3.1 硬件清单
3.2 软件与工具
- RT-Thread Studio
- Python 3.9–3.11,pip包:pytorch等ai库
- Yolo-Fastest
3.3 RT-Thread Studio
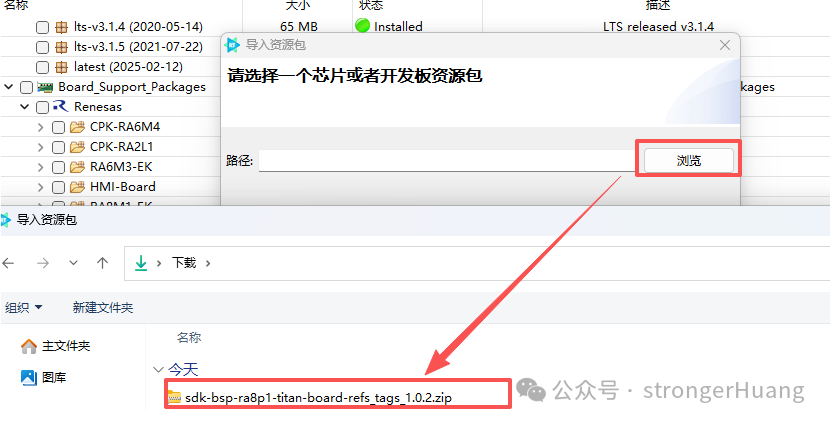
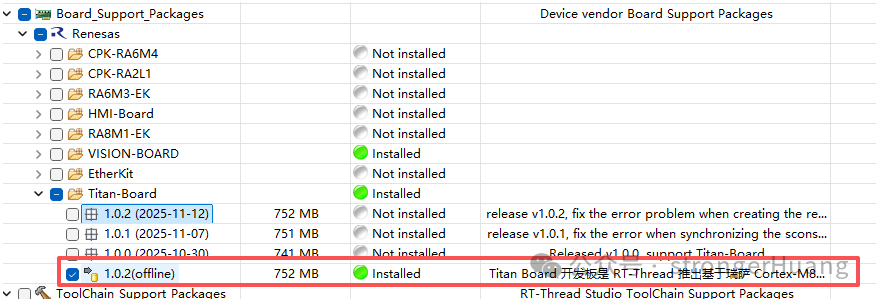
- 在 RT-Thread Studio 中下载 Titan-Board SDK 及相关依赖(下载Titan-Board SDK 时,其他依赖会自动下载)。
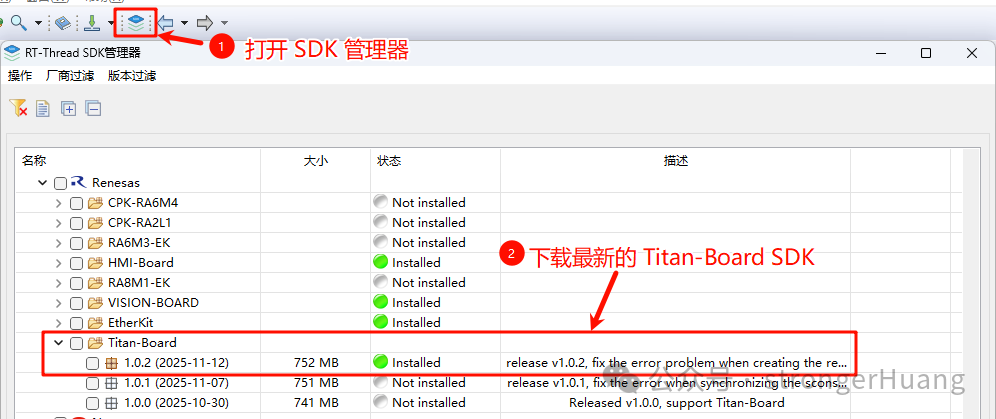
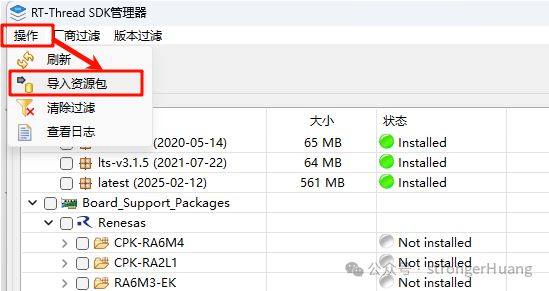
- 网盘中提供了下载好的 Titan-Board SDK,可以通过导入的方式安装 SDK。
👆提示:如果在烧录时检测不到 DAP-Link,按下方链接中的步骤操作即可解决。
https://rt-thread-studio.github.io/sdk-bsp-ra8p1-titan-board/latest/faq/FAQ_page/README_zh.html
3.4. Python 环境
👆参考:https://github.com/AlexeyAB/darknet?tab=readme-ov-file#how-to-compile-on-windows-using-cmake
由于需要安装vs 2022、cmake等工具,下载需要的时间过久,我这边有编译好的darknet.exe,可以使用cpu直接训练模型,如果需要使用gpu训练模型,可以按照darknet官方的安装步骤重新编译。
编译前注意修改配置文件,根据自己的需求修改。
option(CMAKE_VERBOSE_MAKEFILE “Create verbose makefile” ON)
option(CUDA_VERBOSE_BUILD “Create verbose CUDA build” OFF)
option(BUILD_SHARED_LIBS “Create dark as a shared library” ON)
option(BUILD_AS_CPP “Build Darknet using C++ compiler also for C files” OFF)
option(BUILD_USELIB_TRACK “Build uselib_track” ON)
option(MANUALLY_EXPORT_TRACK_OPTFLOW “Manually export the TRACK_OPTFLOW=1 define” OFF)
option(ENABLE_OPENCV “Enable OpenCV integration” OFF)
option(ENABLE_CUDA “Enable CUDA support” OFF)
option(ENABLE_CUDNN “Enable CUDNN” OFF)
option(ENABLE_CUDNN_HALF “Enable CUDNN Half precision” OFF)
option(ENABLE_ZED_CAMERA “Enable ZED Camera support” OFF)
option(ENABLE_VCPKG_INTEGRATION “Enable VCPKG integration” OFF)
3.5. Conda 安装
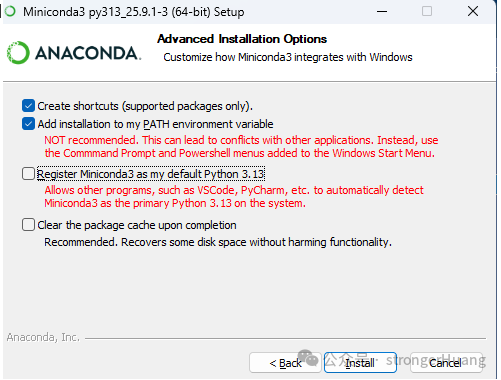
双击安装miniconda,注意这一步要选择添加环境变量
3.6. 安装 Python 环境
导入环境,convert用于将darknet模型转为tflite模型并量化。
3.6.1. convert
下面是安装方式,二选一
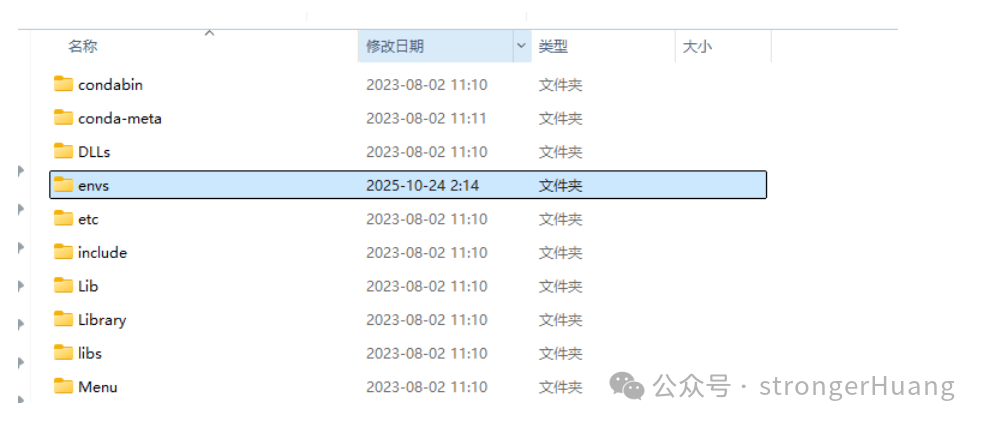
将convert.zip解压到anaconda安装目录的envs中。
- 安装keras-YOLOv3-model-set环境。
conda create -n convert python=3.8
conda activate convert
cd keras-YOLOv3-model-set
pip install Cython
pip install -r requirements.txt
3.6.2. ruhmi
安装ruhmi环境,用于将量化后的tflite模型转为能在开发板上部署的模型。
conda create -n ruhmi python=3.10
conda activate ruhmi
cd ruhmi-framework-mcu
pip install “install\mera-2.4.0+pkg.179-cp310-cp310-win_amd64.whl”
pip install onnx==1.17.0 tflite==2.18.0
训练模型
4.1 收集数据
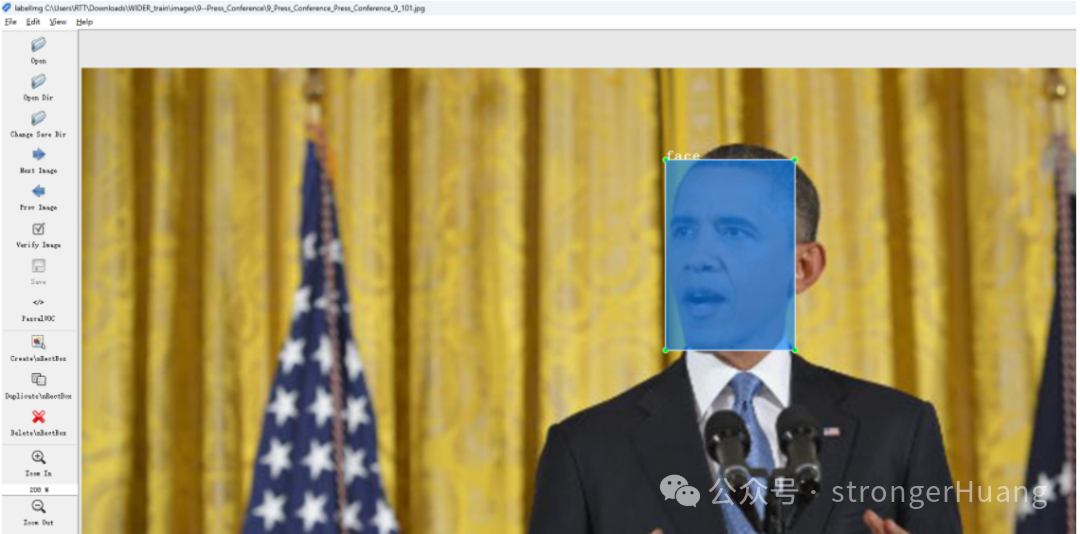
- 创建好的数据集可以使用
Yolo-Fastest\scripts\xml2yolo.py来转为yolo格式。同时会得到会得到train.txt和val.txt的生成路径。
python scripts/xml2yolo.py
face
darknet.exe detector calc_anchors datasets/voc.data -num_of_clusters 9 -width 192 -height 192
anchors = 3, 5, 6, 10, 11, 17, 14, 30, 25, 25, 25, 52, 43, 54, 58, 90, 94, 117
width=192
height=192
channels=1
# 两个yolo都要改
[convolutional]
size=1
stride=1
pad=1
filters=18
activation=linear

[yolo]
mask = 0,1,2
anchors =  3,  5,   6, 10,  11, 17,  14, 30,  25, 25,  25, 52,  43, 54,  58, 90,  94,117
classes=1
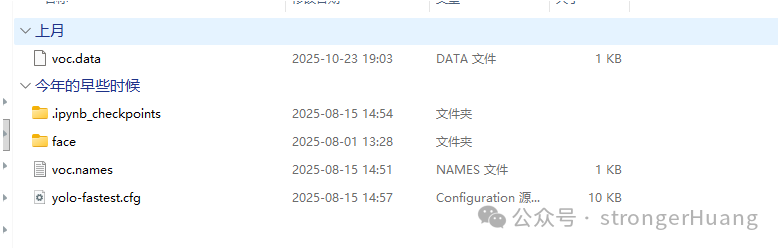
- 我提取收集整理好了人脸识别数据,位于datasets中。
4.2 训练
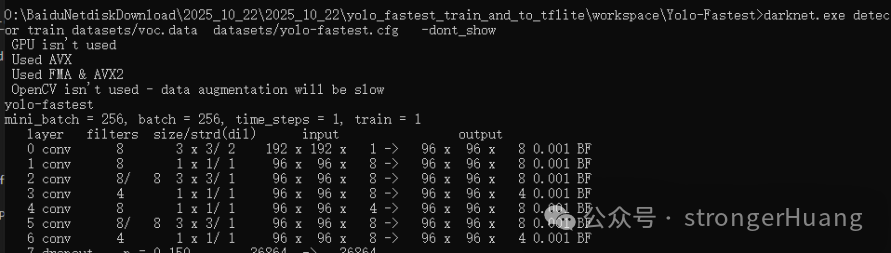
使用我编译好的darknet.exe
cd Yolo-fastest
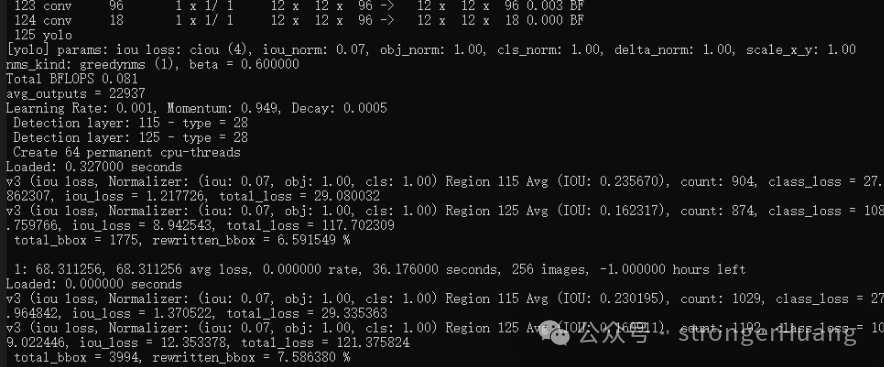
darknet.exe detector train datasets/voc.data datasets/yolo-fastest.cfg -dont_show
大概训练2小时才会有好一些的模型结果(GPU启动训练的情况下)。
AI部署转换
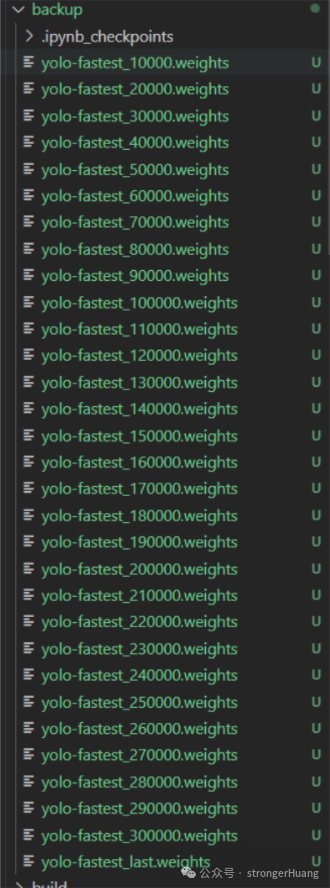
训练模型结束后,会在Yolo-fastest/backup中保存模型权重。我们选择最后一轮的权重,用于转换。
5.1 darknet->tflite
转换代码需要的参数如下。

我们需要复制训练好的权重、cfg文件到keras-YOLOv3-model-set下,然后运行,这里需要稍等一会,需要大概6分钟。
conda activate convert
cd /path/to/keras-YOLOv3-model-set
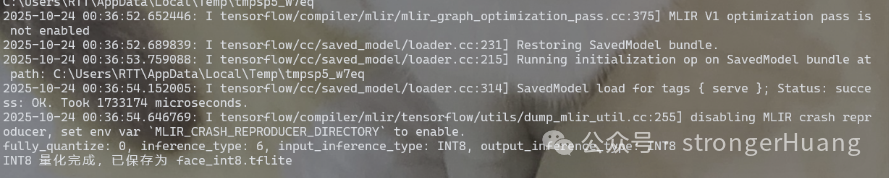
python tools/model_converter/conver2tflite_and_int8.py --config_path yolo-fastest.cfg --weights_path yolo-fastest_last.weights --output_path face.h5 --int8_img_path ../Yolo-Fastest/datasets/face/data_1/train/image/ --save_tflite_path face_int8.tflite -f
最终会得到face_int8.tflite模型。
5.2 tflite->ruhmi
将上⼀步得到的tflite文件复制到ruhmi-framework-mcu/models下,然后运行以下指令
conda activate ruhmi
cd /path/to/ruhmi-framework-mcu/scripts
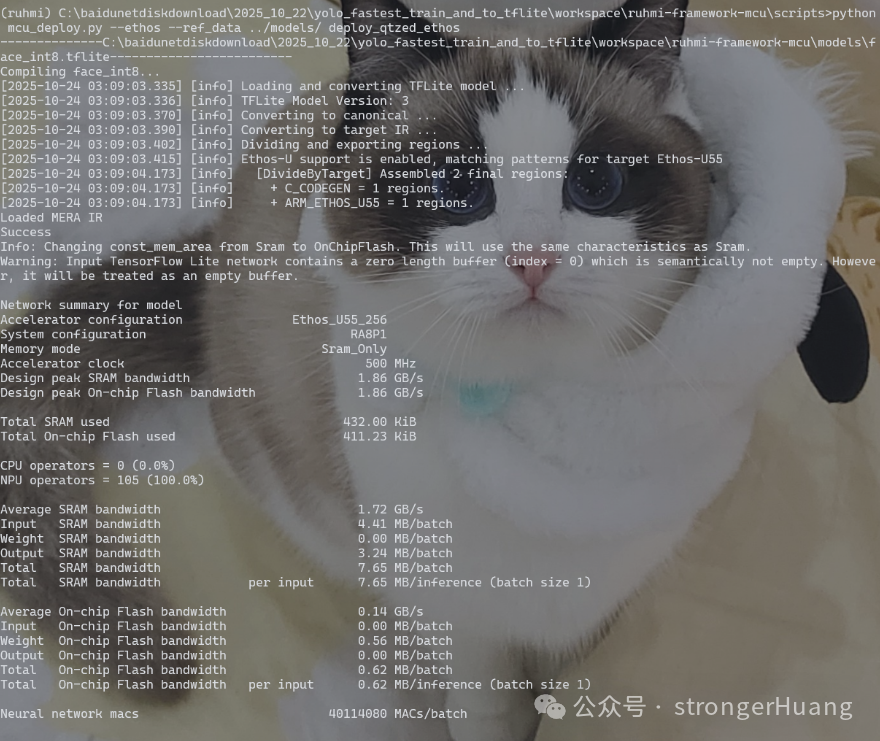
python mcu_deploy.py --ethos --ref_data ../models/ deploy_qtzed_ethos
AI部署模型
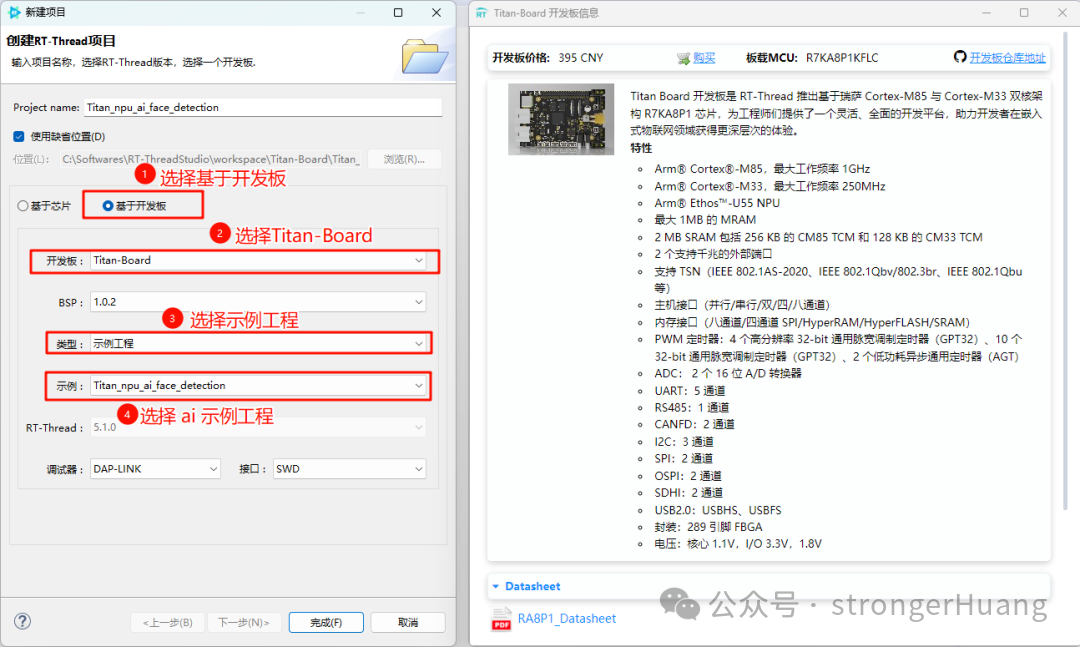
- 在 RT-Thread Studio 中创建示例工程。

- tflite->ruhmi会在ruhmi-framework-mcu/scripts下生成可部署模型⽂件,路径如下
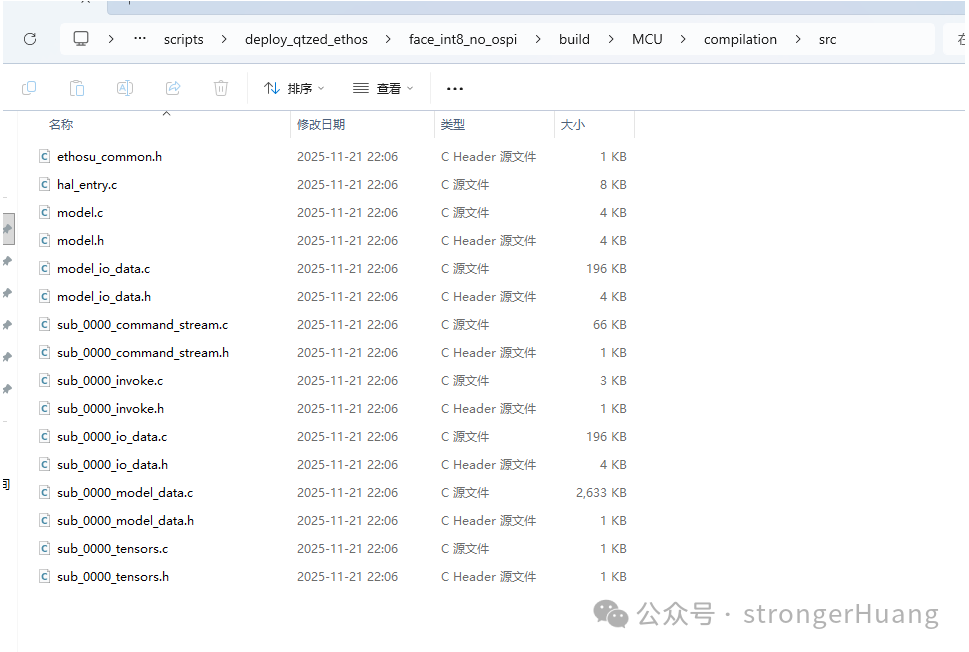
- 接下来,删除
*_io_data.* 和hal_entry.c,然后将剩下的文件拷贝到刚刚创建的示例工程的Titan_npu_ai_face_detection/src/models下。
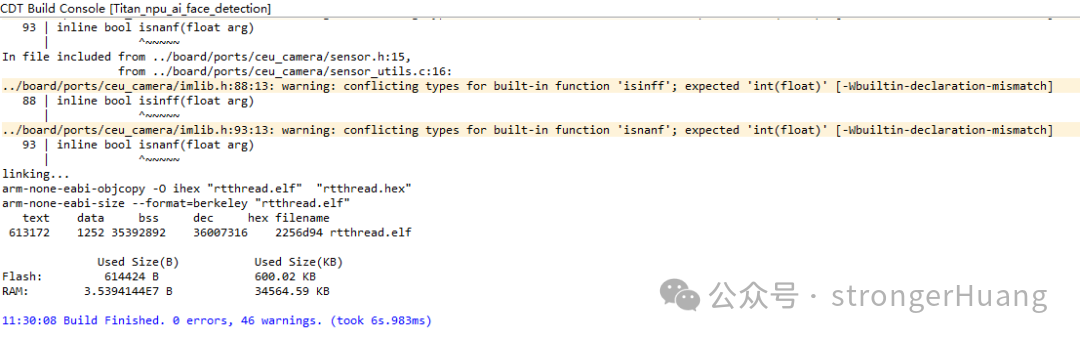
- 编译然后下载。


网盘资源及培训视频
 发表于 2025-12-4 23:45:07
|
查看: 153|
回复: 0
发表于 2025-12-4 23:45:07
|
查看: 153|
回复: 0
