现代 .NET 应用面临的数据源、端点和微服务越来越复杂,保持高吞吐与快响应的压力也与日俱增。缓存是最直接的应对手段之一,但具体到“用什么缓存”以及“怎么设计”,依然存在很大的探讨空间。
这篇文章源自 .NET 官方博客,作者 Jared Meade 通过一个可运行的 .NET 10 控制台程序,完整演示了如何将 Azure Database for PostgreSQL 作为分布式缓存后端,再叠加上 HybridCache 的内存层,让应用同时获得“速度”与“可靠性”。每一步都配备了可执行的代码,拿来就能跑。
目标:打造一个能直接复用的参考实现
跟着文章走完一遍后,你的应用将具备以下能力:
- 基于 .NET Generic Host 构建,统一管理配置、依赖注入、日志与后台服务
- 从
appsettings.json 加载缓存参数
- 通过
dotnet user-secrets 安全存储数据库连接字符串
- 以结构化日志的形式输出带精确时间戳的运行时信息
- 模拟一次耗时的外部数据请求
- 将分布式缓存条目持久化到 Azure PostgreSQL
- 利用
HybridCache 把内存缓存和分布式缓存融合成一个统一的接口
- 打印每次请求的耗时,直观对比缓存命中前后的性能差异
整套示例可在 Windows 与 Linux 上无缝运行。
前置要求
- .NET 10 SDK
- 一个可连接的 Azure Database for PostgreSQL 实例(本地 Postgres 亦可)
- 熟悉 .NET Generic Host 的基本概念
如果你想深入钻研更多分布式与高并发架构设计,也可以在云栈社区的技术论坛里找到不少同行分享的实战经验与源码下载。
第一步:创建项目并启用 Host
mkdir dcache-demo
cd dcache-demo
dotnet new console
dotnet add package Microsoft.Extensions.Hosting
Microsoft.Extensions.Hosting 引入了完备的 DI、配置、日志以及托管服务支持。安装完成后,.csproj 文件内会多出类似如下的依赖项:
<ItemGroup>
  <PackageReference Include="Microsoft.Extensions.Hosting" Version="10.0.5" />
</ItemGroup>
将 Program.cs 替换为 Host 架构的初始骨架代码:
using Microsoft.Extensions.Hosting;

var builder = Host.CreateDefaultBuilder(args);

builder.ConfigureAppConfiguration((hostingContext, config) => {
    // 后续在此添加更多配置源
});

builder.ConfigureServices((hostingContext, services) => {
    // 后续在此注册服务
});

builder.ConfigureLogging(logging => {
    // 后续在此配置日志
});

var app = builder.Build();
await app.RunAsync();
Host.CreateDefaultBuilder 已自动挂接了标准配置源、DI 容器和默认日志设定。
第二步:配置结构化日志
首先引入所需的命名空间:
using Microsoft.Extensions.Logging;
using Microsoft.Extensions.DependencyInjection;
接着,将 ConfigureLogging 部分替换为带时间戳的简洁控制台日志:
builder.ConfigureLogging(logging => {
    logging.ClearProviders();
    logging.SetMinimumLevel(LogLevel.Information);
    logging.AddSimpleConsole(options => {
        options.TimestampFormat = "[yyyy-MM-dd HH:mm:ss.ffffff] ";
        options.SingleLine = true;
    });
});
在调用 RunAsync 之前,加一行启动日志,以此验证日志系统是否正常工作:
var app = builder.Build();
var logger = app.Services.GetRequiredService<ILogger<Program>>();
logger.LogInformation("Console logging is now enabled!");
await app.RunAsync();
运行之后,你将看到类似下面的输出:
[2026-03-20 17:01:11.358539] info: Program[0] Console logging is now enabled!
[2026-03-20 17:01:11.377219] info: Microsoft.Hosting.Lifetime[0] Application started. Press Ctrl+C to shut down.
第三步:加入一个模拟耗时任务
光有日志还不够,得让 Host 干点实际的事。我们在 await app.RunAsync() 之后,增加 WeatherForecast 数据模型和一个名为 ConsoleService 的后台服务:
public class WeatherForecast {
    public DateOnly Date { get; set; }
    public int TemperatureC { get; set; }
    public int TemperatureF => 32 + (int)(TemperatureC / 0.5556);
    public string? Summary { get; set; }
    public static readonly string[] Summaries = new[] {
        "Freezing", "Bracing", "Chilly", "Cool", "Mild",
        "Warm", "Balmy", "Hot", "Sweltering", "Scorching"
    };
}

public class ConsoleService : BackgroundService {
    private readonly ILogger<ConsoleService> _logger;

    public ConsoleService(ILogger<ConsoleService> logger) {
        _logger = logger;
    }

    protected override async Task ExecuteAsync(CancellationToken stoppingToken) {
        _logger.LogInformation("Console Service Started.");
        while (!stoppingToken.IsCancellationRequested) {
            var response = await GetDataFromTheSource(stoppingToken);
            _logger.LogInformation("Returned {Count} forecast item(s)", response.Count());
            await Task.Delay(500, stoppingToken);
        }
    }

    async Task<IEnumerable<WeatherForecast>> GetDataFromTheSource(CancellationToken cancellationToken) {
        await Task.Delay(2000, cancellationToken); // 模拟 2 秒的外部延迟
        _logger.LogInformation("Fetching Weather");
        return Enumerable.Range(1, 1).Select(index => new WeatherForecast {
            Date = DateOnly.FromDateTime(DateTime.Now.AddDays(index)),
            TemperatureC = Random.Shared.Next(-20, 55),
            Summary = WeatherForecast.Summaries[Random.Shared.Next(WeatherForecast.Summaries.Length)]
        }).ToArray();
    }
}
然后,在 ConfigureServices 里注册这个后台服务:
builder.ConfigureServices((hostingContext, services) => {
    services.AddHostedService<ConsoleService>();
});
此时运行程序,你会注意到,每次请求都要等待大约 2 秒——这正是我们想要用缓存来优化的地方。
第四步:安装所需的缓存包
dotnet add package Microsoft.Extensions.Caching.Postgres
dotnet add package Microsoft.Extensions.Caching.Hybrid
Microsoft.Extensions.Caching.Postgres:负责将缓存条目持久化到 PostgreSQL 数据库。Microsoft.Extensions.Caching.Hybrid:将内存缓存和分布式缓存组合成单一的逻辑层。
第五步:配置连接字符串与缓存参数
安全地存储数据库连接信息——切记,不要将连接字符串提交到源码管理中!
dotnet user-secrets init
dotnet user-secrets set "ConnectionStrings:PostgresCache" \
  "Host=your-server.postgres.database.azure.com;Port=5432;Username=your-user;Password=your-password;Database=your-database;Pooling=true;MinPoolSize=0;MaxPoolSize=100;Timeout=15;"
随后,创建一个 appsettings.json 文件来定义缓存的行为参数:
{
  "PostgresCache": {
    "SchemaName": "public",
    "TableName": "cache",
    "CreateIfNotExists": true,
    "UseWAL": false,
    "ExpiredItemsDeletionInterval": "00:30:00",
    "DefaultSlidingExpiration": "00:20:00"
  }
}
为了确保此文件被复制到输出目录,需要修改 .csproj 文件:
<ItemGroup>
  <None Update="appsettings.json">
    <CopyToOutputDirectory>PreserveNewest</CopyToOutputDirectory>
    <CopyToPublishDirectory>PreserveNewest</CopyToPublishDirectory>
  </None>
</ItemGroup>
最后,更新 ConfigureAppConfiguration,使其加载 User Secrets 和 JSON 配置:
using Microsoft.Extensions.Configuration;

builder.ConfigureAppConfiguration((hostingContext, config) => {
    config.AddUserSecrets<Program>();
    config.AddJsonFile("appsettings.json", optional: false, reloadOnChange: true);
    if (hostingContext.HostingEnvironment.IsProduction()) {
        config.AddEnvironmentVariables();
    }
});
第六步:注册 Postgres 分布式缓存与 HybridCache
先添加命名空间:
using Microsoft.Extensions.Caching.Hybrid;
接着,在 ConfigureServices 里完成服务注册:
builder.ConfigureServices((hostingContext, services) => {
    services.AddHostedService<ConsoleService>();

    services.AddDistributedPostgresCache(options => {
        options.ConnectionString = hostingContext.Configuration.GetConnectionString("PostgresCache");
        options.SchemaName = hostingContext.Configuration.GetValue<string>("PostgresCache:SchemaName", "public");
        options.TableName = hostingContext.Configuration.GetValue<string>("PostgresCache:TableName", "cache");
        options.CreateIfNotExists = hostingContext.Configuration.GetValue<bool>("PostgresCache:CreateIfNotExists", true);
        options.UseWAL = hostingContext.Configuration.GetValue<bool>("PostgresCache:UseWAL", false);

        var expirationInterval = hostingContext.Configuration.GetValue<string>("PostgresCache:ExpiredItemsDeletionInterval");
        if (!string.IsNullOrEmpty(expirationInterval) && TimeSpan.TryParse(expirationInterval, out var interval)) {
            options.ExpiredItemsDeletionInterval = interval;
        }

        var slidingExpiration = hostingContext.Configuration.GetValue<string>("PostgresCache:DefaultSlidingExpiration");
        if (!string.IsNullOrEmpty(slidingExpiration) && TimeSpan.TryParse(slidingExpiration, out var sliding)) {
            options.DefaultSlidingExpiration = sliding;
        }
    });

    services.AddHybridCache();
});
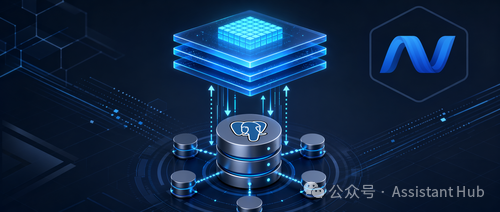
这里的 services.AddHybridCache() 就是关键所在。它会自动将内存缓存与已注册的分布式缓存组合在一起,而且两层缓存的状态是自动同步的。
这样做还有一个好处:即使应用进程重启导致内存缓存数据全部丢失,Postgres 里存储的缓存条目依然有效,服务不会因此而中断。
第七步:在服务中调用 HybridCache
更新 ConsoleService,通过构造函数注入 HybridCache,并设定分层过期策略:
public class ConsoleService : BackgroundService {
    private readonly ILogger<ConsoleService> _logger;
    private readonly HybridCache _cache;

    // 内存层 3 秒过期,分布式层 6 秒过期
    private readonly HybridCacheEntryOptions _entryOptions = new HybridCacheEntryOptions {
        LocalCacheExpiration = TimeSpan.FromSeconds(3),
        Expiration = TimeSpan.FromSeconds(6),
    };

    public ConsoleService(ILogger<ConsoleService> logger, HybridCache cache) {
        _logger = logger;
        _cache = cache;
    }

    protected override async Task ExecuteAsync(CancellationToken stoppingToken) {
        _logger.LogInformation("Console Service Started.");
        while (!stoppingToken.IsCancellationRequested) {
            var timer = System.Diagnostics.Stopwatch.StartNew();
            var response = await _cache.GetOrCreateAsync(
                "weather:forecast:next-day",
                async cancel => {
                    _logger.LogInformation("Cache miss for weather request. Fetching from source.");
                    var result = await GetDataFromTheSource(cancel);
                    return result;
                },
                cancellationToken: stoppingToken,
                options: _entryOptions
            );
            timer.Stop();
            _logger.LogInformation("Returned {Count} forecast item(s) from HybridCache in {ElapsedMs} ms",
                response.Count(),
                timer.Elapsed.TotalMilliseconds
            );
            await Task.Delay(500, stoppingToken);
        }
    }

    // GetDataFromTheSource 方法的实现与之前完全一致,此处不再重复
}
GetOrCreateAsync 的执行逻辑可以这样理解:
- 如果内存层有有效的缓存数据 → 直接返回,延迟在亚毫秒级。
- 如果内存层已过期,但 Postgres 层中仍然有效 → 从数据库取回数据,延迟在几十毫秒级。
- 如果两层都过期了 → 调用真实的数据源,然后将新数据同时写入两层缓存。
性能对比
引入了 HybridCache 之后,日志输出会清晰地展示出三种命中场景的性能差异:
[17:22:46.408653] info: ConsoleService[0] Returned 1 forecast item(s) from HybridCache in 2061.0478 ms  ← 首次从源获取
[17:22:46.911366] info: ConsoleService[0] Returned 1 forecast item(s) from HybridCache in 0.6072 ms    ← 内存命中
[17:22:47.415489] info: ConsoleService[0] Returned 1 forecast item(s) from HybridCache in 0.3266 ms    ← 内存命中
[17:22:49.446790] info: ConsoleService[0] Returned 1 forecast item(s) from HybridCache in 38.9606 ms   ← Postgres 命中
[17:22:49.958174] info: ConsoleService[0] Returned 1 forecast item(s) from HybridCache in 0.2307 ms    ← 内存命中
[17:22:50.463451] info: ConsoleService[0] Cache miss for weather request. Fetching from source.         ← 两层缓存均已过期
- 内存命中:< 1 ms
- Postgres 分布式命中:~39 ms
- 无缓存/数据源直达:~2000 ms
适用场景与扩展方向
这套方案在以下几种场景下能发挥出显著优势:
- 应用本身已经依赖 Postgres,不想为了缓存而额外维护一套 Redis 集群。
- 存在多实例部署,需要跨节点共享缓存状态,从而实现高可用性。
- 对进程重启后的缓存连续性有硬性要求,不希望冷启动带来性能抖动。
若想探索更多进阶用法,比如通过 Microsoft Entra 认证注册缓存,或是复用已有的数据源对象,可以查阅官方 GitHub 仓库:Azure/Microsoft.Extensions.Caching.Postgres。
参考资料
 发表于 2026-5-5 20:52:25
|
查看: 86|
回复: 0
发表于 2026-5-5 20:52:25
|
查看: 86|
回复: 0
