L8.院士
5624
0
745
概述
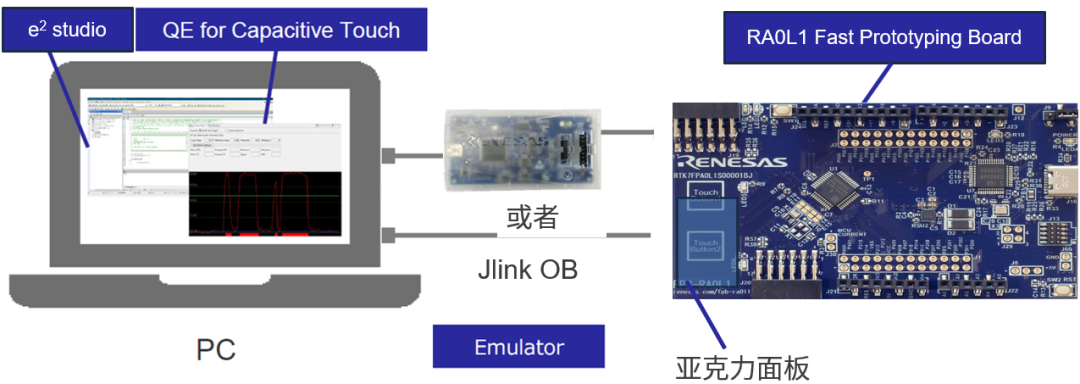
本文将指导您如何基于瑞萨电子的RA0L1快速原型板(Fast Prototyping Board),使用e2studio集成开发环境快速搭建并开发一个电容式触摸应用样例工程。内容涵盖从工程创建、FSP配置、QE for Capacitive Touch工具的使用进行应用开发与自动调优,到最终添加应用代码实现触摸控制LED的全过程。
本文基于以下开发环境:
软件运行环境
硬件运行环境
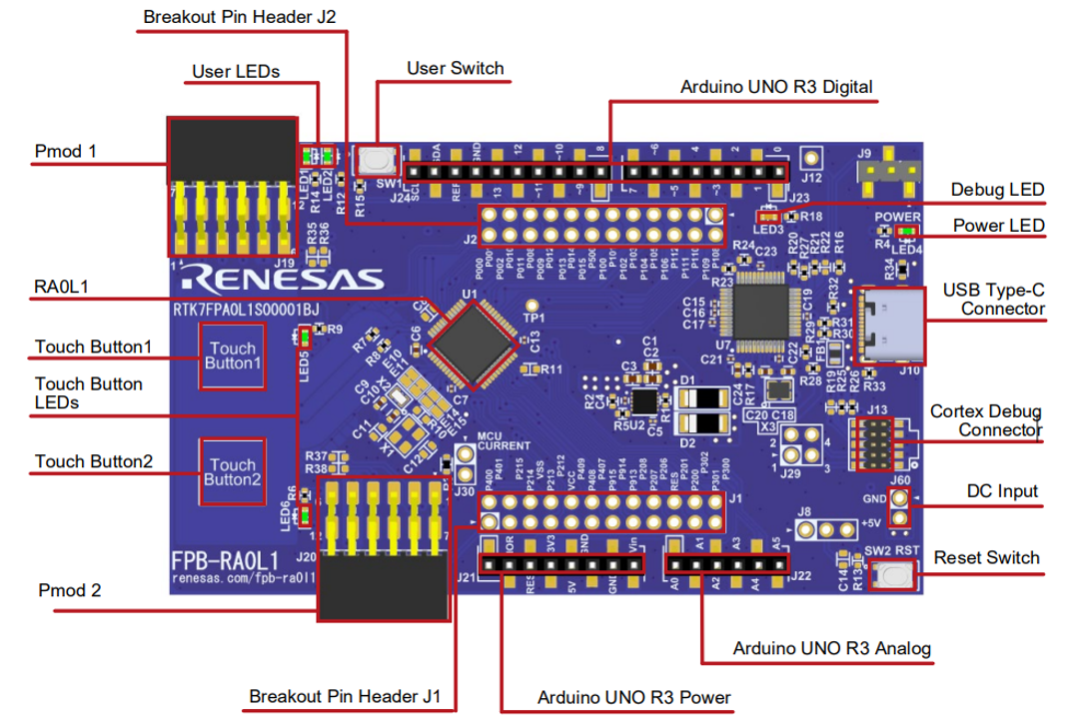
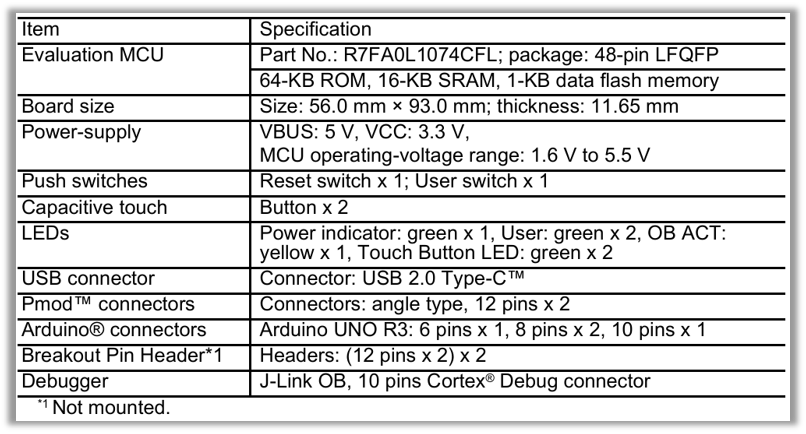
RA0L1 Fast Prototyping Board简介
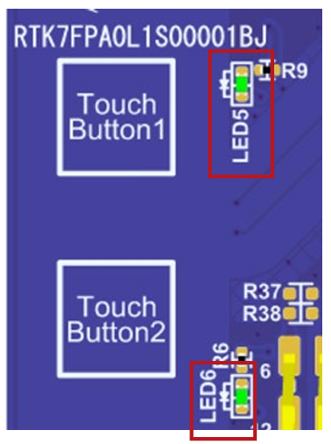
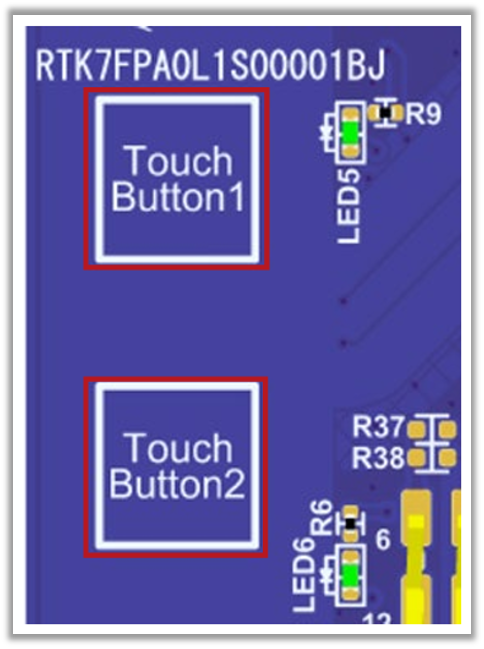
RA0L1 Fast Prototyping Board (RTK7FPA0L1S00001BJ)
FPB-RA0L1 – User‘s Manual https://www.renesas.cn/zh/document/mat/fpb-ra0l1-users-manual?r=25576244
硬件运行环境搭建
硬件连接框图
基于e2studio创建触摸样例工程
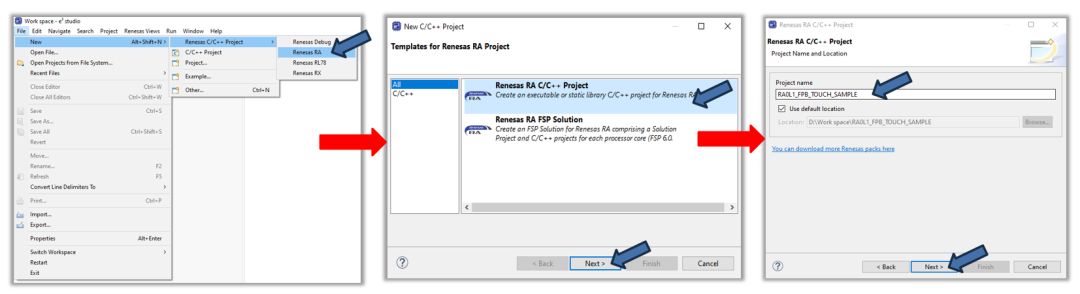
在e2studio中创建RA新工程
[File]
RA0L1_FPB_TOUCH_SAMPLE
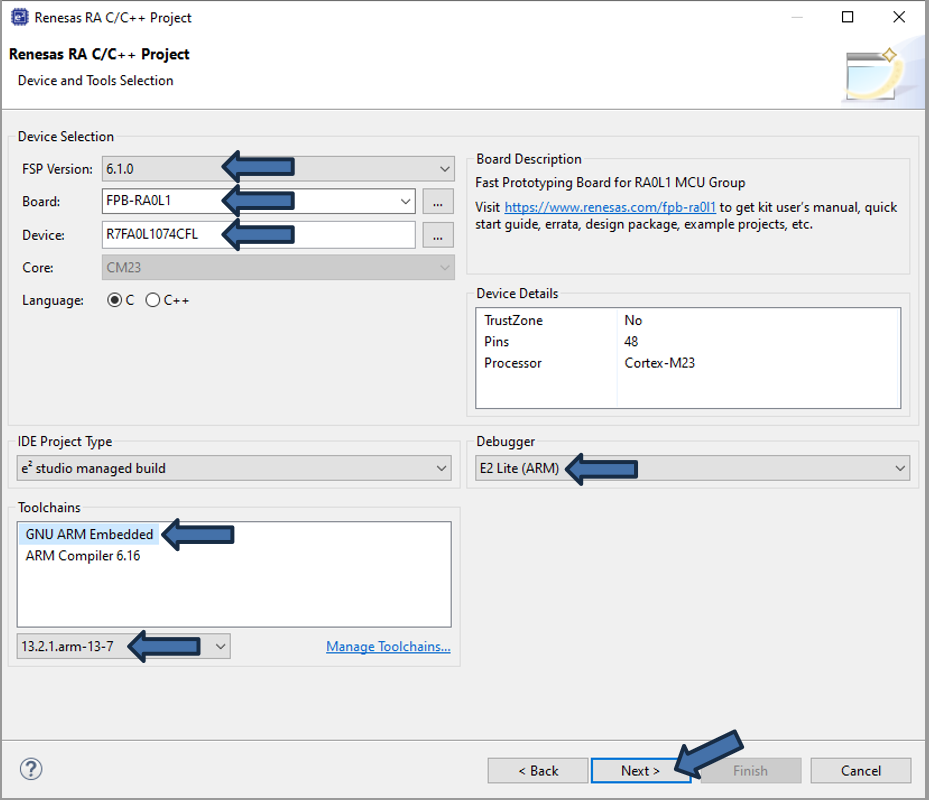
6.1.0
FPB-RA0L1
R7FA0L1074CFL
GNU ARM Embedded
13.2.1.arm-13-7
E2 Lite(ARM)
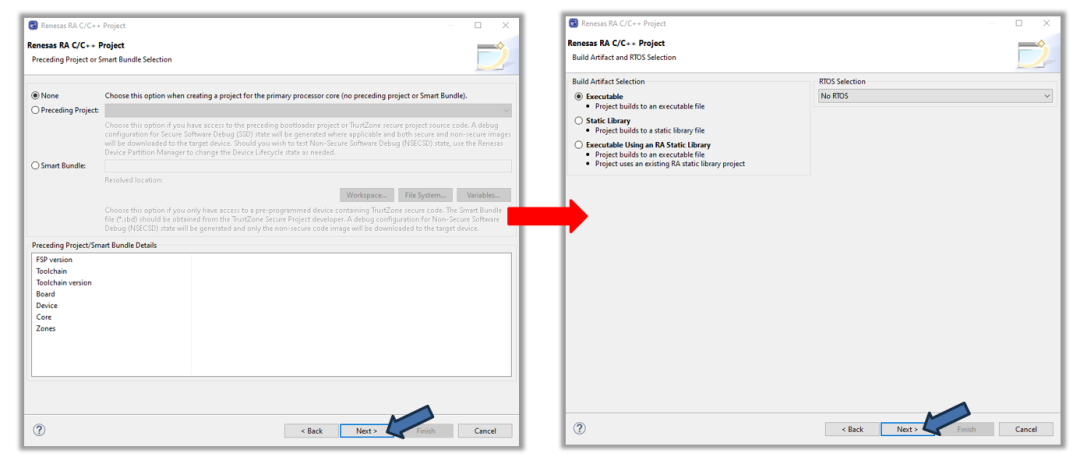
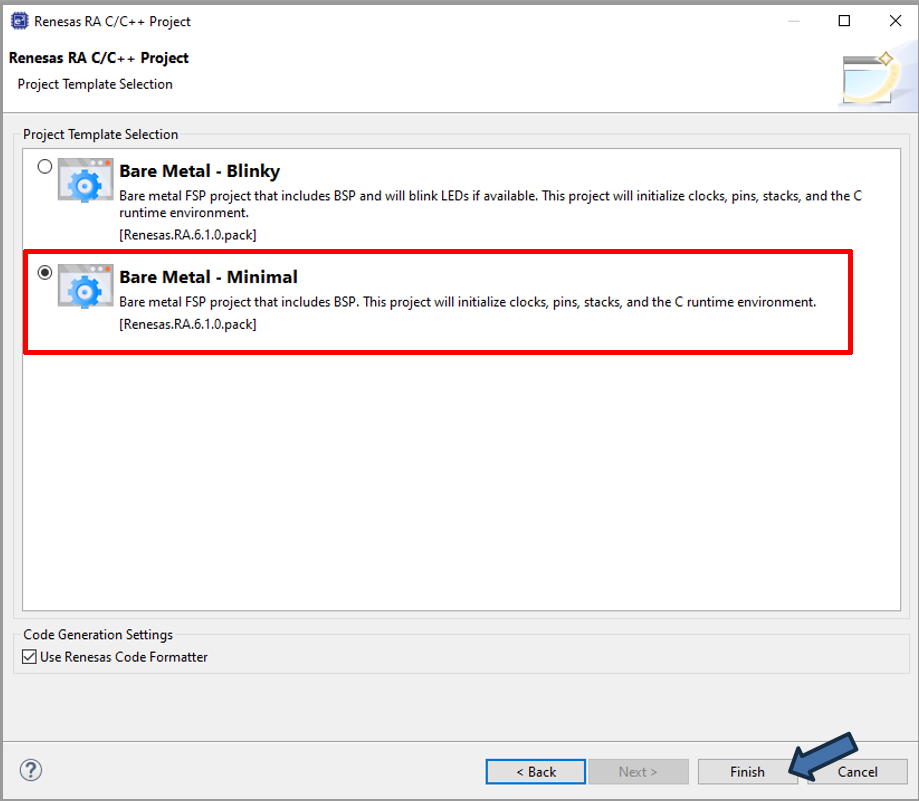
Bare Metal - minimal
Finish
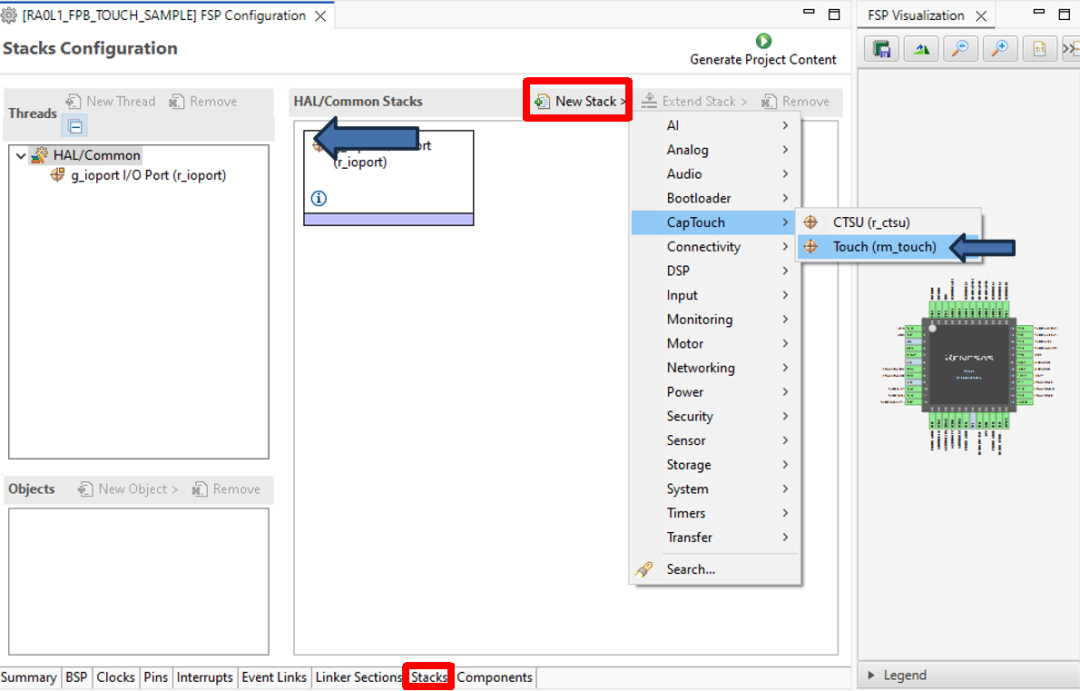
在FSP中为新工程添加驱动程序
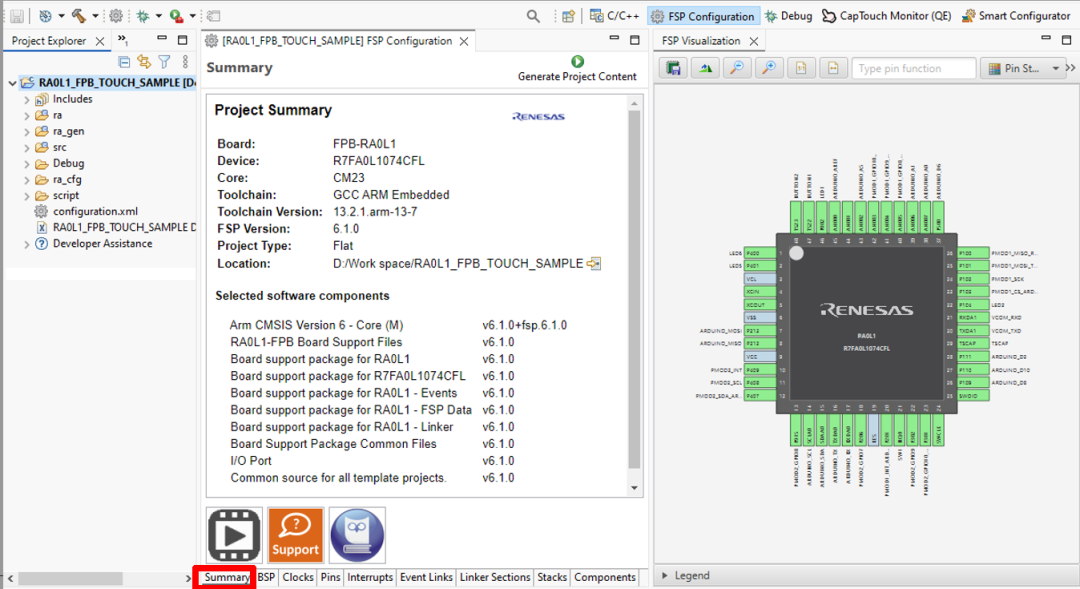
RA新工程创建完成后,默认打开FSP的Summary选项卡。
FSP设定
New Stack
Touch (rm_touch)
CTSU (r_ctsu)
使用QE for Capacitive Touch开发触摸应用
在e2studio中打开QE For Capacitive touch
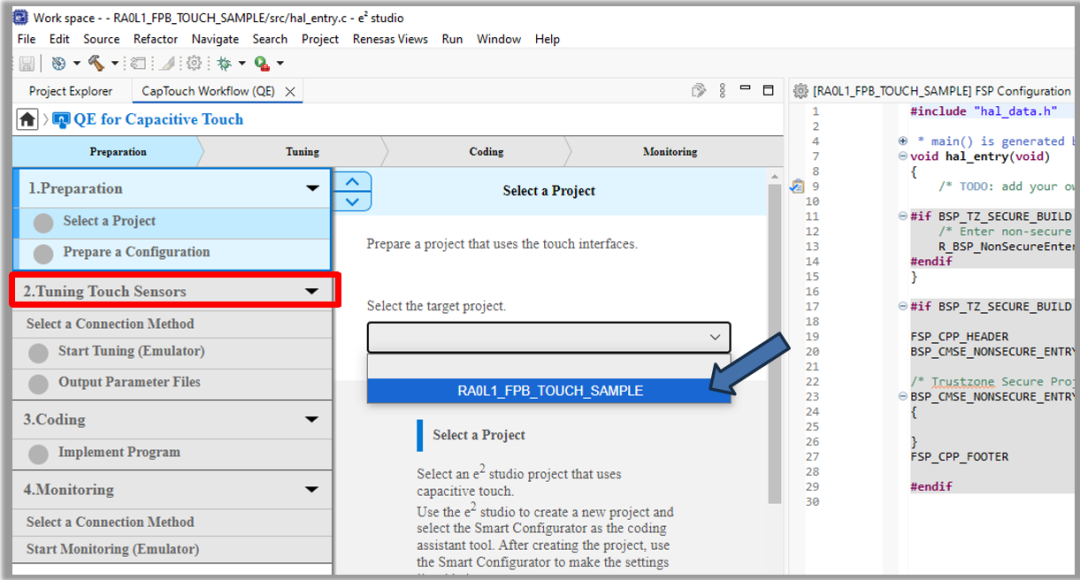
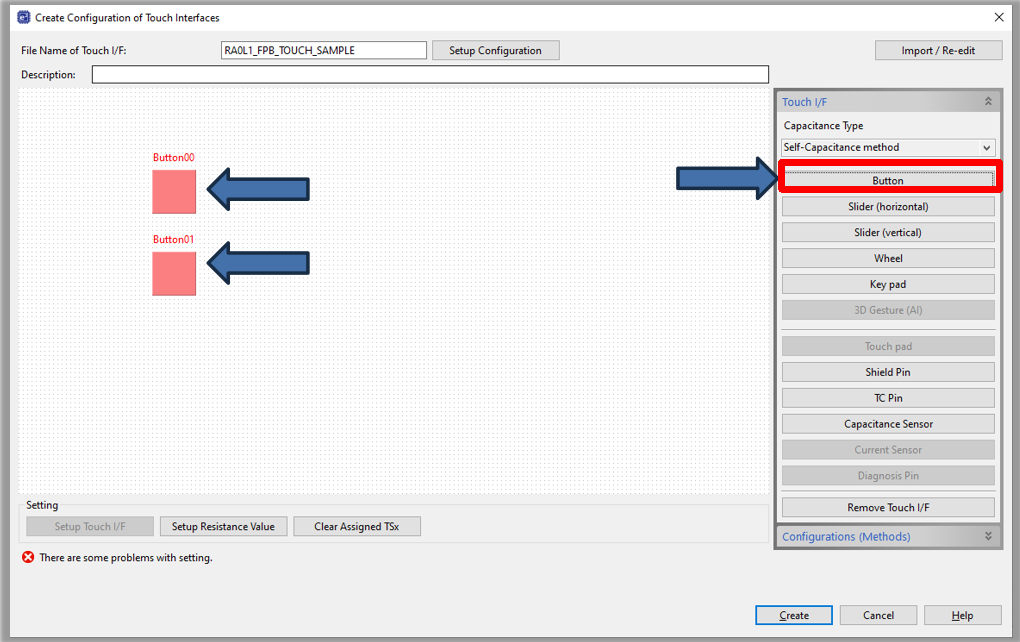
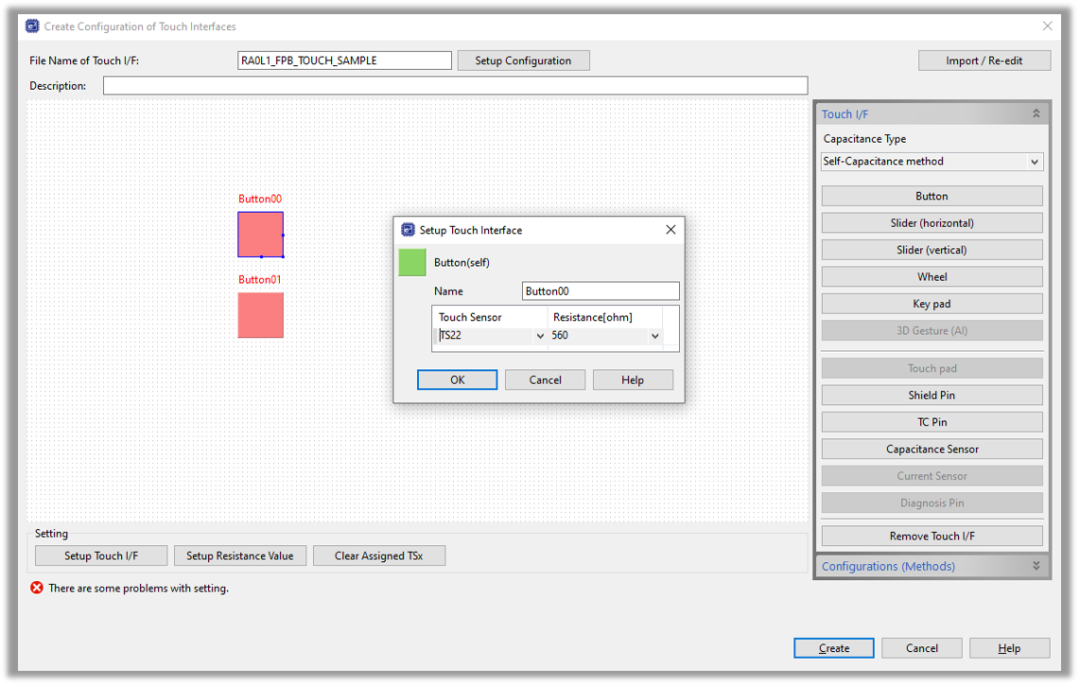
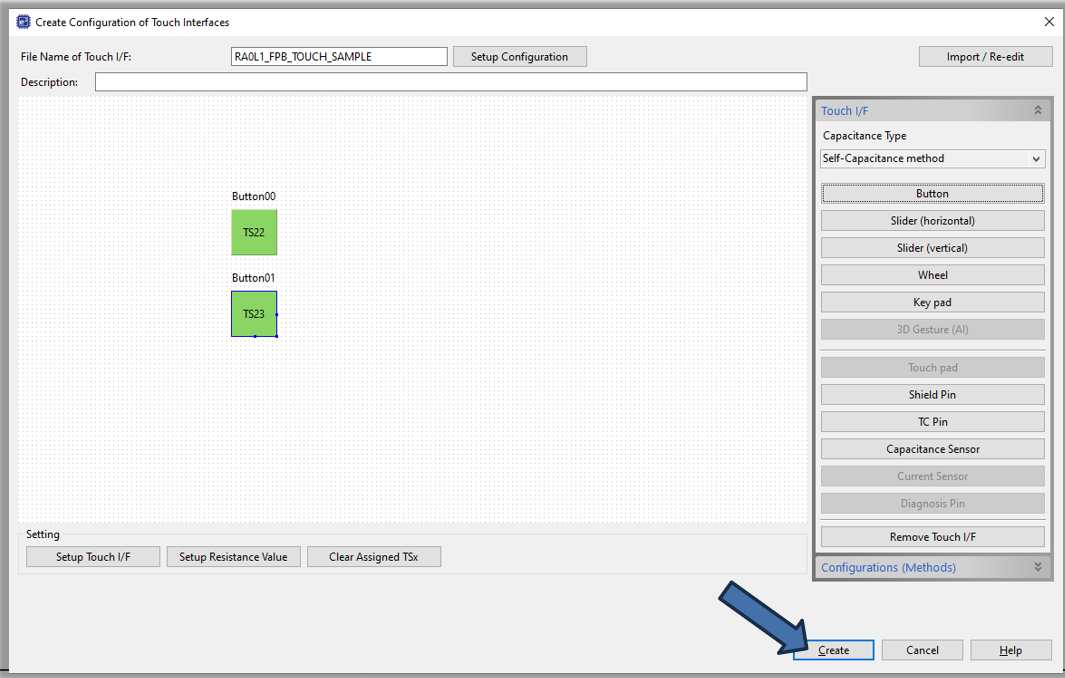
Preparation(准备)
Button
Create
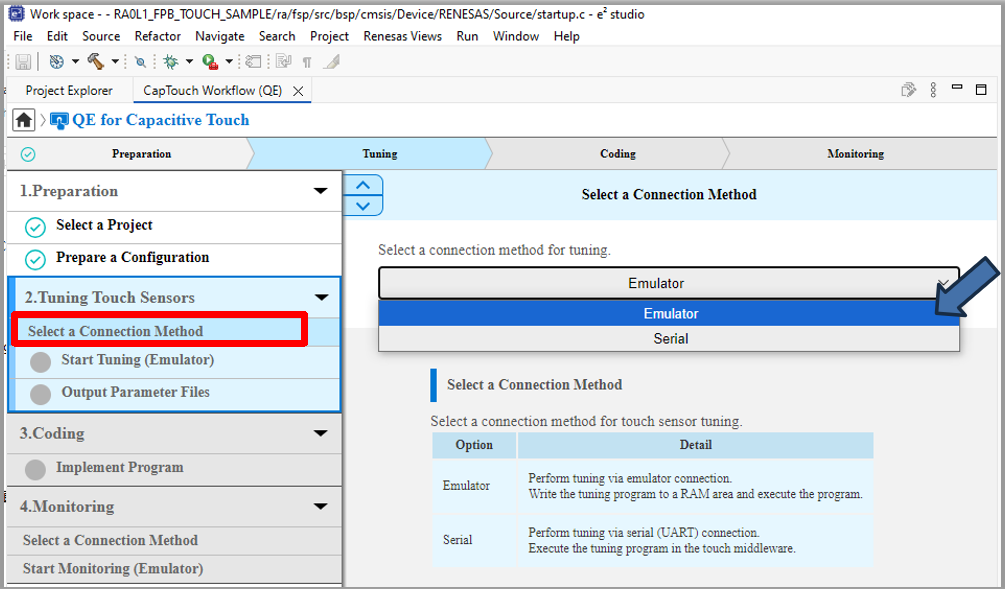
Tuning(调优)
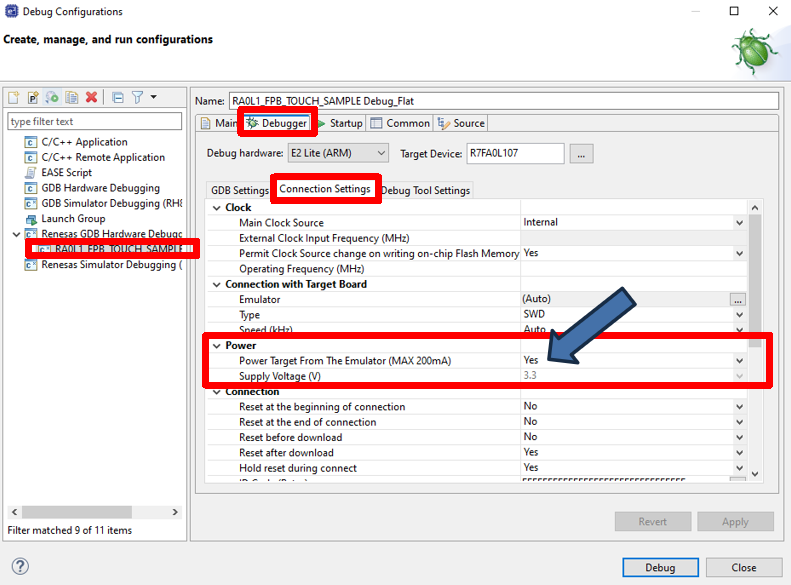
Debug Configuration
RA0L1_FPB_TOUCH_SAMPLE_HardwareDebug
Debugger
Emulator
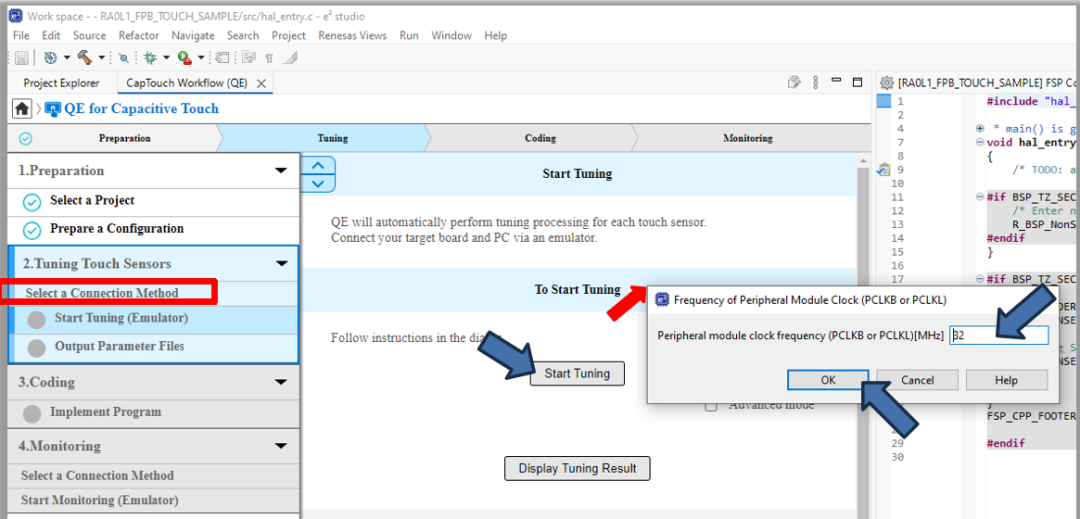
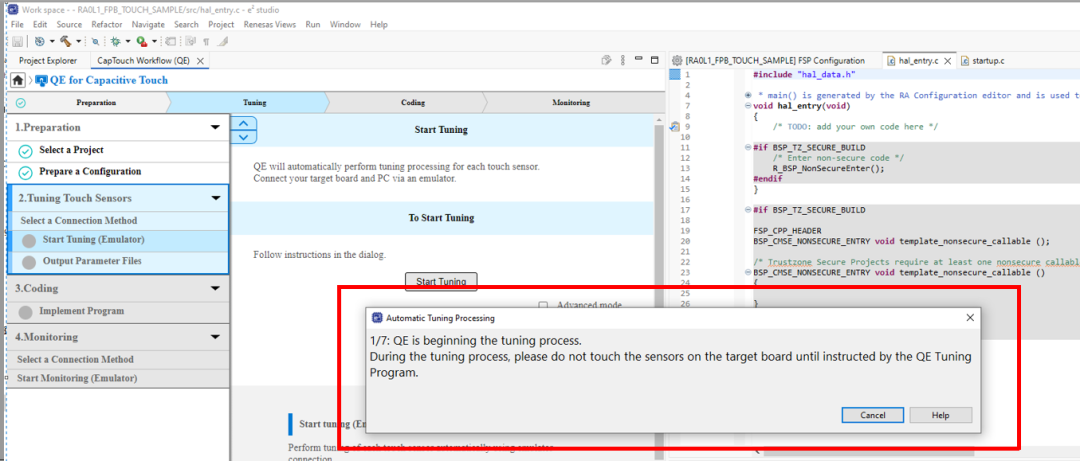
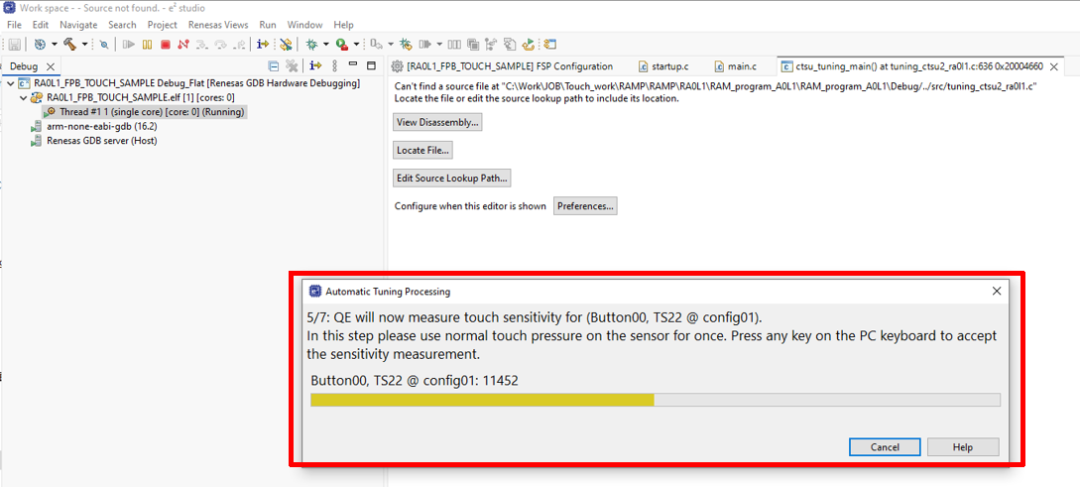
Start Tuning
OK
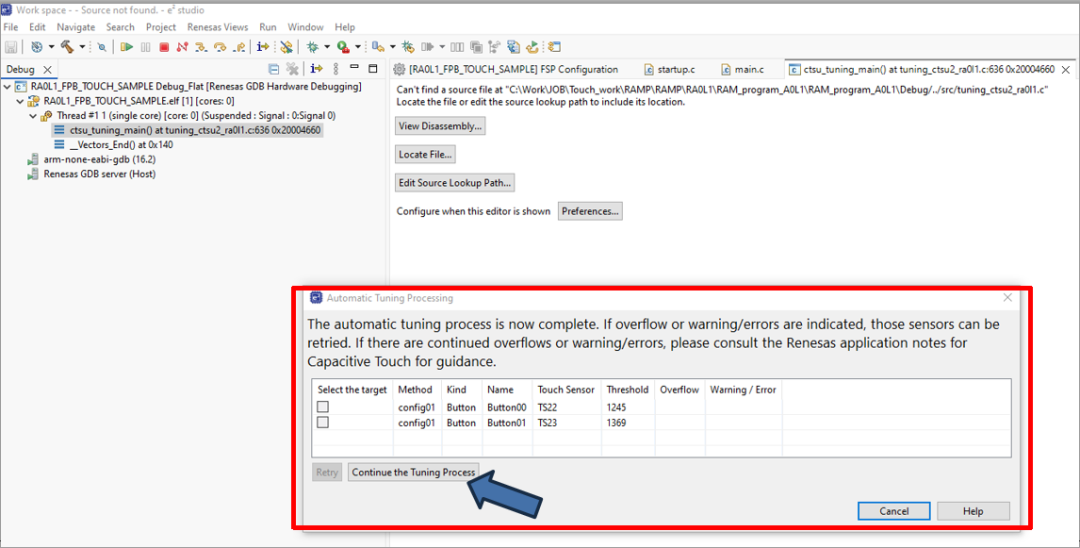
Continue the Tuning Process
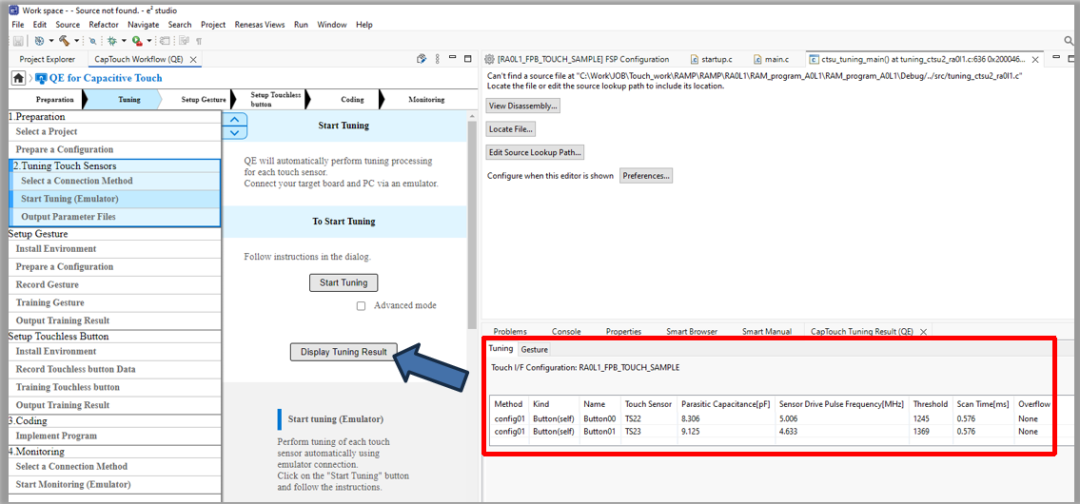
Display Tuning Result
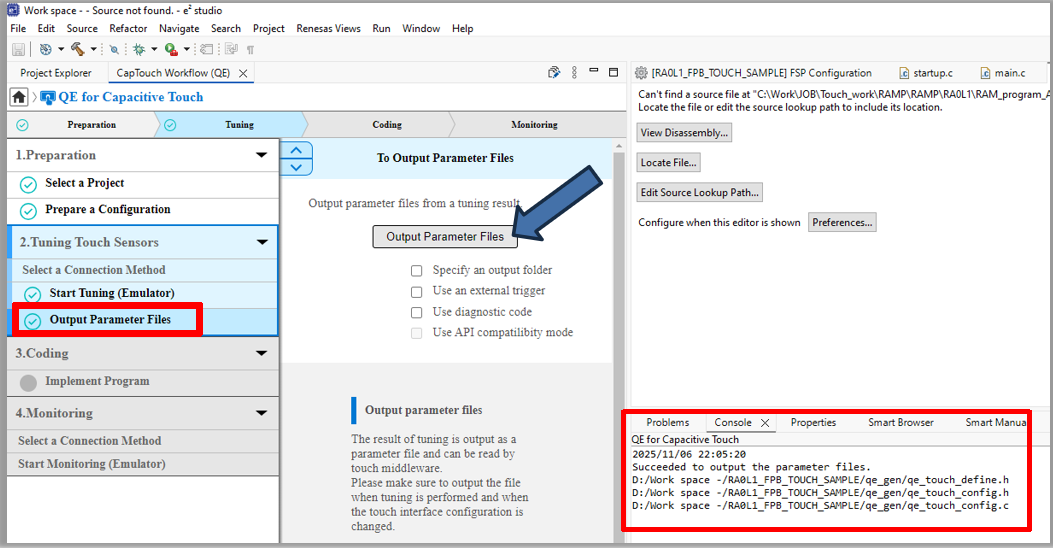
Output Parameter Files
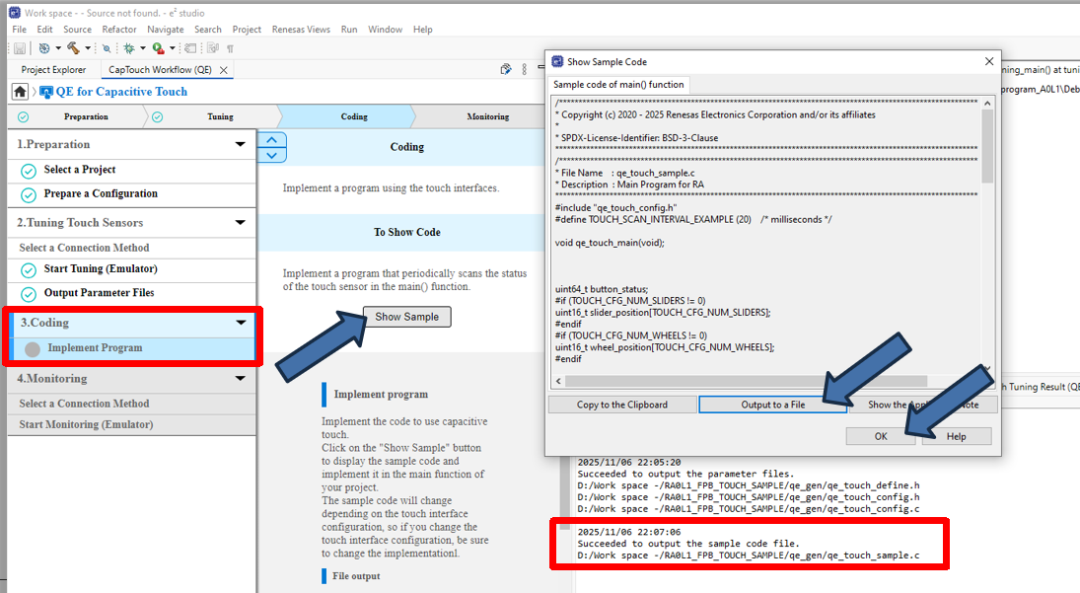
Coding(编码)
Show Sample
Output to a file
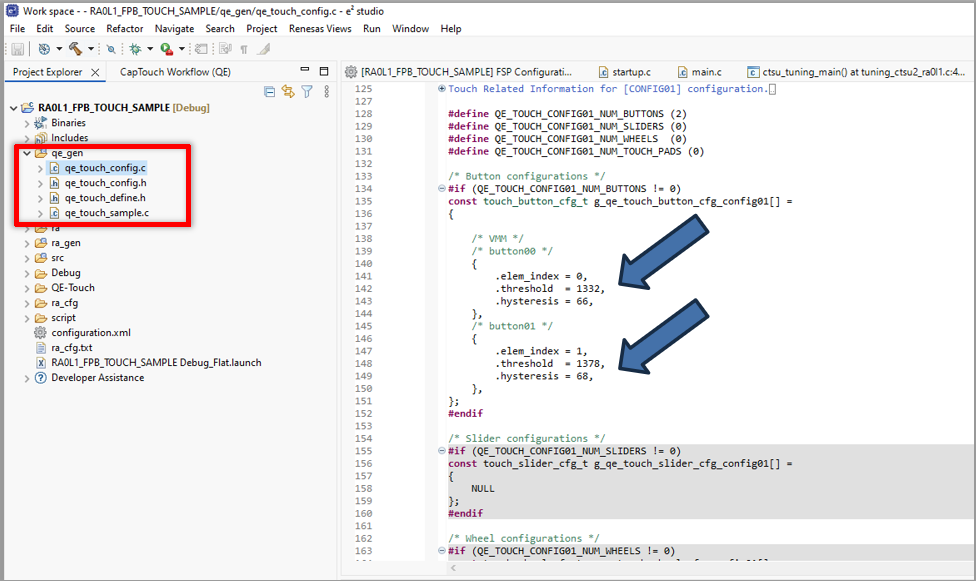
qe_touch_config.c
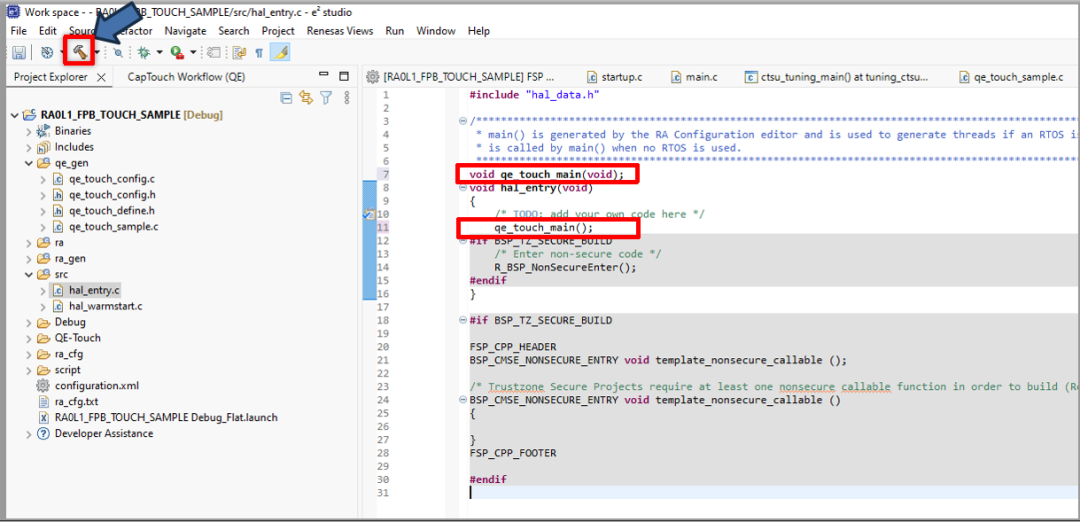
hal_entry.c
qe_touch_main()
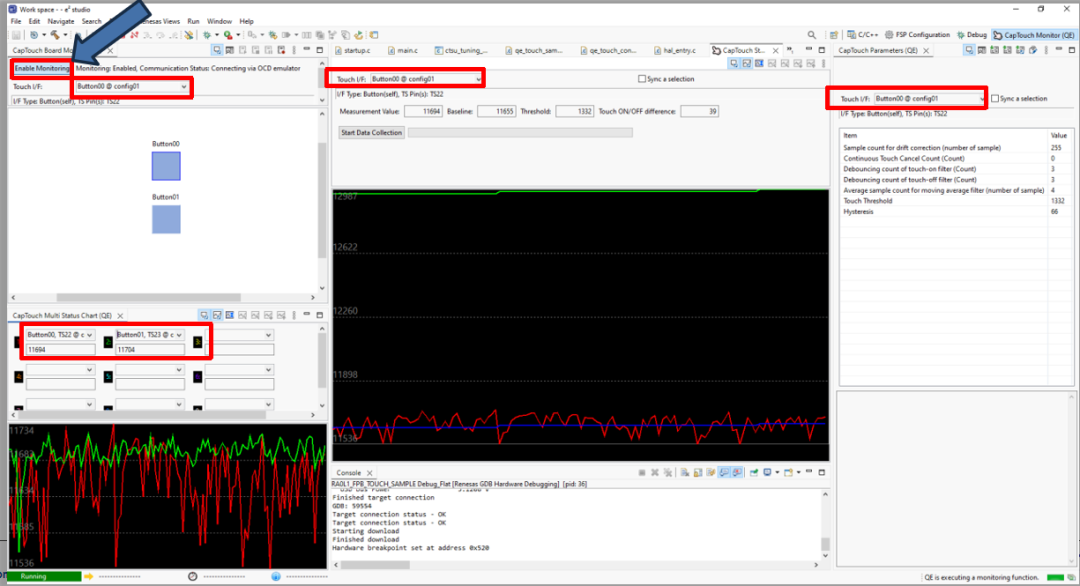
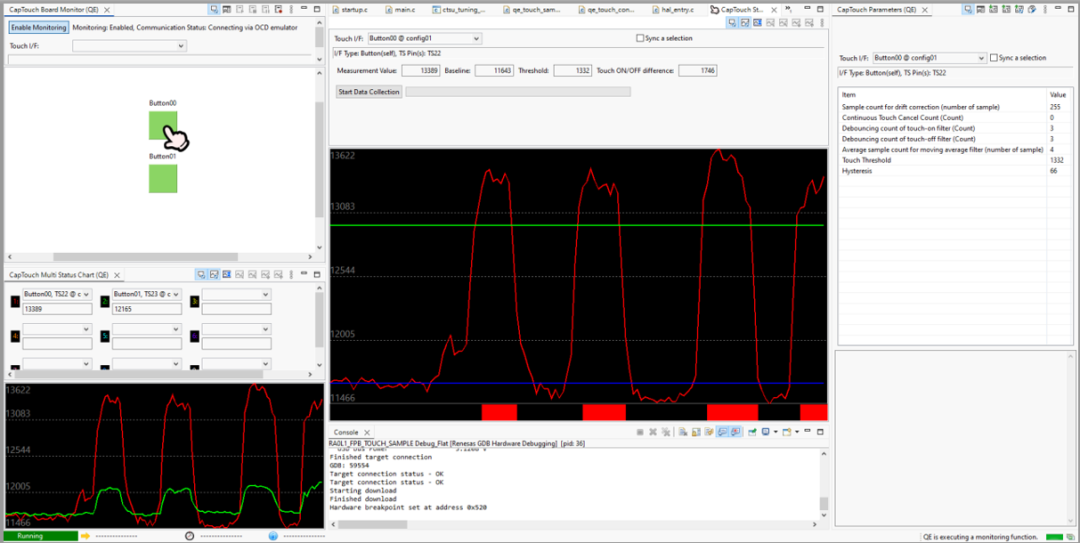
Monitoring(监控)
Show Views
Board Monitor
Enable Monitoring
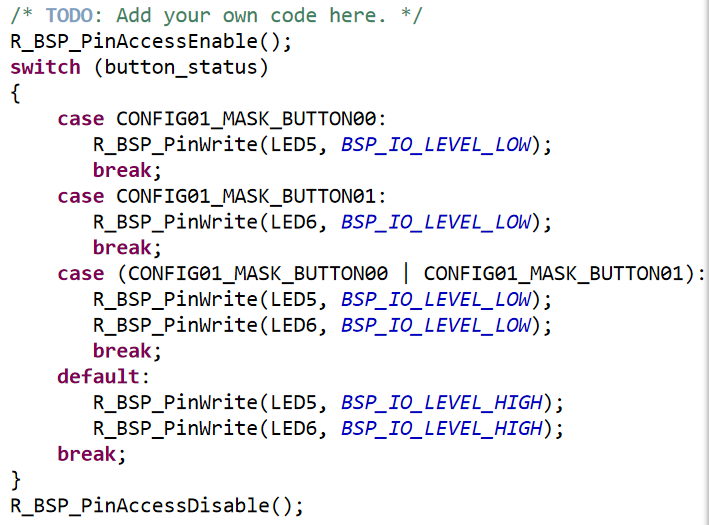
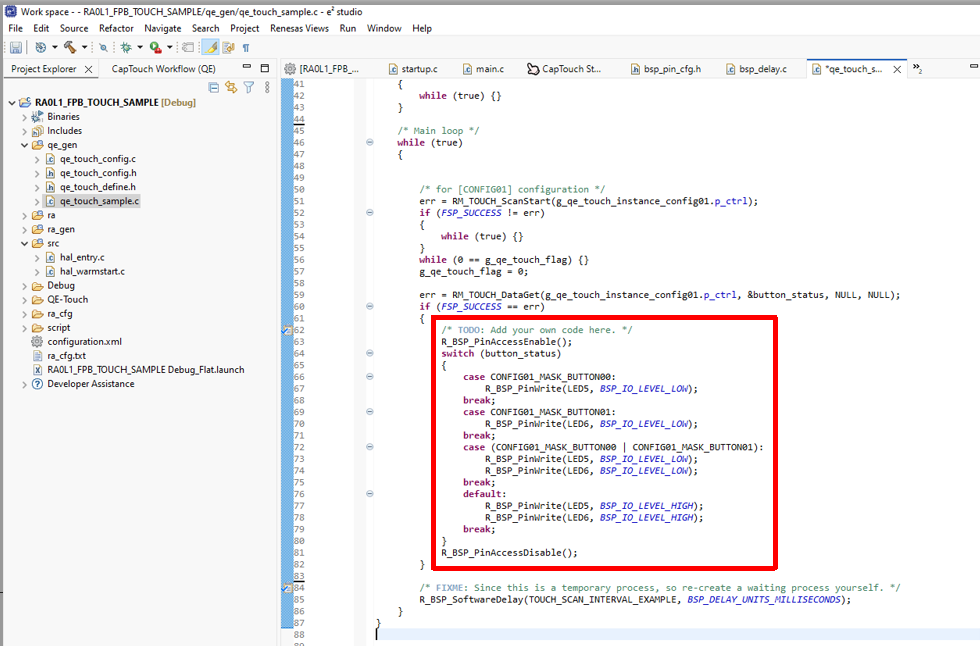
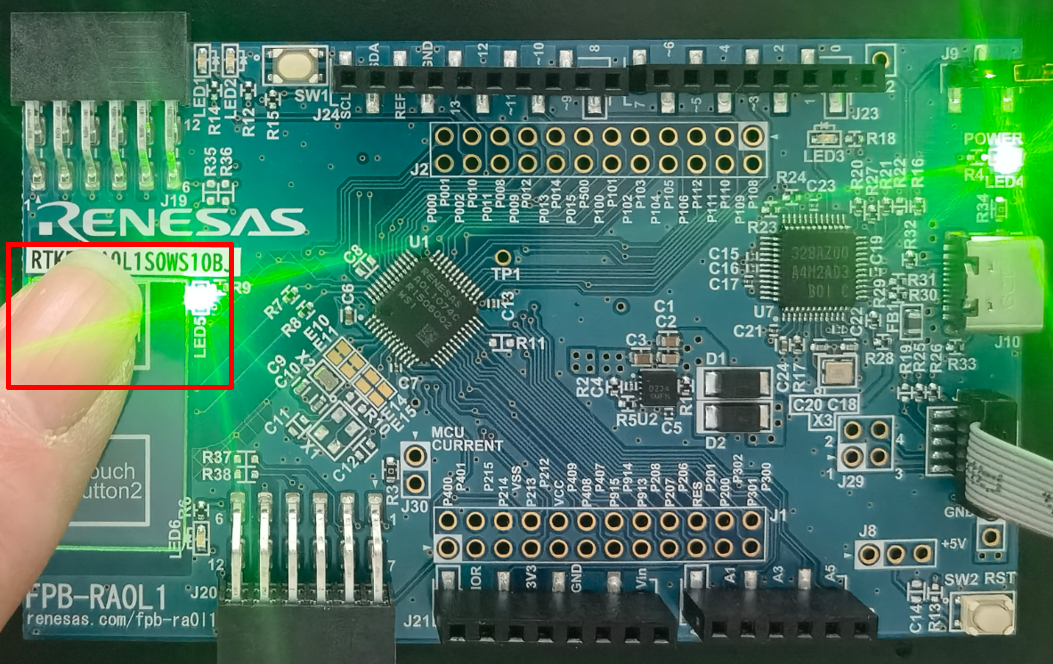
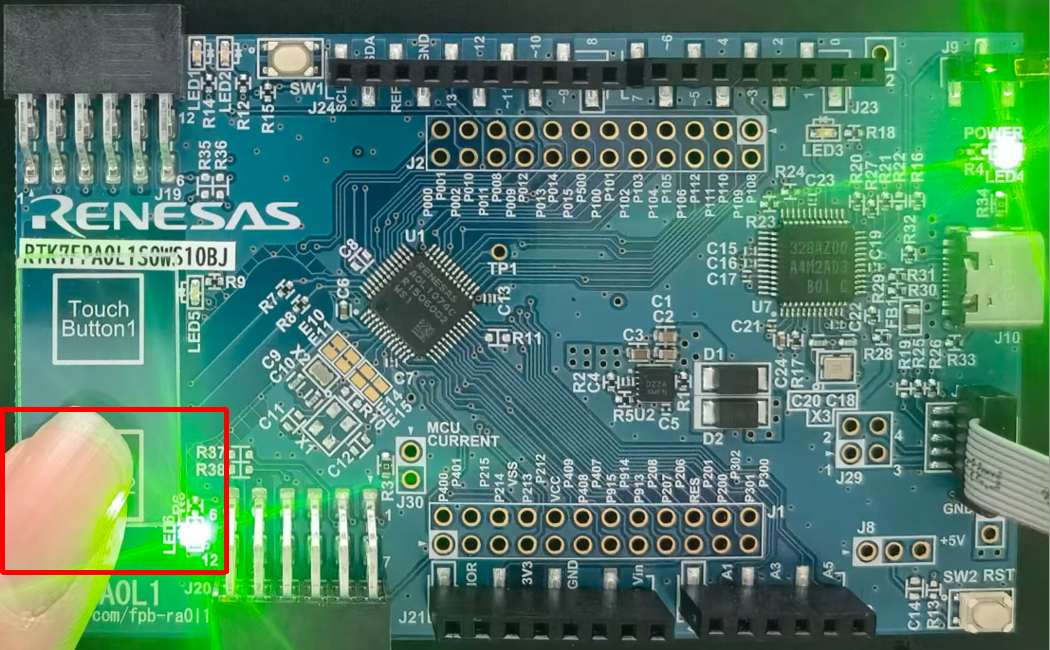
添加应用代码实现LED闪烁
bsp_pin_cfg.h
#define LED6 (BSP_IO_PORT_04_PIN_00) /* Green, Lo: Turn on */
#define LED5 (BSP_IO_PORT_04_PIN_01) /* Green, Lo: Turn on */
qe_gen\qe_touch_sample.c
Touch Button 1
Touch Button 2
收藏0回复 显示全部楼层 举报
发表回复 回帖后跳转到最后一页
手机版|小黑屋|网站地图|云栈社区 ( 苏ICP备2022046150号-2 )
GMT+8, 2026-6-30 05:25 , Processed in 0.605308 second(s), 43 queries , Gzip On.
Powered by Discuz! X3.5
© 2025-2026 云栈社区.
 发表于 2025-12-24 05:45:28
|
查看: 241|
回复: 0
发表于 2025-12-24 05:45:28
|
查看: 241|
回复: 0


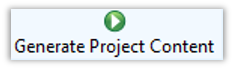 )生成驱动程序。
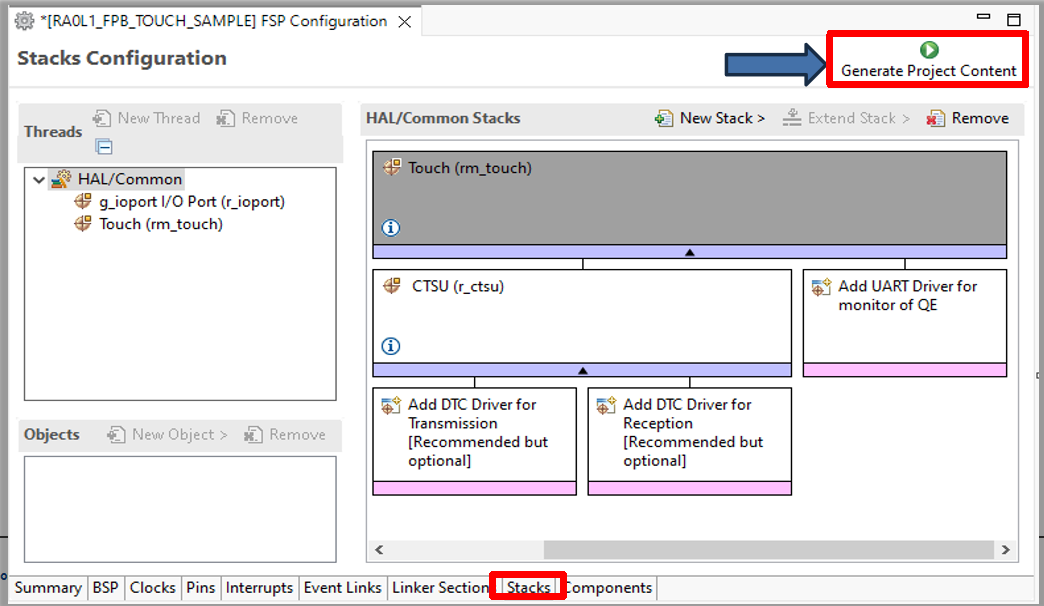
 )编译工程。
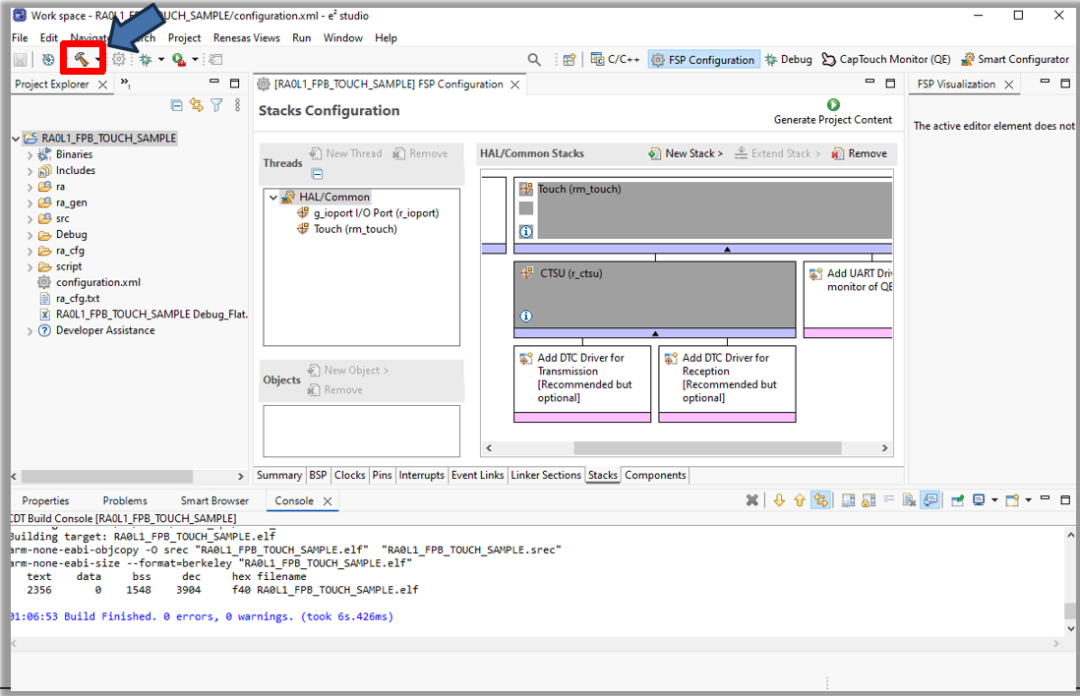
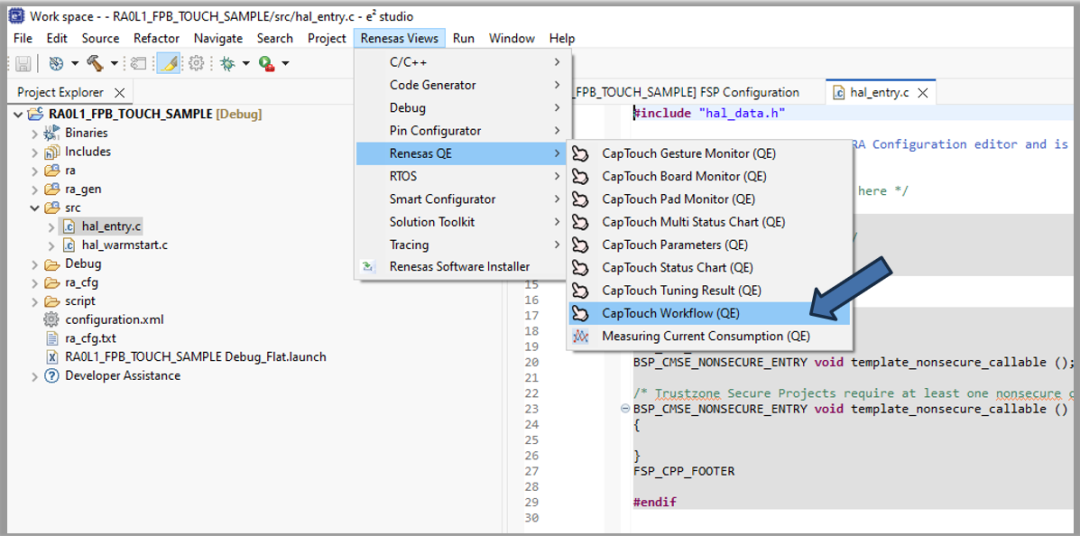

 )旁边的下拉菜单,选择