在人工智能应用开发中,如何让大语言模型(LLM)掌握并使用我们自己的专业知识,是一个常见且关键的需求。检索增强生成(RAG)技术提供了一种高效可靠的解决方案。本文将带你一步步实现一个基于 SpringAI、Qwen3-8B、bge-large-zh-v1.5 和 Milvus 的本地知识库问答系统,从环境准备到代码实现,手把手教你构建自己的智能助手。如果你对构建此类应用感兴趣,欢迎前往 云栈社区 与其他开发者交流探讨。
一、环境准备
在开始编写代码之前,我们需要准备好以下软硬件环境:
- 硬件要求:至少 24G 显存的显卡。
- 软件基础:Python 运行环境。
- 模型下载:
- LLM 模型:本文使用的是
Qwen3-8B 模型。
- Embedding 模型:使用
bge-large-zh-v1.5 模型。
- 数据准备:一份用于构建知识库的数据集。本文示例使用了魔塔社区(ModelScope)的“三国演义知识问答”数据集,地址为:
https://modelscope.cn/datasets/ssf2024/sanguoyanyiquestion。
运行 Qwen3-8B 模型
通过 vLLM 启动一个兼容 OpenAI API 的服务。
nohup python -m vllm.entrypoints.openai.api_server \
--model /code/models/Qwen/Qwen3-8B \
--served-model-name qwen3-8b \
--max-model-len 8k \
--host 0.0.0.0 \
--port 6006 \
--dtype bfloat16 \
--gpu-memory-utilization 0.8 \
--enable-auto-tool-choice \
--tool-call-parser hermes &
运行 Embedding 模型 bge-large-zh-v1.5
同样使用 vLLM 启动 Embedding 模型服务。
nohup python -m vllm.entrypoints.openai.api_server \
--model /code/models/BAAI/bge-large-zh-v1.5 \
--served-model-name bge-large-zh \
--host 0.0.0.0 \
--port 6007 \
--dtype bfloat16 \
--gpu-memory-utilization 0.4 \
--max-model-len 512 &
运行 Milvus 向量数据库
Milvus 的安装非常简便,可以通过 Docker 快速启动一个单机版实例。具体步骤可参考其 官方文档。
# 下载安装脚本
curl -sfL https://raw.githubusercontent.com/milvus-io/milvus/master/scripts/standalone_embed.sh -o standalone_embed.sh
# 启动 Docker 容器
bash standalone_embed.sh start
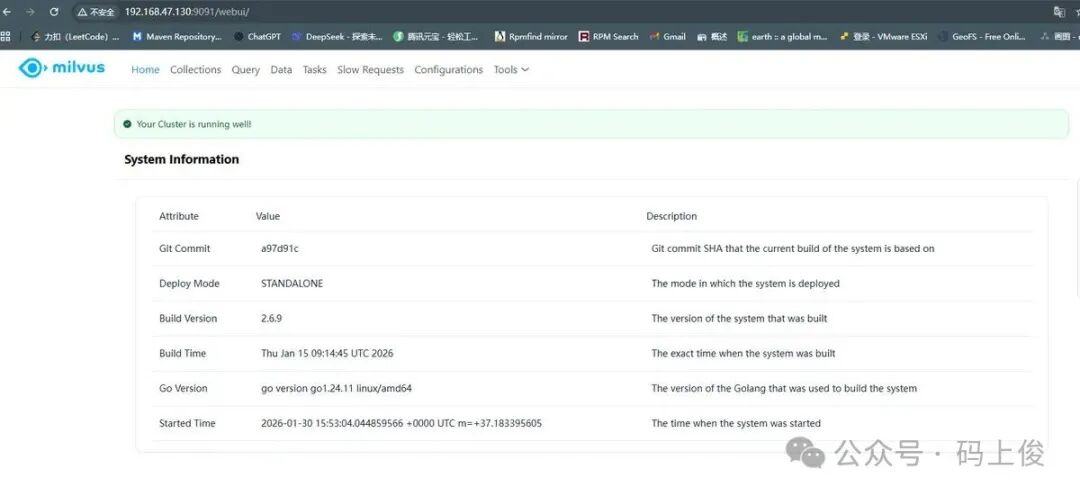
启动成功后,通过浏览器访问 Milvus 的管理地址,如果看到类似下图的界面,说明 Milvus 已经成功运行。注意,原始图片中的“公众号”水印等引流信息已按要求移除,下图展示的是成功运行的核心信息提示。
二、代码编写
接下来我们进入核心的 Spring Boot 应用开发环节。我们将使用 SpringAI 框架来简化与大模型和向量数据库的交互。
1. 添加项目依赖 (pom.xml)
首先,在项目的 pom.xml 中添加必要的依赖。
<dependencies>
    <dependency>
        <groupId>org.springframework.ai</groupId>
        <artifactId>spring-ai-starter-model-openai</artifactId>
    </dependency>

    <dependency>
        <groupId>io.projectreactor.netty</groupId>
        <artifactId>reactor-netty-http</artifactId>
    </dependency>

    <dependency>
        <groupId>org.projectlombok</groupId>
        <artifactId>lombok</artifactId>
        <optional>true</optional>
    </dependency>

    <!-- QuestionAnswerAdvisor 依赖包-->
    <dependency>
        <groupId>org.springframework.ai</groupId>
        <artifactId>spring-ai-advisors-vector-store</artifactId>
    </dependency>

    <!--  RetrievalAugmentationAdvisor  依赖包-->
    <dependency>
        <groupId>org.springframework.ai</groupId>
        <artifactId>spring-ai-rag</artifactId>
    </dependency>

    <!--  Milvus VectorStore 依赖包-->
    <dependency>
        <groupId>org.springframework.ai</groupId>
        <artifactId>spring-ai-starter-vector-store-milvus</artifactId>
    </dependency>

    <!-- Tika DocumentReader 依赖包-->
    <dependency>
        <groupId>org.springframework.ai</groupId>
        <artifactId>spring-ai-tika-document-reader</artifactId>
    </dependency>

</dependencies>
2. 配置应用属性 (application.yml)
在配置文件中,我们需要指定 LLM 和 Embedding 模型的 API 地址、Milvus 的连接信息等。
spring:
  application:
    name: mashangjun-ai-rag
  ai:
    openai:
      chat:
        options:
          model: qwen3-8b
      embedding:
        base-url: http://192.168.10.102:6007/
        options:
          model: bge-large-zh
      base-url: http://192.168.10.102:6006/
      api-key: sk-1234567890abcd
    vectorstore:
      milvus:
        client:
          host: 192.168.47.130
          port: 19530
          token: root:Milvus
        database-name: default
        embedding-dimension: 1024
        collection-name: msj_ai
        initialize-schema: true
server:
  port: 8081
3. 核心配置类 (ChatConfig)
这个配置类负责初始化 ChatClient,并配置两个关键的 Advisor:RetrievalAugmentationAdvisor 用于检索增强生成,QuestionAnswerAdvisor 用于标准的问答。
@Configuration
@RequiredArgsConstructor
public class ChatConfig {

final MilvusVectorStore vectorStore;

@Bean
public ChatClient chatClient(ChatModel chatModel){
return ChatClient.builder(chatModel)
.defaultSystem("你作为一名专业的AI助手,请根据用户提示信息回答问题。")
.build();
}

    /**
     * 配置 RetrievalAugmentationAdvisor
     *
     * @return RetrievalAugmentationAdvisor
     */
    @Bean
    public RetrievalAugmentationAdvisor retrievalAugmentationAdvisor(){
        VectorStoreDocumentRetriever retriever = VectorStoreDocumentRetriever.builder()
                .vectorStore(vectorStore)
                .similarityThreshold(0.5)
                .topK(5)
                .build();

        ContextualQueryAugmenter augmenter = ContextualQueryAugmenter.builder()
                .allowEmptyContext(true)
                .build();

        return RetrievalAugmentationAdvisor.builder()
                .documentRetriever(retriever)
                .queryAugmenter(augmenter)
                .build();
    }

    @Bean
    public QuestionAnswerAdvisor questionAnswerAdvisor(){
        return QuestionAnswerAdvisor.builder(vectorStore)
                .searchRequest(SearchRequest.builder().similarityThreshold(0.2d)
                        .topK(6).build())
                .build();
    }

}
4. 数据加载组件 (LoadData)
项目启动时,这个组件会自动检查 Milvus 集合中是否有数据。如果没有,它会从本地的 train.json 文件中读取数据,进行分块处理,并存入 向量数据库。
@Slf4j
@Component
@RequiredArgsConstructor
public class LoadData {
final MilvusVectorStore vectorStore;

    @Value("${spring.ai.vectorstore.milvus.collection-name}")
    private String collectionName;

    @PostConstruct
    public void loadData() throws IOException {
        log.info("开始初始化数据:{}", collectionName);
        Optional<Object> nativeClient = vectorStore.getNativeClient();
        if(nativeClient.isPresent()){
            log.info("Milvus 客户端初始化成功");
        }else{
            log.error("Milvus 客户端初始化失败");
            return;
        }
        MilvusServiceClient client = (MilvusServiceClient) nativeClient.get();
        R<GetCollectionStatisticsResponse> resp = client.getCollectionStatistics(
                GetCollectionStatisticsParam.newBuilder()
                        .withCollectionName(collectionName)
                        .build()
        );
        if(resp.getStatus()!= R.Status.Success.getCode()){
            log.error("Milvus 获取集合统计信息失败:{}", resp.getMessage());
            return;
        }
        long rowCount = new GetCollStatResponseWrapper(resp.getData()).getRowCount();
        if(rowCount >0){
            log.info("集合已存在,跳过初始化数据");
            return;
        }

        // 加载数据到向量数据库
        ClassPathResource resource = new ClassPathResource("train.json");
        // 读取文件内容
        String content = new String(resource.getInputStream().readAllBytes());

        // 拆分文档,写入向量数据库
        TokenTextSplitter splitter = TokenTextSplitter.builder()
                .withChunkSize(512)
                .withMinChunkSizeChars(200)
                .withKeepSeparator(true)
                .build();
        var chunks = splitter.split(List.of(new Document(content)));
        vectorStore.add(chunks);
    }

}
5. 聊天接口 (TalkController)
最后,我们提供一个简单的 REST API 接口。用户发送问题后,系统会调用配置了 QuestionAnswerAdvisor 的 ChatClient,从知识库中检索相关信息并生成回答。
@RestController
@RequestMapping
@RequiredArgsConstructor
public class TalkController {

final ChatClient chatClient;
final QuestionAnswerAdvisor questionAnswerAdvisor;
final RetrievalAugmentationAdvisor retrievalAugmentationAdvisor;

    /**
     * 聊天
     *
     * @param question 问题
     * @return 回复
     */
    @GetMapping("/talk")
    public Flux<String> talk(@RequestParam("question")String question){
        return chatClient.prompt(question)
                .advisors(questionAnswerAdvisor)
                .stream()
                .content();
    }

}
效果展示
完成以上步骤后,启动 Spring Boot 应用。当应用启动并完成数据加载后,我们就可以通过 /talk 接口进行提问了。
例如,当我们询问“列国三名将”时,系统会先从我们构建的“三国演义”知识库中检索最相关的信息片段,然后结合 Qwen3-8B 模型生成回答。下图展示了开发者工具中看到的检索与问答过程,系统正确地从上下文中识别并输出了蜀汉、吴国、魏国的名将名单。

下图则展示了知识库中存储的原始数据格式,它是以 JSON 结构化的问答对形式存在的,这为高效检索奠定了基础。

项目源码地址
本文完整的项目代码已开源,你可以通过以下地址获取并运行:https://gitee.com/JustNickNameWSH/msj-ai-rag。
通过这个实战项目,你可以清晰地看到,利用 SpringAI 这样的现代化框架,结合强大的开源模型和向量数据库,构建一个功能完善的本地 RAG 知识库系统并不复杂。希望本文能为你实现自己的 AI 应用提供有价值的参考。
 发表于 2026-2-27 06:22:01
|
查看: 280|
回复: 0
发表于 2026-2-27 06:22:01
|
查看: 280|
回复: 0
